.jpeg)
Deploy When Available is now GA
Queue for any GPU spec, even one that's fully rented out, and we'll deploy it the moment capacity opens up. No more refreshing the console or running a sniping tool.
All
Blog
A deep technical dive into how the Runpod Hub streamlines serverless AI deployment with a GitHub-native, release-triggered model. Learn how hub.json and.


The Runpod Hub represents a fundamental shift in how developers deploy and distribute AI applications, moving away from traditional container registry workflows toward a GitHub-native deployment model. This technical deep dive examines the architecture, implementation patterns, and developer workflow optimizations that make the Hub a compelling platform for serverless AI deployment.
The Hub operates on a release-based indexing system that fundamentally changes how serverless AI applications are distributed. Rather than requiring developers to build, tag, and push container images to registries, the platform monitors GitHub releases and automatically handles the containerization pipeline. This approach eliminates the traditional friction points in serverless deployment while maintaining the flexibility developers need for complex AI workloads. If you've been following us for awhile, you may be familiar with our GitHub integration for serverless deployment, and this represents the next evolution of that. Rather than simply deploying to your own serverless endpoint, you can now browse and create deployments and act within a wider Runpod ecosystem, similar to our existing template offerings. The big difference is that while the template listing is open to all, the Hub requires offerings to be vetted by Runpod staff for functionality. Don't let this stop you or discourage you from creating, though! The code for creating a serverless endpoint is nearly identical to a Hub listing, so you won't
When you publish a repository to the Hub, the platform creates a persistent connection to your GitHub repository through webhooks and release monitoring. Each new release triggers an automated build process that reads your repository's configuration files, validates the deployment specification, and creates the necessary serverless infrastructure. This model ensures that your deployments remain synchronized with your source code without requiring manual intervention or complex CI/CD pipeline configuration.
Every Hub deployment requires a specific set of files that work together to define both the runtime environment and deployment configuration. At the core, your repository must contain a handler.py file that implements the serverless function interface, defining how incoming requests are processed and responses are generated. The Dockerfile defines the container environment, including system dependencies, Python packages, and any model files or preprocessing tools your application requires. If you're already familiar with our serverless architecture, these requirements are the same as before.
The platform also requires two configuration files that bridge the gap between your code and the deployment infrastructure: hub.json and tests.json. These files can be placed either in the repository root or in a dedicated .runpod directory, with the latter taking precedence. This directory structure allows you to maintain deployment-specific configurations without cluttering your main development environment, while ensuring that Hub-specific requirements don't interfere with your local development workflow.
The hub.json file serves as the declarative specification for your serverless deployment, but its design goes deeper than simple metadata configuration. The file structure reflects a sophisticated understanding of how AI applications differ from traditional web services, particularly in resource requirements and environment configuration
Here's a practical example of a hub.json configuration for a Stable Diffusion deployment that demonstrates these concepts:
The tests.json specification reveals the platform's approach to ensuring deployment reliability in a distributed, auto-scaling environment. Unlike traditional testing frameworks that focus on unit or integration testing, the Hub's testing system is designed specifically for validating serverless inference endpoints under realistic conditions.
The timeout specification isn't just about preventing runaway processes—it's about validating that your deployment can meet real-world latency requirements. AI inference workloads have unique timing characteristics, with model loading, GPU initialization, and inference execution each contributing to total request latency. The testing framework validates these end-to-end performance characteristics rather than just functional correctness.
The test environment configuration allows for hardware-specific validation, ensuring that your deployment works correctly on the GPU types you've specified. This is particularly important for AI workloads where numerical precision, memory bandwidth, and compute capabilities can vary significantly between hardware generations.
Here's a corresponding tests.json example that validates the Stable Diffusion deployment from our previous configuration:
This test suite validates different aspects of the deployment: basic functionality with standard parameters, batch processing capabilities, high-resolution generation that stresses GPU memory, and feature-specific validation like negative prompting. The timeout values are carefully calibrated based on expected inference times, and the test environment mirrors the production GPU specifications to ensure consistent behavior.
Here's a breakdown of each variable in the tests.json example:
tests array)name: A unique identifier for this specific test case. In this example, "Testing values" is the test name that will appear in build logs and test reports when the Hub validates your deployment.
input: The actual JSON payload that gets sent to your serverless function during testing. This represents the request body that your handler.py file will receive. In this generic example, param1 and param2 would be parameters your AI model expects - for a real deployment, these might be something like {"prompt": "a red car", "steps": 20} for image generation or {"text": "Hello world", "language": "en"} for translation.
timeout: Maximum time (in milliseconds) the test is allowed to run before being marked as failed. 10000ms = 10 seconds. This prevents tests from hanging indefinitely and ensures your deployment can meet reasonable response time expectations.
config object)gpuTypeId: Specifies exactly which GPU model to use for testing. "NVIDIA GeForce RTX 4090" means the test will run on that specific hardware. This ensures your deployment is validated on the same type of GPU that users might deploy it on, which is crucial since different GPUs have different memory capacities, compute capabilities, and driver compatibility.
gpuCount: Number of GPUs to allocate for the test environment. Setting this to 1 means the test runs on a single GPU. Some AI models require multiple GPUs, so you might set this to 2 or higher for multi-GPU deployments.
env: Environment variables that are set during testing, separate from what end users might configure. In this example, TEST_ENV_VAR is set to test_value. This allows you to override default settings specifically for testing - you might set a test API key, enable debug logging, or point to test model weights rather than production ones.
allowedCudaVersions: Array of CUDA runtime versions that your deployment supports. The test system will validate that your code works correctly with these CUDA versions. Different AI frameworks require specific CUDA versions, and this ensures compatibility. The versions are listed from newest to oldest (12.7 down to 11.7), giving the test system flexibility to use any compatible version available.
First, navigate to the main Hub page, and click Get Started under Add Your Repo. Since I've already set up my GitHub repo through the integration previously, it will appear, along with the repos I've created. We'll use our simple serverless Hello World as our example here.

It will then bring us to the configuration page where we see examples for our JSON files and handler. If you're working with an existing serverless config that already has a Dockerfile, it will pick it up automatically. If not, you'll need to create that first, and the instructions for that are in the Runpod Dockerfile guide.

Create a .runpod folder in your repo, and ensure that the hub.json and tests.json files are in there.
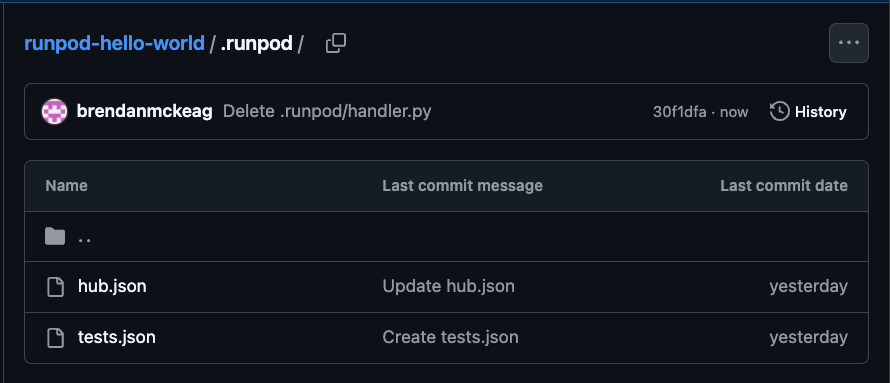
Lastly, go to Releases and create a release for the repo.
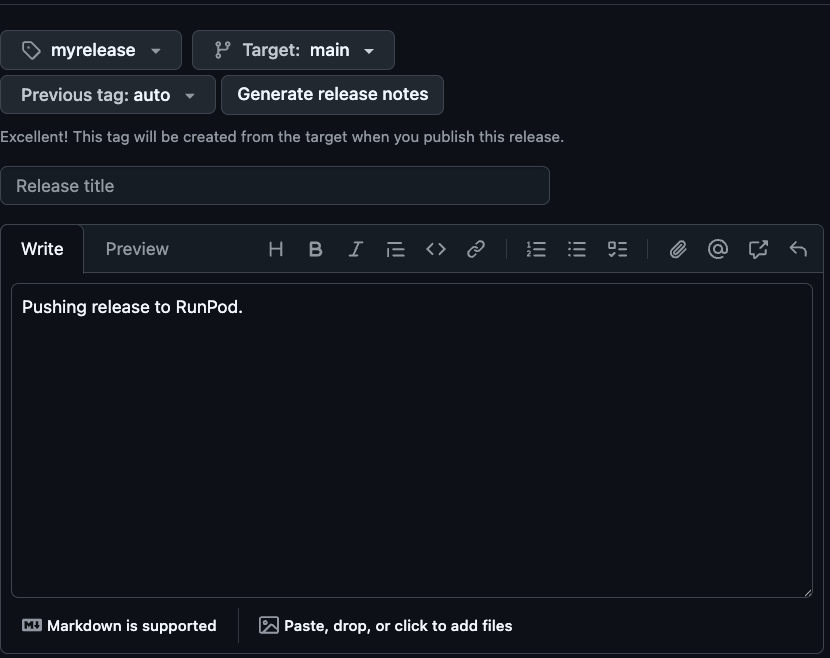
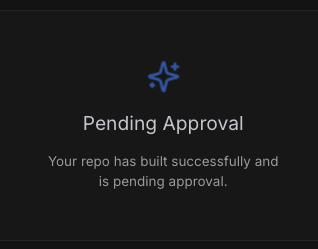
Once all requirements are met (you can navigate back to your listing to ensure that they are) it should be replaced with a notification that the listing is being reviewed.
Once the listing is approved, you can deploy it simply by clicking the Deploy button,
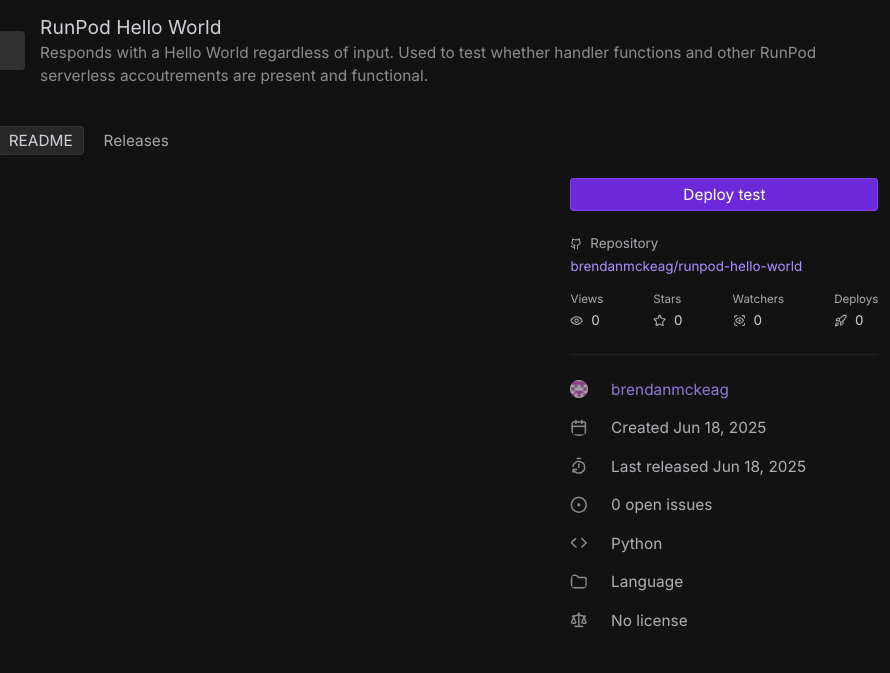
And from here, it'll automatically create a Hub listing with the endpoint specifications (GPU spec, container size, etc.) Feel free to edit the endpoint after deployment if necessary, but bear in mind the default in your new deploys will be based on whatever is in your JSON files, not after the fact endpoint edits.
The Hub's open-source-first approach creates interesting dynamics in AI model distribution and collaboration. By making all listings open source and GitHub-connected, the platform encourages a level of transparency that's often missing in proprietary AI deployment platforms. Developers can examine not just the API interface but the complete implementation, including optimization techniques, preprocessing steps, and model management strategies.
This transparency extends to the deployment configuration itself. When you deploy a Hub listing, you're not just getting access to an inference endpoint—you're getting a complete reference implementation that you can fork, modify, and redeploy. This creates opportunities for rapid iteration and customization that would be difficult to achieve with traditional deployment models.
The community contribution model also means that best practices and optimizations can propagate quickly across the ecosystem. When one developer discovers an effective preprocessing technique or optimization strategy, it can be shared through the open repository model and adopted by others working on similar problems.
Author profile: Brendan McKeag
Blog Posts
Queue for any GPU spec, even one that's fully rented out, and we'll deploy it the moment capacity opens up. No more refreshing the console or running a sniping tool.

Explore why faster chips have shifted the bottleneck to AI infrastructure, and what that means for teams running production workloads.
.jpeg)
With MIG, we can partition RTX 6000 Pro cards into isolated 24 GB instances. Here's when it makes sense for your workloads.
