Connect Google Colab to Runpod for Custom GPU Power
Prefer Colab's interface but need more reliable compute? This guide shows you how to connect Google Colab to a Runpod instance via port forwarding.
It looks like some of you are used to Google Colab's interface and would prefer to use that over the command line or JupyterLab's interface. Well, good news, you can connect Colab to use your own custom compute instead of the GPU that they assign to you! Unfortunately, Google won't let you connect directly to a remote instance, but with a few simple steps, you can get around it by using your local machine to forward the remote port. Sound complicated? It's not too bad! We can get this going together in a few minutes :)
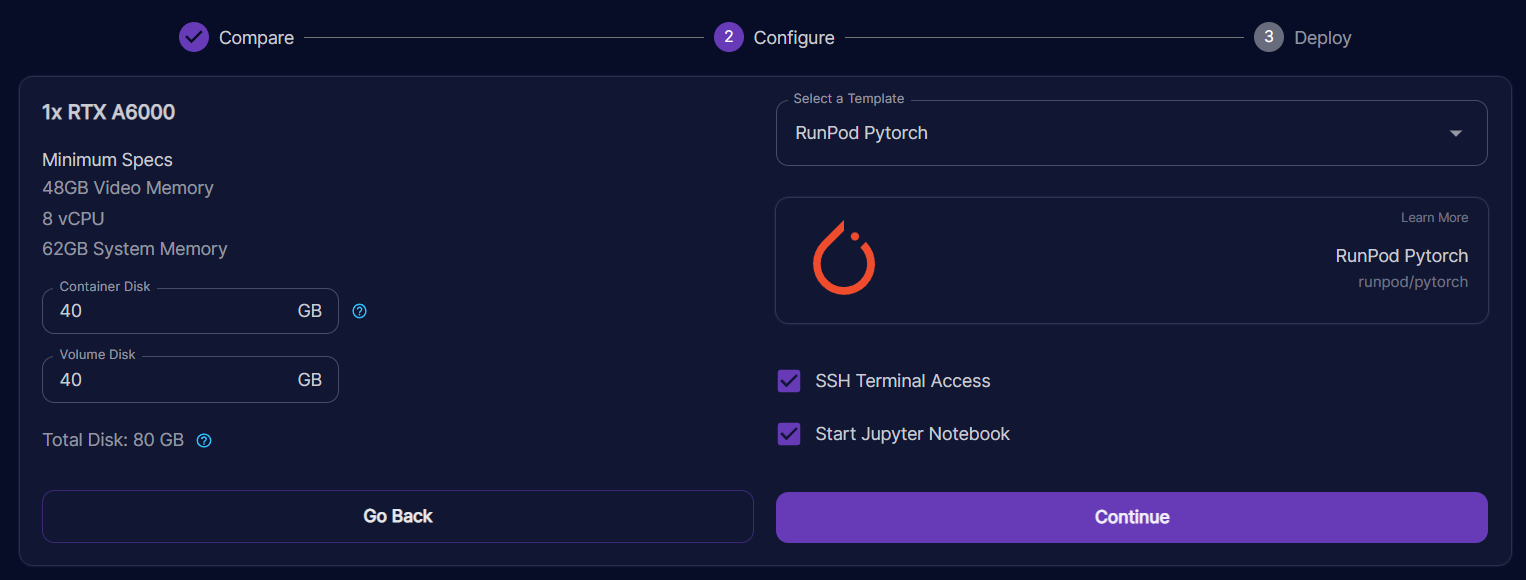
First thing's first, start a Runpod instance. For this guide, I'm going to use the Runpod pytorch launch template, but you can use any template that you want. Warning, custom images may require more dependency installs to make it work! Make sure that your instance has "SSH Terminal Access" checked. If you want to deploy on community cloud, you need to find a TCP enabled instance through the "Browse" menu.
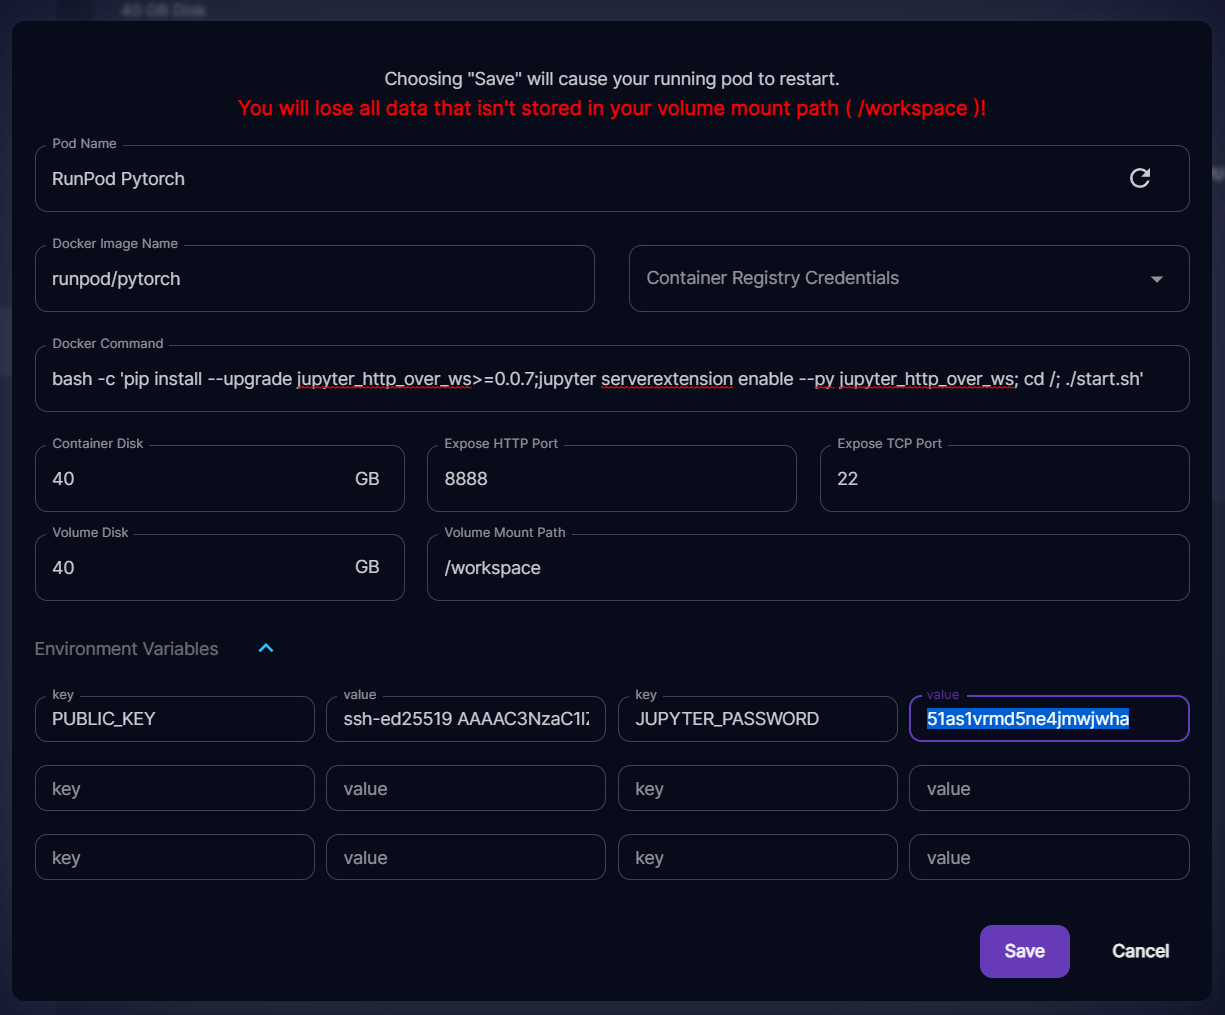
Put the following into your "Docker Command" field. While you are here, copy the JUPYTER_PASSWORD env variable value (in this case it's 51as1vrmd5ne4jmwjwha). We'll need this password later to authenticate. Hit Save to start your instance with the new command.
This should work for any Runpod standard template. All it does is enable the Jupyter extension that enables http over websockets before starting Jupyter Lab.
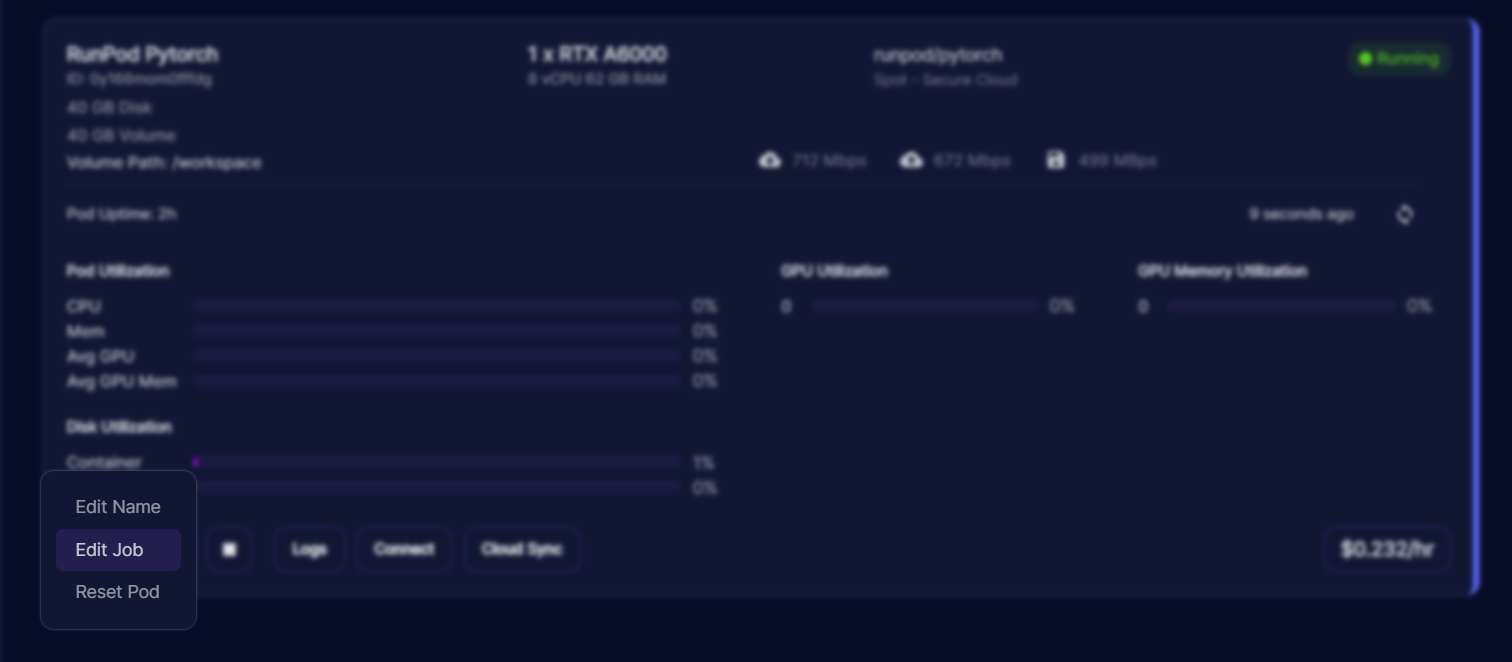
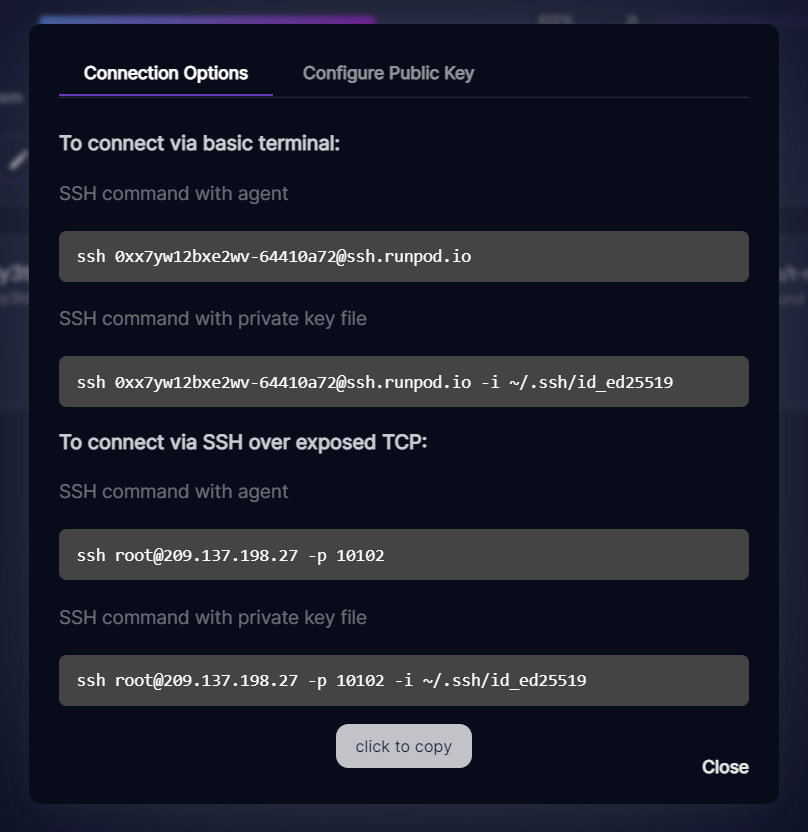
Once your instance starts, start an SSH tunnel with port forwarding. You can do this by copying the last command in your "Connect" menu and then appending -L 8888:localhost:8888.
In this case the full connection command you want to run is:
This connects you to the pod and forwards 8888 within the pod to 8888 on your local machine. Google Colab needs this to connect to the pod, as it connects through your machine to do so.
Open up your favorite notebook in Google Colab. You will see a "Connect" button/dropdown in the top right corner.
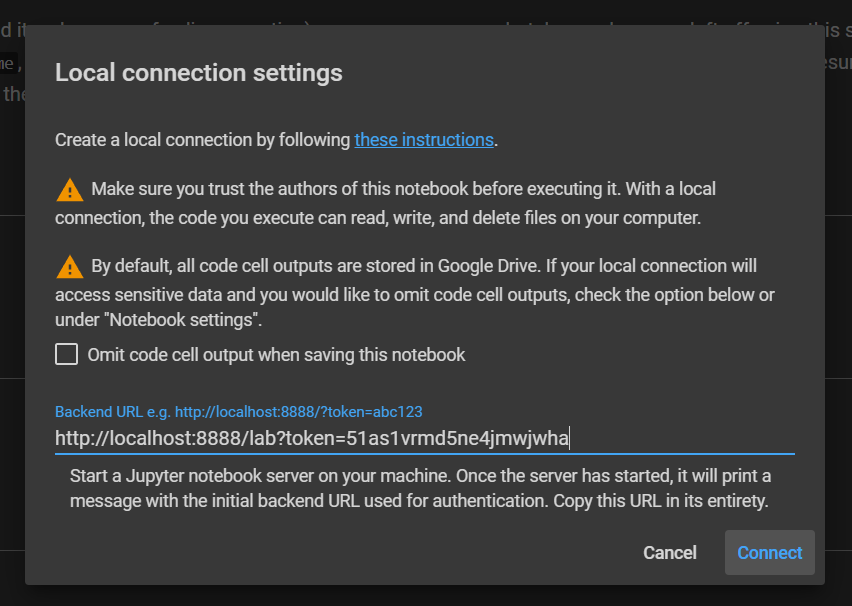
Click on it and select "Connect to a local runtime". This will present you with a field to fill in the address of the local runtime. This is where that JUPYTER_PASSWORD you copied earlier comes in handy. Put the password you copied after the ?token= and then hit connect. If you forgot where you put that password, you can always go back to the "Edit Job" menu and find it there. Be sure to hit Cancel instead of saving, as it will reboot your pod if you save it!
This is what it looks like for this specific pod. Remember to replace this with your own password!
If all goes well, then you should now be connected to your pod through Colab! You should see a Connected(local) in green in the top right corner.
I hope that this helps anyone that wanted the power of Runpod with the familiar UI/UX that Google Colab provides. Happy exploring!
Five Ways to Avoid Tripping Yourself Up Configuring Runpod
Learn five essential best practices for configuring Runpod environments, including code deployment, GPU right-sizing, storage persistence, file maintenance, and regional selection, to help engineers avoid common pitfalls that lead to wasted money, lost data, and performance issues.
Why companies are choosing nimble cloud platforms over hyperscalers
Iterative AI teams are shifting from hyperscalers to purpose-built AI clouds. Learn how to optimize iteration speed, scale instantly, and cut costs by up to 90%.