We've cooked up a bunch of improvements designed to reduce friction and make the.


Lorem ipsum dolor sit amet, consectetur adipiscing elit, sed do eiusmod tempor incididunt ut labore et dolore magna aliqua. Ut enim ad minim veniam, quis nostrud exercitation ullamco laboris nisi ut aliquip ex ea commodo consequat. Duis aute irure dolor in reprehenderit in voluptate velit esse cillum dolore eu fugiat nulla pariatur.
Block quote
Ordered list
Unordered list
Bold text
Emphasis
Superscript
Subscript
Runpod Serverless is a cloud computing solution designed for short-lived, event-driven tasks. Runpod automatically manages the underlying infrastructure so you don’t have to worry about scaling or maintenance. You only pay for the compute time that you actually use, so you don’t pay when your application is idle.
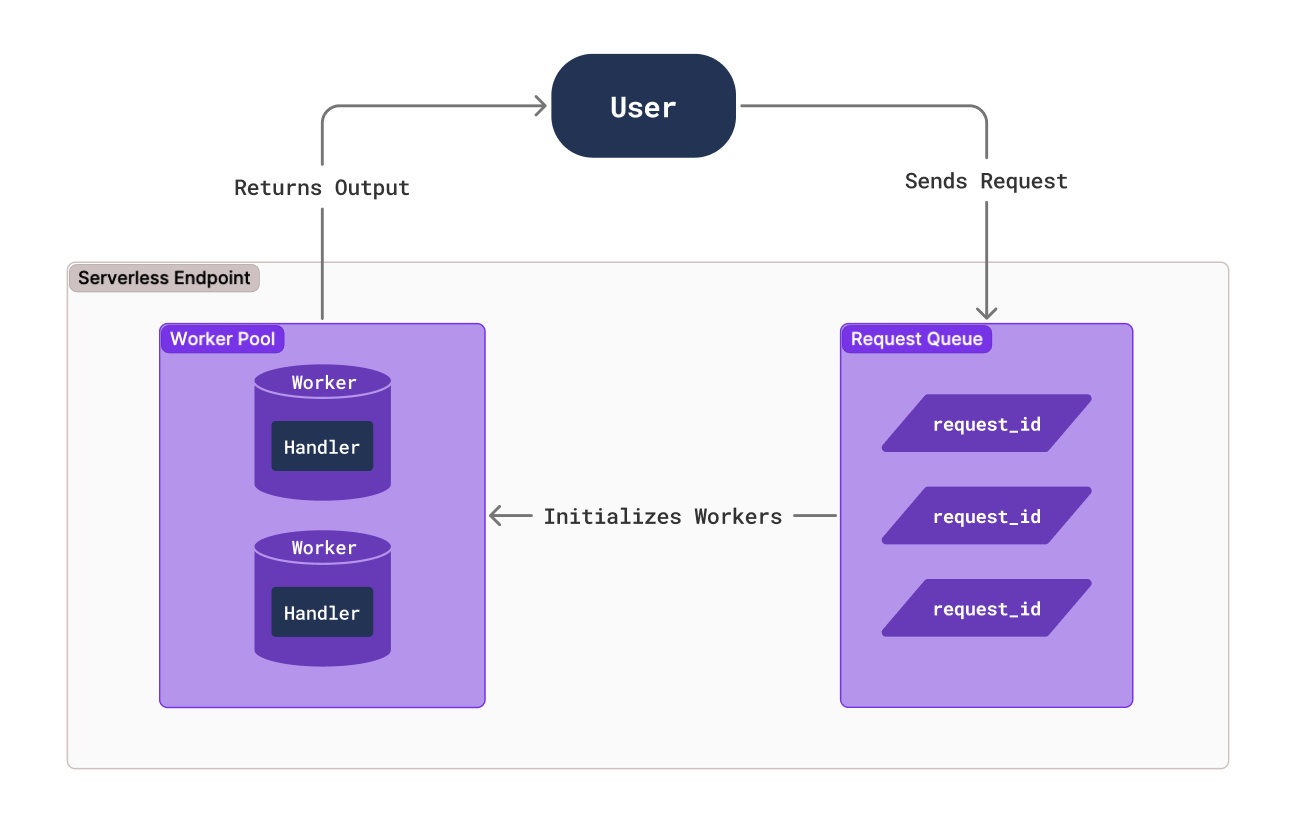
You configure an endpoint for your Serverless application with compute resources and other settings, and workers process requests that arrive at that endpoint. You create a handler function that defines how workers process incoming requests and return results. Runpod automatically starts and stops workers based on demand to optimize resource usage and minimize cost.
When a client sends a request to your endpoint, it is put into a queue and waits for a worker to become available. A worker processes the request using your handler function and returns a result to the client.
You can certainly create custom workers from scratch, but in most cases it’s easiest to start with a template. Runpod provides several templates to help you get started. Let’s create workers using a few of these templates.
In this blog post you’ll learn how to:
The worker-basic template is a minimal Serverless example. When the endpoint receives a request, Runpod spins up a worker to execute the handler function, which in this case prints out some text and sleeps for a few seconds.
Let’s try testing this template locally:
git clone https://github.com/runpod-workers/worker-basic.gitpython -m venv venvsource venv/bin/activatevenv\Scripts\activatepip install runpodpython rp_handler.py--- Starting Serverless Worker | Version 1.7.13 ---
INFO | Using test_input.json as job input.
DEBUG | Retrieved local job: {'input': {'prompt': 'John Doe', 'seconds': 15}, 'id': 'local_test'}
INFO | local_test | Started.
Worker Start
Received prompt: John Doe
Sleeping for 15 seconds...
DEBUG | local_test | Handler output: John Doe
DEBUG | local_test | run_job return: {'output': 'John Doe'}
INFO | Job local_test completed successfully.
INFO | Job result: {'output': 'John Doe'}
INFO | Local testing complete, exiting.--- Starting Serverless Worker | Version 1.7.13 —
INFO | Using test_input.json as job input.
DEBUG | Retrieved local job: {'input': {'prompt': 'George Washington', 'seconds': 5}, 'id': 'local_test'}
INFO | local_test | Started.
Worker Start
Received prompt: George Washington
Sleeping for 5 seconds...
DEBUG | local_test | Handler output: George Washington
DEBUG | local_test | run_job return: {'output': 'George Washington'}
INFO | Job local_test completed successfully.
INFO | Job result: {'output': 'George Washington'}
INFO | Local testing complete, exiting.In this example, the worker simply prints some text and sleeps for a given number of seconds. In a real application, you would replace this with functionality like running a Large Language Model (LLM) or performing some other compute-intensive operation. We will try doing this later.
Let’s look through rp_handler.py so we can understand how it works:
import runpod
import time

def handler(event):
    print(f"Worker Start")
    input = event['input']

    prompt = input.get('prompt')
    seconds = input.get('seconds', 0)

    print(f"Received prompt: {prompt}")
    print(f"Sleeping for {seconds} seconds...")

    # Replace the sleep code with your Python function to generate images, text, or run any machine learning workload
    time.sleep(seconds)

    return prompt

if __name__ == '__main__':
    runpod.serverless.start({'handler': handler })
The handler(event) function is the entry point for the worker.
event is a dictionary containing the request input in the input key. Here, we store the input values in local variables, print them to the console, and sleep.
When we run the script, it calls runpod.serverless.start, which requests a worker at the endpoint, and sets the handler function to handler.
We will learn how to deploy a worker later - for now, let’s check out another template.
git clone https://github.com/runpod-workers/worker-template.gitpython -m venv venvsource venv/bin/activatevenv\Scripts\activatepip install runpodpython handler.py--- Starting Serverless Worker | Version 1.7.13 ---
INFO | Using test_input.json as job input.
DEBUG | Retrieved local job: {'input': {'name': 'John Doe'}, 'id': 'local_test'}
INFO | local_test | Started.
DEBUG | local_test | Handler output: Hello, John Doe!
DEBUG | local_test | run_job return: {'output': 'Hello, John Doe!'}
INFO | Job local_test completed successfully.
INFO | Job result: {'output': 'Hello, John Doe!'}
INFO | Local testing complete, exiting.--- Starting Serverless Worker | Version 1.7.13 —
INFO | Using test_input.json as job input.
DEBUG | Retrieved local job: {'input': {'name': 'George Washington'}, 'id': 'local_test'}
INFO | local_test | Started.
DEBUG | local_test | Handler output: Hello, George Washington!
DEBUG | local_test | run_job return: {'output': 'Hello, George Washington!'}
INFO | Job local_test completed successfully.
INFO | Job result: {'output': 'Hello, George Washington!'}
INFO | Local testing complete, exiting.In this example, the worker simply prints some text. In a real application, you would replace this with functionality like running a Large Language Model (LLM) or performing some other compute-intensive operation. We will try doing this later.
Let’s look through handler.py so we can understand how it works:
"""Example handler file."""

import runpod

# If your handler runs inference on a model, load the model here.
# You will want models to be loaded into memory before starting serverless.

def handler(job):
    """Handler function that will be used to process jobs."""
    job_input = job["input"]

    name = job_input.get("name", "World")

    return f"Hello, {name}!"

runpod.serverless.start({"handler": handler})
As the comments mention, if your handler function uses an LLM, you should load it at the start of your script rather than in the handler function itself so that it’s not loaded every time the handler function is called.
The handler(job) function is the entry point for the worker.
job is a dictionary containing the request input in the input key. Here, we store the input value name in a local variable and print it to the console.
The runpod.serverless.start function requests a worker at the endpoint, and sets the handler function to handler.
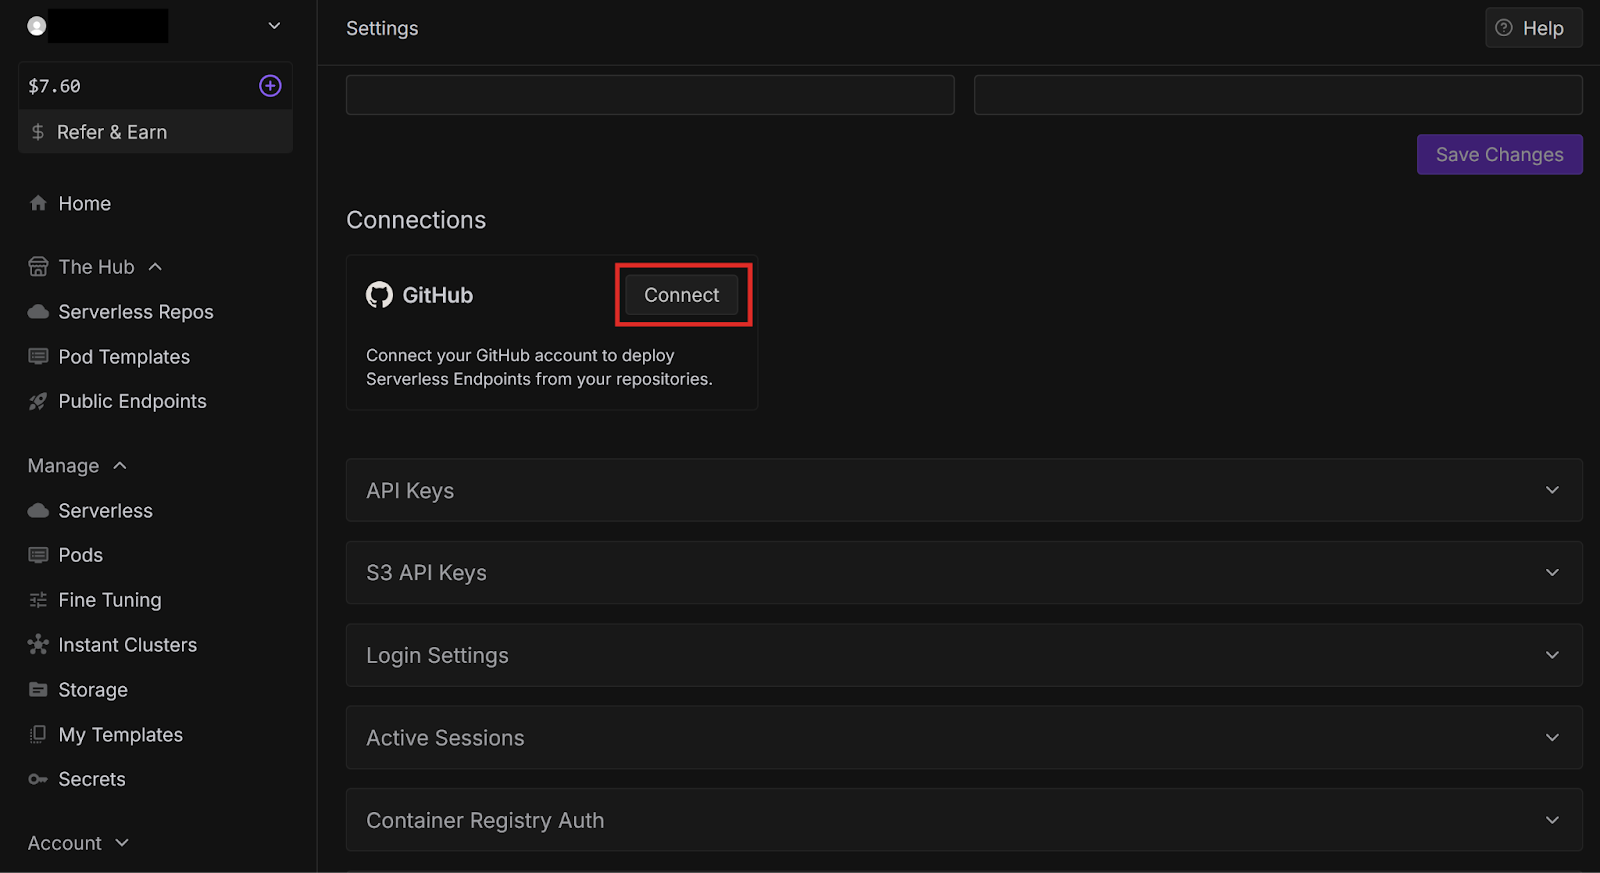
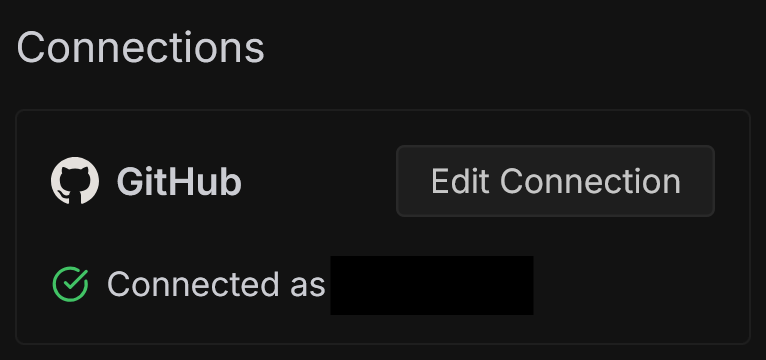
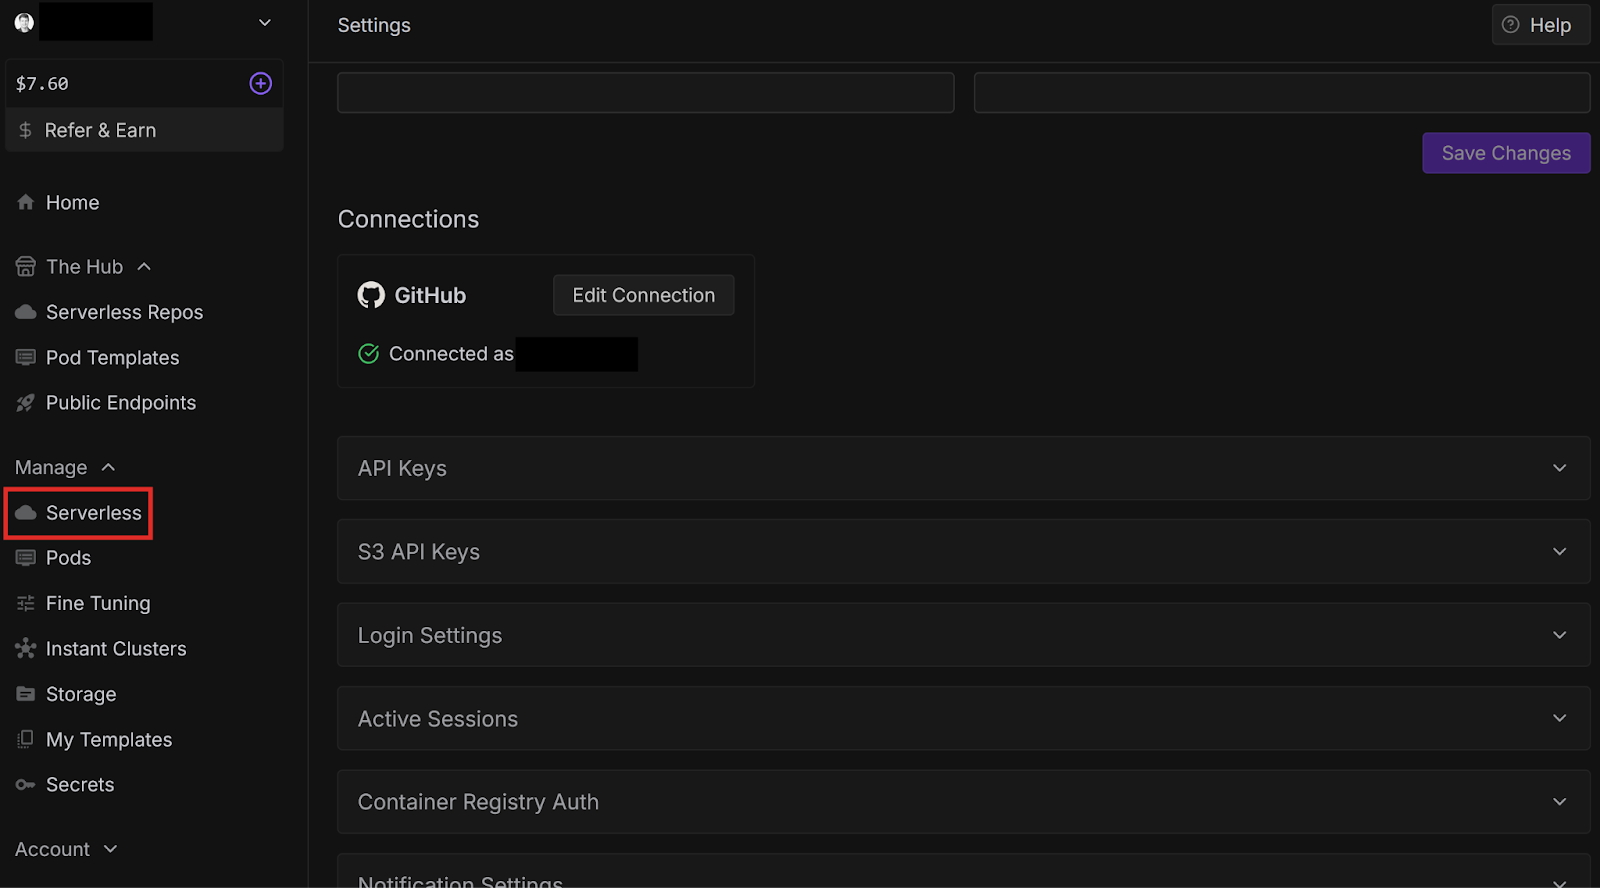
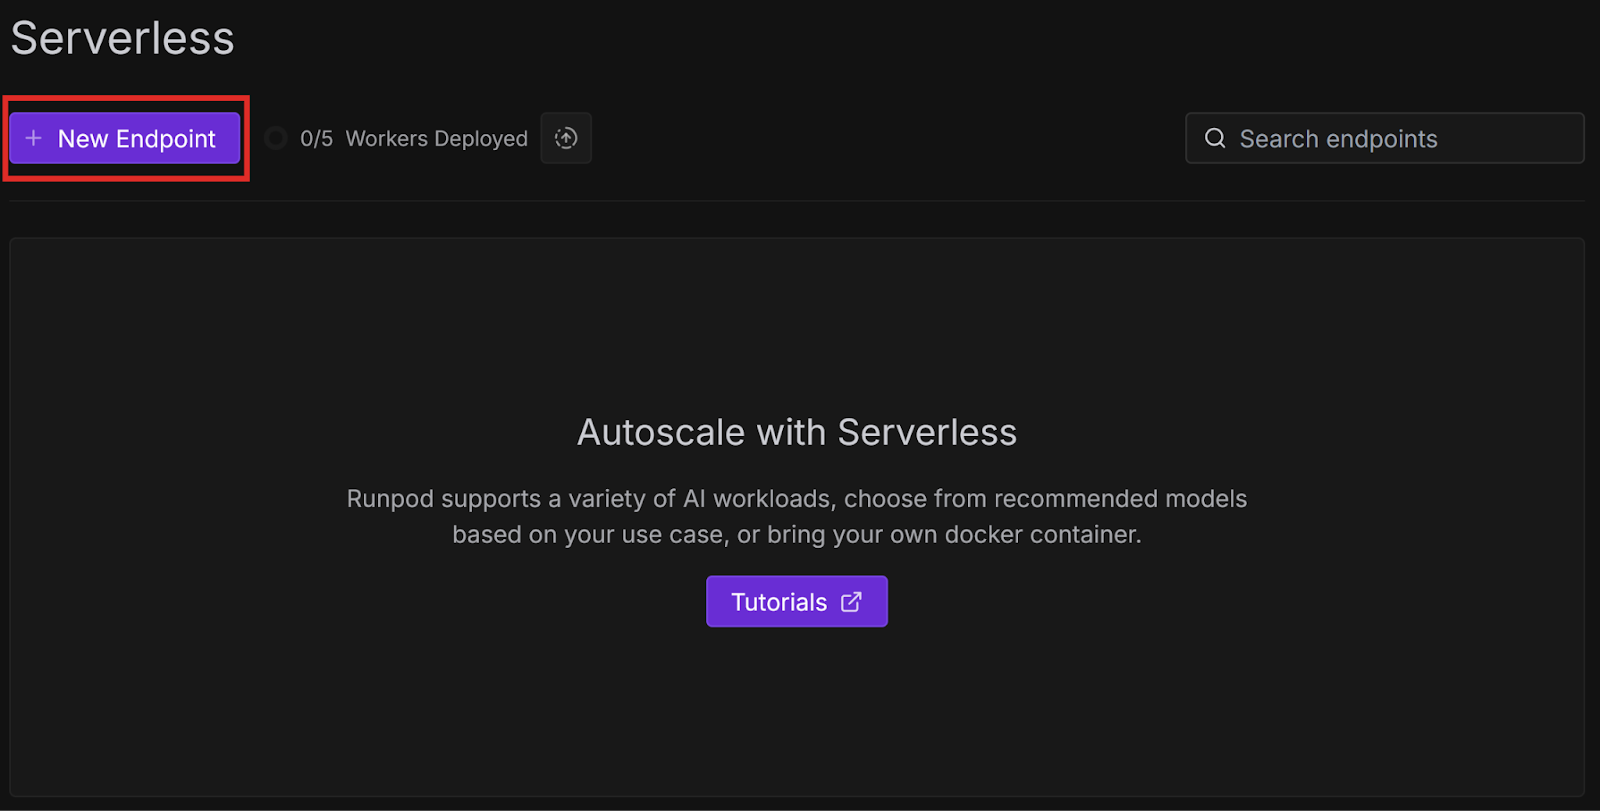
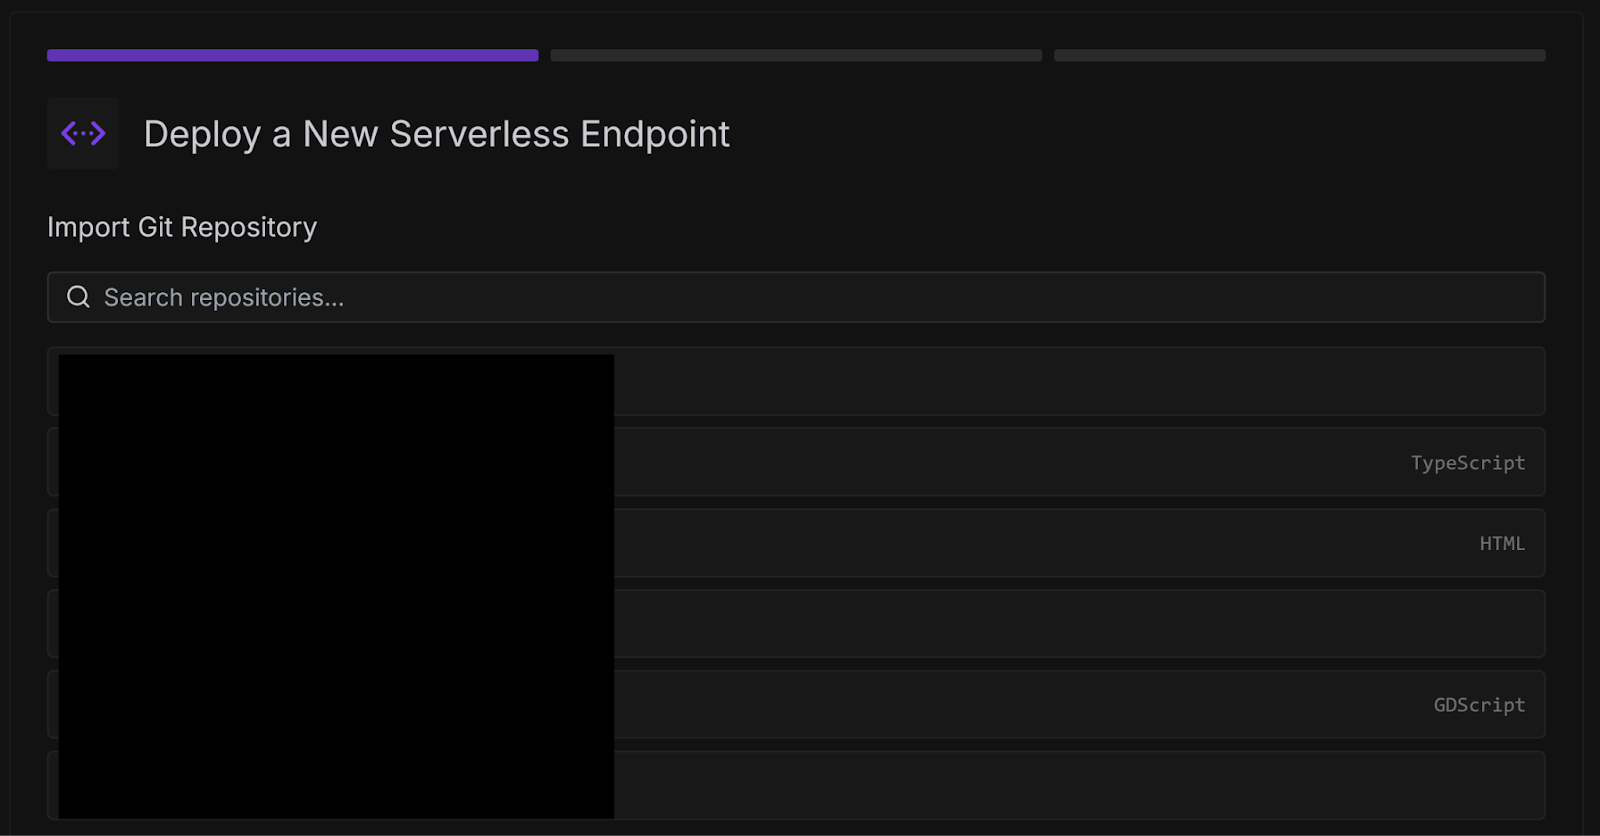
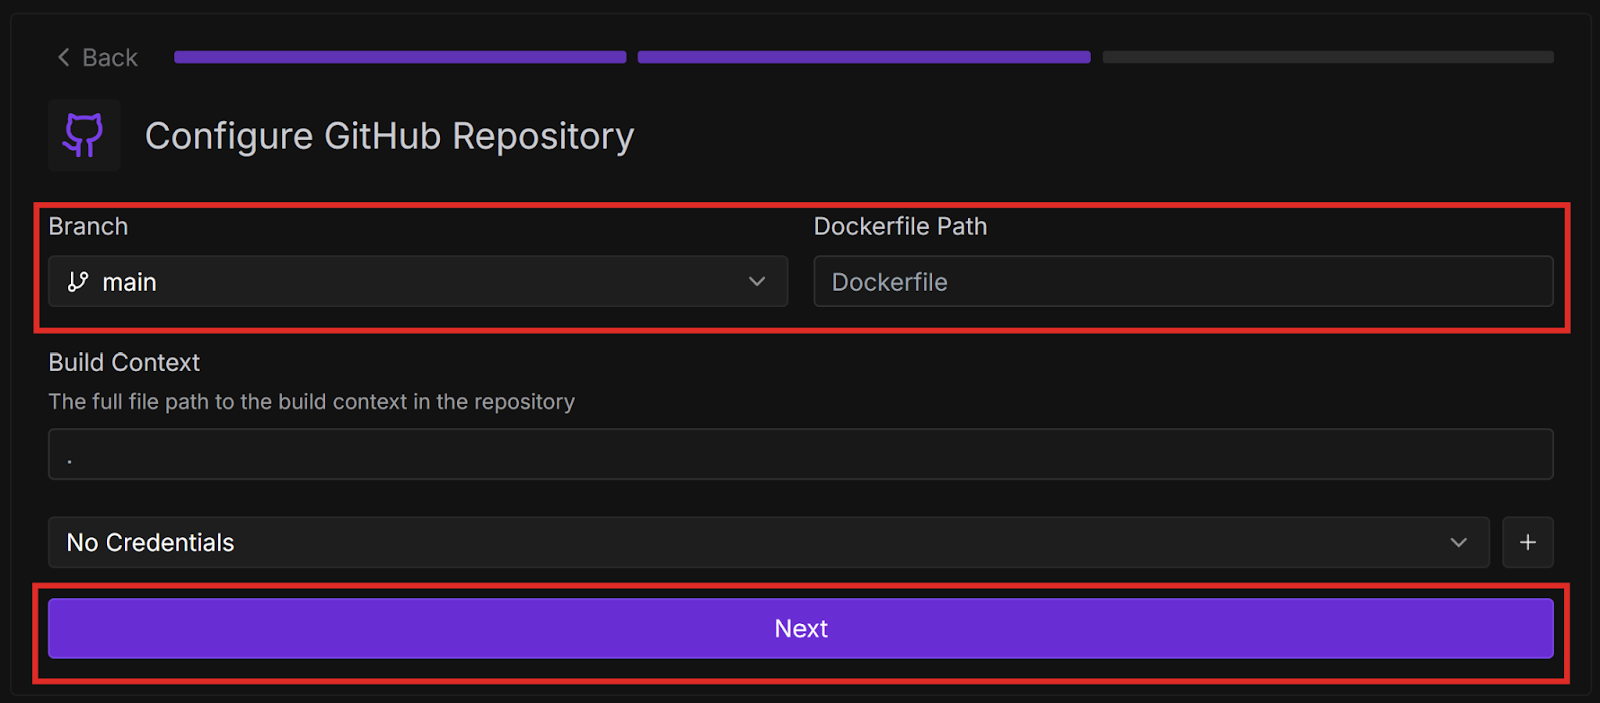
Now that we have learned how to create a simple worker from a template, let’s learn how to deploy it:

{
  "input": {
    "prompt": "Hello World"
  }
}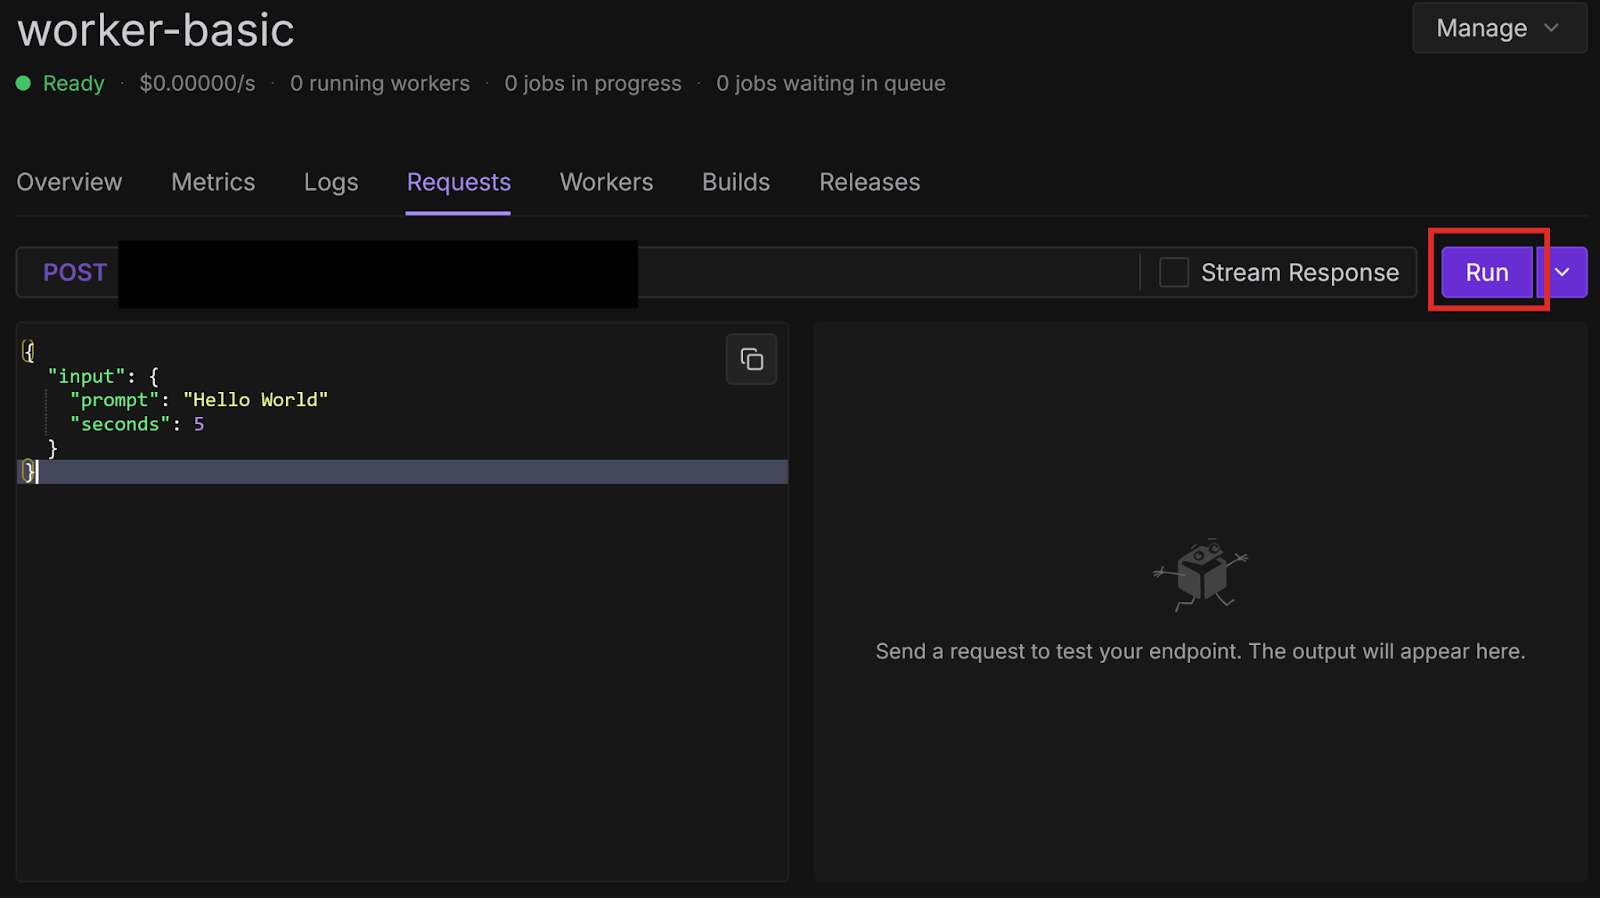
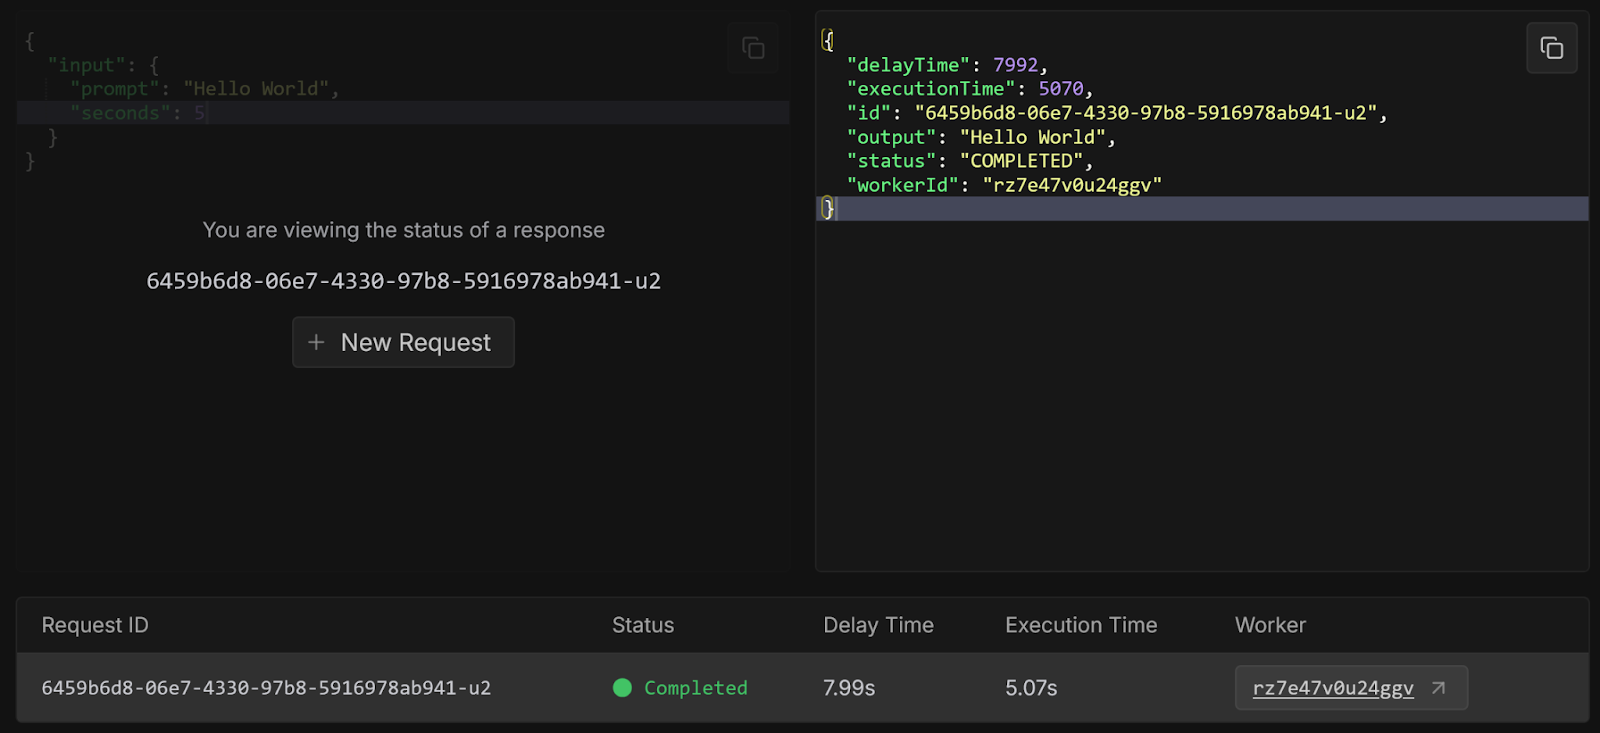
Congratulations, you have successfully created a worker from a template repository and deployed it from GitHub! These examples were very basic, but there are many other more practical templates available, which we will explore in future blog posts. You can also check them out yourself on GitHub.
Try modifying your handler function to do something more interesting, like having an LLM process a query, or running compute-intensive code. You can also implement GitHub Actions for Continuous Integration/Continuous Deployment to automatically test and deploy every time you push to your repository.


Learn how to quickly create, test, and deploy Runpod Serverless workers using GitHub templates—accelerating AI workloads with pay-per-use efficiency and zero infrastructure hassle.

Runpod Serverless is a cloud computing solution designed for short-lived, event-driven tasks. Runpod automatically manages the underlying infrastructure so you don’t have to worry about scaling or maintenance. You only pay for the compute time that you actually use, so you don’t pay when your application is idle.
You configure an endpoint for your Serverless application with compute resources and other settings, and workers process requests that arrive at that endpoint. You create a handler function that defines how workers process incoming requests and return results. Runpod automatically starts and stops workers based on demand to optimize resource usage and minimize cost.
When a client sends a request to your endpoint, it is put into a queue and waits for a worker to become available. A worker processes the request using your handler function and returns a result to the client.

You can certainly create custom workers from scratch, but in most cases it’s easiest to start with a template. Runpod provides several templates to help you get started. Let’s create workers using a few of these templates.
In this blog post you’ll learn how to:
The worker-basic template is a minimal Serverless example. When the endpoint receives a request, Runpod spins up a worker to execute the handler function, which in this case prints out some text and sleeps for a few seconds.
Let’s try testing this template locally:
git clone https://github.com/runpod-workers/worker-basic.gitpython -m venv venvsource venv/bin/activatevenv\Scripts\activatepip install runpodpython rp_handler.py--- Starting Serverless Worker | Version 1.7.13 ---
INFO | Using test_input.json as job input.
DEBUG | Retrieved local job: {'input': {'prompt': 'John Doe', 'seconds': 15}, 'id': 'local_test'}
INFO | local_test | Started.
Worker Start
Received prompt: John Doe
Sleeping for 15 seconds...
DEBUG | local_test | Handler output: John Doe
DEBUG | local_test | run_job return: {'output': 'John Doe'}
INFO | Job local_test completed successfully.
INFO | Job result: {'output': 'John Doe'}
INFO | Local testing complete, exiting.--- Starting Serverless Worker | Version 1.7.13 —
INFO | Using test_input.json as job input.
DEBUG | Retrieved local job: {'input': {'prompt': 'George Washington', 'seconds': 5}, 'id': 'local_test'}
INFO | local_test | Started.
Worker Start
Received prompt: George Washington
Sleeping for 5 seconds...
DEBUG | local_test | Handler output: George Washington
DEBUG | local_test | run_job return: {'output': 'George Washington'}
INFO | Job local_test completed successfully.
INFO | Job result: {'output': 'George Washington'}
INFO | Local testing complete, exiting.In this example, the worker simply prints some text and sleeps for a given number of seconds. In a real application, you would replace this with functionality like running a Large Language Model (LLM) or performing some other compute-intensive operation. We will try doing this later.
Let’s look through rp_handler.py so we can understand how it works:
import runpod
import time

def handler(event):
    print(f"Worker Start")
    input = event['input']

    prompt = input.get('prompt')
    seconds = input.get('seconds', 0)

    print(f"Received prompt: {prompt}")
    print(f"Sleeping for {seconds} seconds...")

    # Replace the sleep code with your Python function to generate images, text, or run any machine learning workload
    time.sleep(seconds)

    return prompt

if __name__ == '__main__':
    runpod.serverless.start({'handler': handler })
The handler(event) function is the entry point for the worker.
event is a dictionary containing the request input in the input key. Here, we store the input values in local variables, print them to the console, and sleep.
When we run the script, it calls runpod.serverless.start, which requests a worker at the endpoint, and sets the handler function to handler.
We will learn how to deploy a worker later - for now, let’s check out another template.
git clone https://github.com/runpod-workers/worker-template.gitpython -m venv venvsource venv/bin/activatevenv\Scripts\activatepip install runpodpython handler.py--- Starting Serverless Worker | Version 1.7.13 ---
INFO | Using test_input.json as job input.
DEBUG | Retrieved local job: {'input': {'name': 'John Doe'}, 'id': 'local_test'}
INFO | local_test | Started.
DEBUG | local_test | Handler output: Hello, John Doe!
DEBUG | local_test | run_job return: {'output': 'Hello, John Doe!'}
INFO | Job local_test completed successfully.
INFO | Job result: {'output': 'Hello, John Doe!'}
INFO | Local testing complete, exiting.--- Starting Serverless Worker | Version 1.7.13 —
INFO | Using test_input.json as job input.
DEBUG | Retrieved local job: {'input': {'name': 'George Washington'}, 'id': 'local_test'}
INFO | local_test | Started.
DEBUG | local_test | Handler output: Hello, George Washington!
DEBUG | local_test | run_job return: {'output': 'Hello, George Washington!'}
INFO | Job local_test completed successfully.
INFO | Job result: {'output': 'Hello, George Washington!'}
INFO | Local testing complete, exiting.In this example, the worker simply prints some text. In a real application, you would replace this with functionality like running a Large Language Model (LLM) or performing some other compute-intensive operation. We will try doing this later.
Let’s look through handler.py so we can understand how it works:
"""Example handler file."""

import runpod

# If your handler runs inference on a model, load the model here.
# You will want models to be loaded into memory before starting serverless.

def handler(job):
    """Handler function that will be used to process jobs."""
    job_input = job["input"]

    name = job_input.get("name", "World")

    return f"Hello, {name}!"

runpod.serverless.start({"handler": handler})
As the comments mention, if your handler function uses an LLM, you should load it at the start of your script rather than in the handler function itself so that it’s not loaded every time the handler function is called.
The handler(job) function is the entry point for the worker.
job is a dictionary containing the request input in the input key. Here, we store the input value name in a local variable and print it to the console.
The runpod.serverless.start function requests a worker at the endpoint, and sets the handler function to handler.
Now that we have learned how to create a simple worker from a template, let’s learn how to deploy it:


{
  "input": {
    "prompt": "Hello World"
  }
}

Congratulations, you have successfully created a worker from a template repository and deployed it from GitHub! These examples were very basic, but there are many other more practical templates available, which we will explore in future blog posts. You can also check them out yourself on GitHub.
Try modifying your handler function to do something more interesting, like having an LLM process a query, or running compute-intensive code. You can also implement GitHub Actions for Continuous Integration/Continuous Deployment to automatically test and deploy every time you push to your repository.
The most cost-effective platform for building, training, and scaling machine learning models—ready when you are.
