.jpeg)
Deploy When Available is now GA
Queue for any GPU spec, even one that's fully rented out, and we'll deploy it the moment capacity opens up. No more refreshing the console or running a sniping tool.
All
Blog
Unlock seamless coding with the VS Code Server template on Runpod. Learn how to connect, code, and iterate remotely with local-like speed and responsiveness.


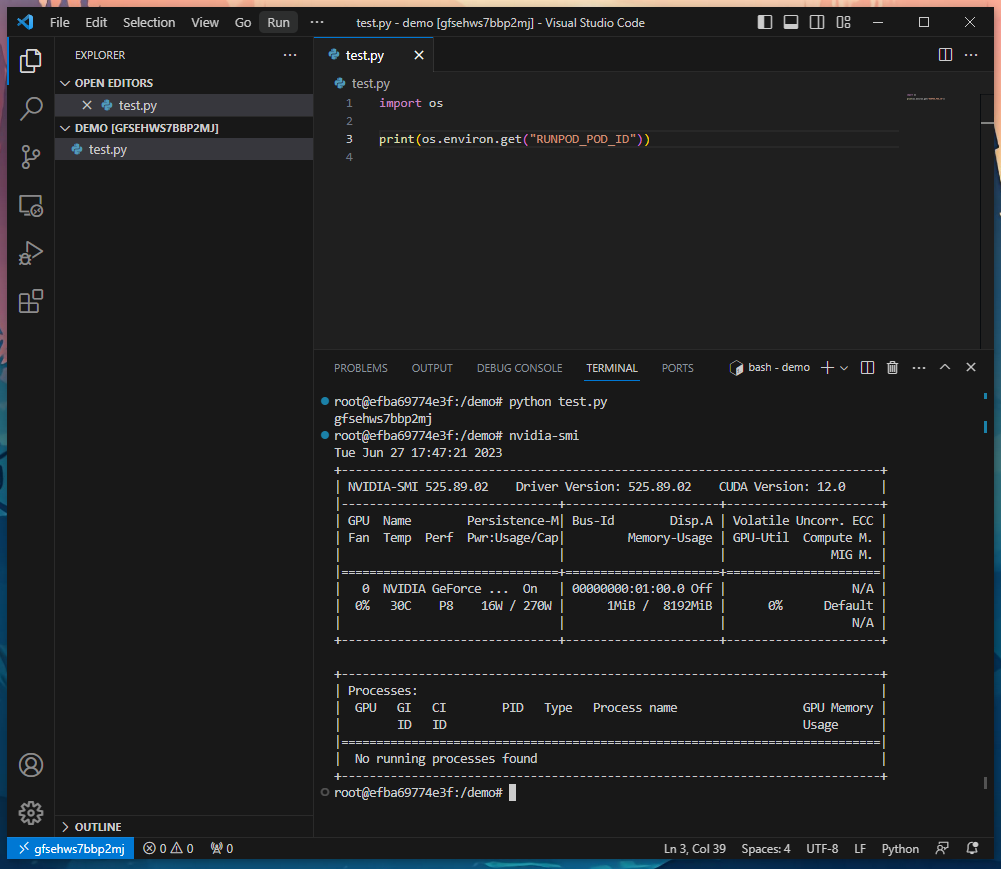
Experience a new level of development with Visual Studio Code (VS Code) and Runpod. This guide will walk you through using the VS Code Server template on Runpod, enabling you to leverage GPU instances for your development needs. By the end of this tutorial, you will be able to interact with your code directly from your locally installed VS Code.
Before we start, ensure you have the following:
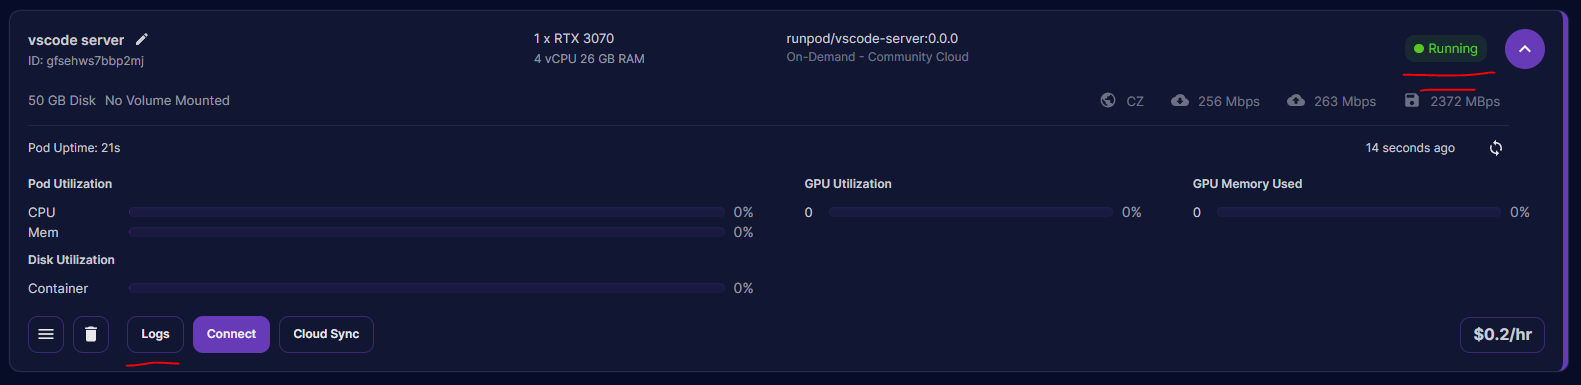
Navigate to the Runpod interface and select the Runpod VS Code Server template. Click on "Deploy" to launch your development server. Once you've initiated the deployment, proceed to the "My Pods" section and wait for your pod to become ready.

Within the "My Pods" section, find your pod, select "Logs", and then select "Container Logs". This will give you access to the logs of your VS Code Server.
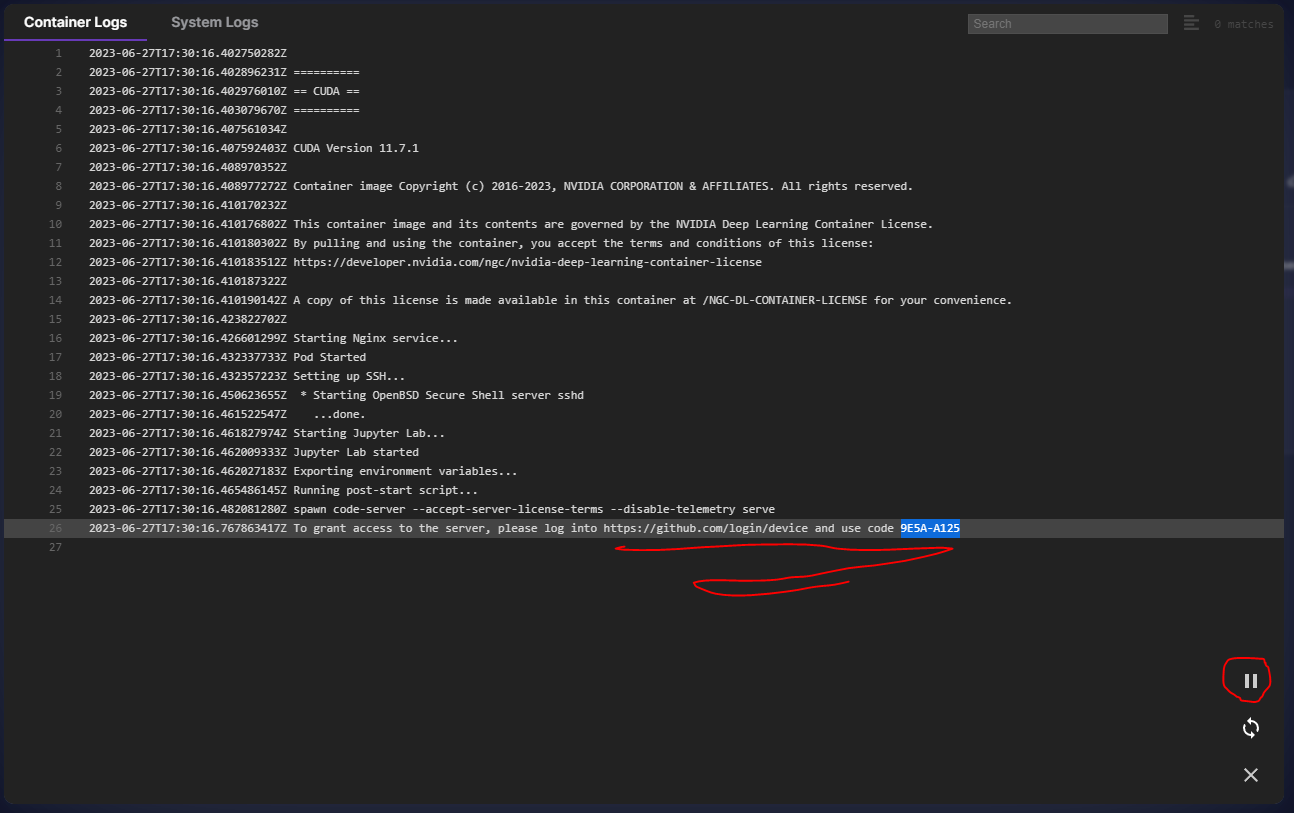
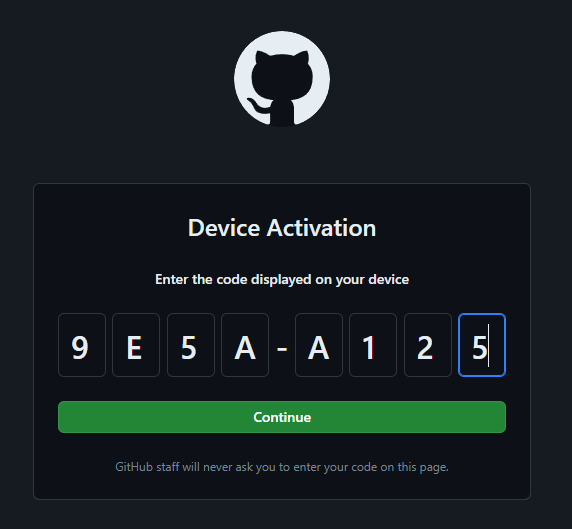
In your container logs, you will find a unique code for registering your VS Code Server. Copy this code, open a new window, and navigate to https://github.com/login/device. Paste the copied code into the provided field on this page. Before proceeding, ensure that there is a pause symbol in the lower right side of the log screen (not a play button). Click "Continue", authorize access, and your VS Code Server will be ready to use.

Open VS Code on your local machine. In the "Remote Explorer" section, you should see an option to connect to the server. Follow the prompts to establish a connection to the VS Code Server running on your Runpod instance.
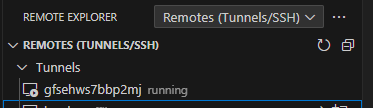
Congratulations! You are now directly connected to your Runpod instance using VS Code. Enjoy the familiar functionality of VS Code while also having the power to develop directly on a GPU-backed system!
Author profile: Justin Merrell
Blog Posts
Queue for any GPU spec, even one that's fully rented out, and we'll deploy it the moment capacity opens up. No more refreshing the console or running a sniping tool.

Explore why faster chips have shifted the bottleneck to AI infrastructure, and what that means for teams running production workloads.
.jpeg)
With MIG, we can partition RTX 6000 Pro cards into isolated 24 GB instances. Here's when it makes sense for your workloads.
