Exploring Runpod Serverless: Create Workers From Templates
Learn how to quickly create, test, and deploy Runpod Serverless workers using GitHub templates, accelerating AI workloads with pay-per-use efficiency and.
Runpod Serverless is a cloud computing solution designed for short-lived, event-driven tasks. Runpod automatically manages the underlying infrastructure so you don’t have to worry about scaling or maintenance. You only pay for the compute time that you actually use, so you don’t pay when your application is idle.
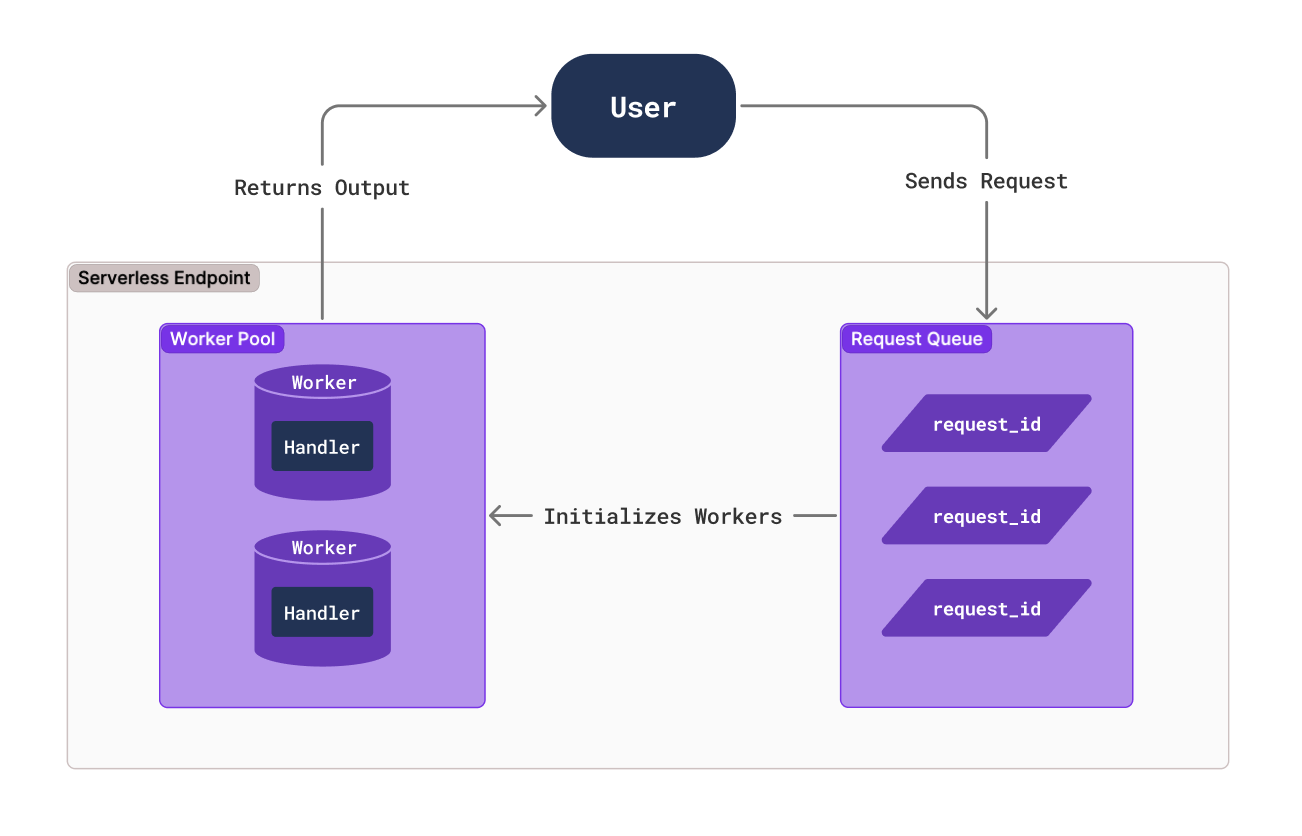
You configure an endpoint for your Serverless application with compute resources and other settings, and workers process requests that arrive at that endpoint. You create a handler function that defines how workers process incoming requests and return results. Runpod automatically starts and stops workers based on demand to optimize resource usage and minimize cost.
When a client sends a request to your endpoint, it is put into a queue and waits for a worker to become available. A worker processes the request using your handler function and returns a result to the client.
You can certainly create custom workers from scratch, but in most cases it’s easiest to start with a template. Runpod provides several templates to help you get started. Let’s create workers using a few of these templates.
What you’ll learn
In this blog post you’ll learn how to:
Create a Serverless worker from a template on GitHub
Test a worker on your local computer
Deploy a worker to Runpod Serverless from a GitHub repository
The worker-basic template is a minimal Serverless example. When the endpoint receives a request, Runpod spins up a worker to execute the handler function, which in this case prints out some text and sleeps for a few seconds.
Open the worker-basic folder in your preferred code editor. Take a look through the files:
Dockerfile: Configures the environment for a Docker container. Notice that it configures Python and installs the necessary packages before calling the handler function.
requirements.txt: Sets the Python packages for Docker to install.
rp_handler.py: Script containing the handler function for the worker.
test_input.json: Mock input data to test the handler function.
Create a Python virtual environment:
Activate the Python virtual environment.
On macOS/Linux:
On Windows:
Install the Runpod SDK:
Run rp_handler.py. The script will automatically read test_input.json as input, passing it to the handler function as an event:
You should get output similar to the following:
Take a look at test_input.json. Notice that the input object matches the input that the handler function took. Now change the prompt and seconds fields and rerun the handler function. You should see output that matches the new input:
In this example, the worker simply prints some text and sleeps for a given number of seconds. In a real application, you would replace this with functionality like running a Large Language Model (LLM) or performing some other compute-intensive operation. We will try doing this later.
Let’s look through rp_handler.py so we can understand how it works:
The handler(event) function is the entry point for the worker.
event is a dictionary containing the request input in the input key. Here, we store the input values in local variables, print them to the console, and sleep.
When we run the script, it calls runpod.serverless.start, which requests a worker at the endpoint, and sets the handler function to handler.
We will learn how to deploy a worker later - for now, let’s check out another template.
Open the worker-template folder in your preferred code editor. Look through the files - in particular, let’s look at the Dockerfile. Note that it uses the runpod/baseimage, which includes CUDA, multiple versions of Python, uv, jupyter notebook and common dependencies.
Create a Python virtual environment:
Activate the Python virtual environment.
On macOS/Linux:
On Windows:
Install the Runpod SDK:
Run handler.py. The script will automatically read test_input.json as input, passing it to the handler function as an event:
You should get output similar to the following:
Take a look at test_input.json. Notice that the input object matches the input that the handler function took. Now change the name field and rerun the handler function. You should see output that matches the new input:
In this example, the worker simply prints some text. In a real application, you would replace this with functionality like running a Large Language Model (LLM) or performing some other compute-intensive operation. We will try doing this later.
Let’s look through handler.py so we can understand how it works:
As the comments mention, if your handler function uses an LLM, you should load it at the start of your script rather than in the handler function itself so that it’s not loaded every time the handler function is called.
The handler(job) function is the entry point for the worker.
job is a dictionary containing the request input in the input key. Here, we store the input value name in a local variable and print it to the console.
The runpod.serverless.start function requests a worker at the endpoint, and sets the handler function to handler.
Deploy a worker from GitHub
Now that we have learned how to create a simple worker from a template, let’s learn how to deploy it:
Sign in to GitHub and fork the worker-basic or worker-template repository. Alternatively, you can create a new repository and copy one of the template’s files into it.
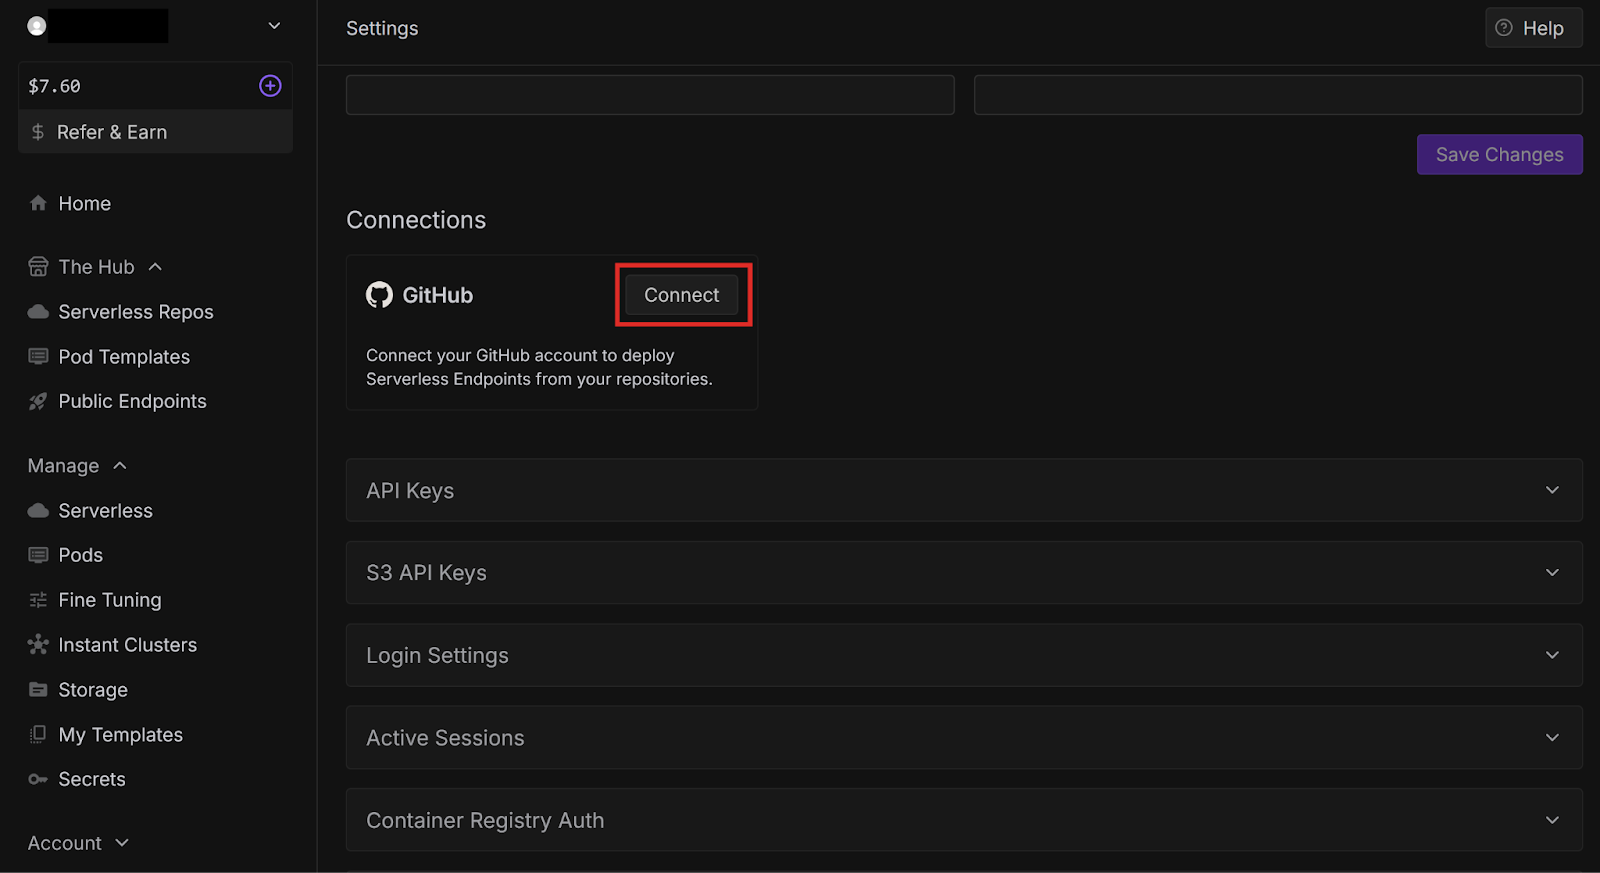
Under Connections, find the GitHub card and select Connect.
Sign in to your GitHub account.
Choose which repositories Runpod can access:
All repositories: Access to all current and future repositories.
Only select repositories: Choose specific repositories. In this case, make sure you select the template repository that you forked.
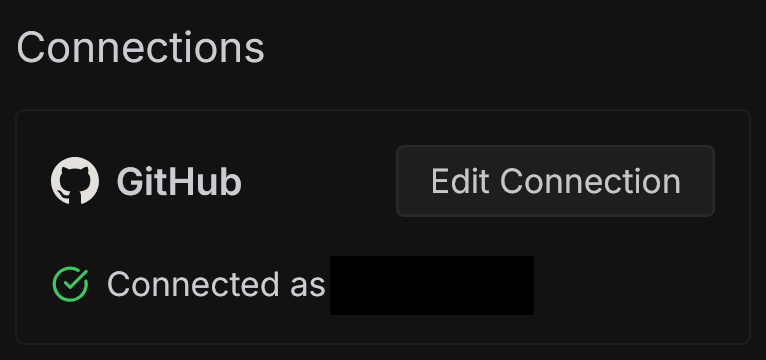
GitHub redirects you back to your Runpod settings, where you should see that your GitHub account is now connected. You can edit the connection settings at any time by selecting Edit Connection.
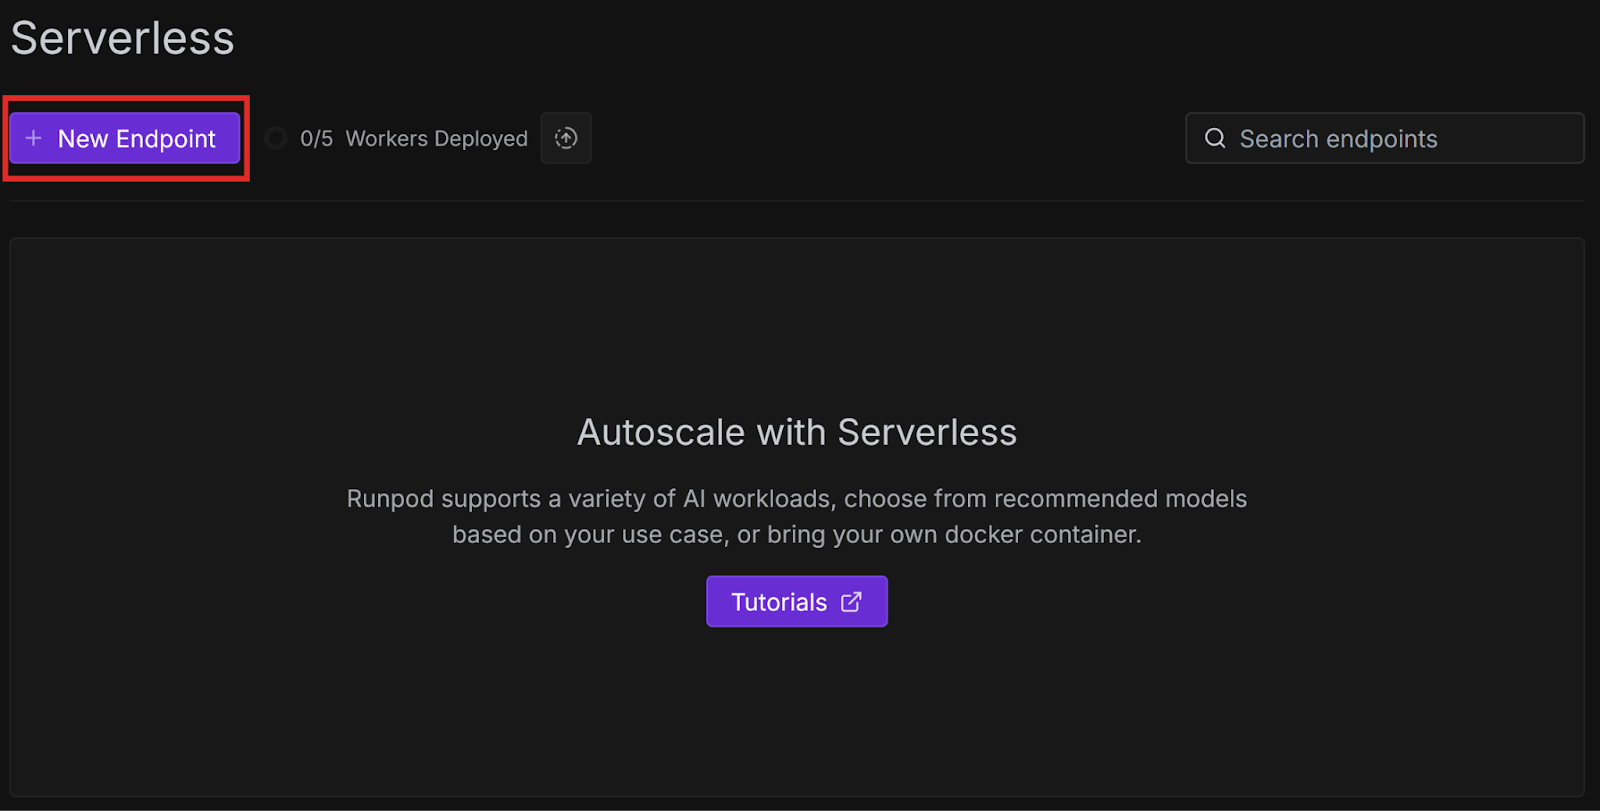
In the left sidebar, under Manage, select Serverless.
Select New Endpoint.
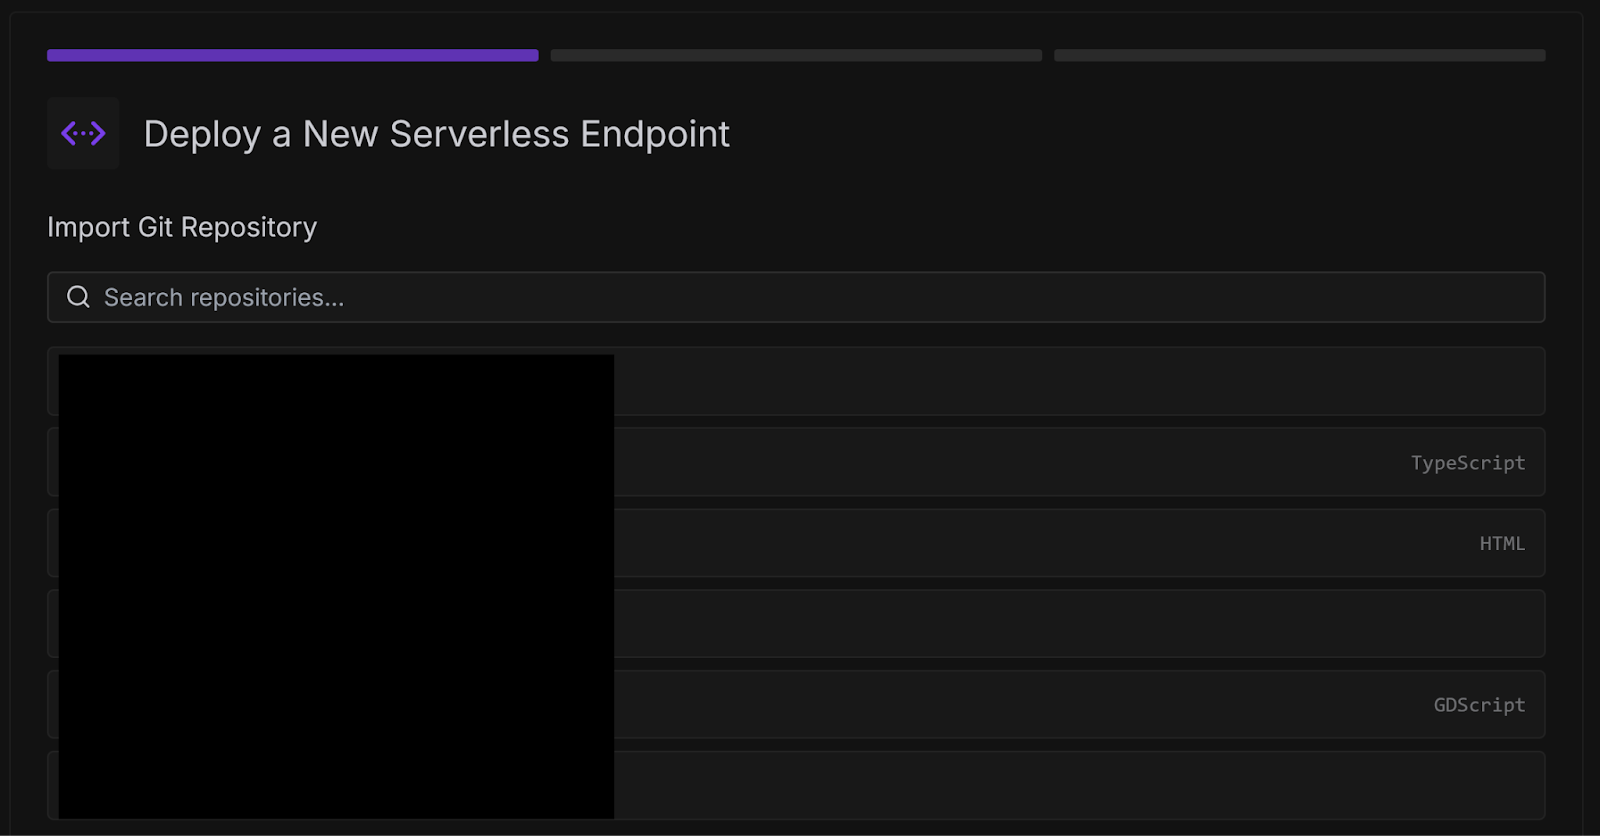
Under Import Git Repository, use the search bar to find the repository that you forked from the worker template and select it.
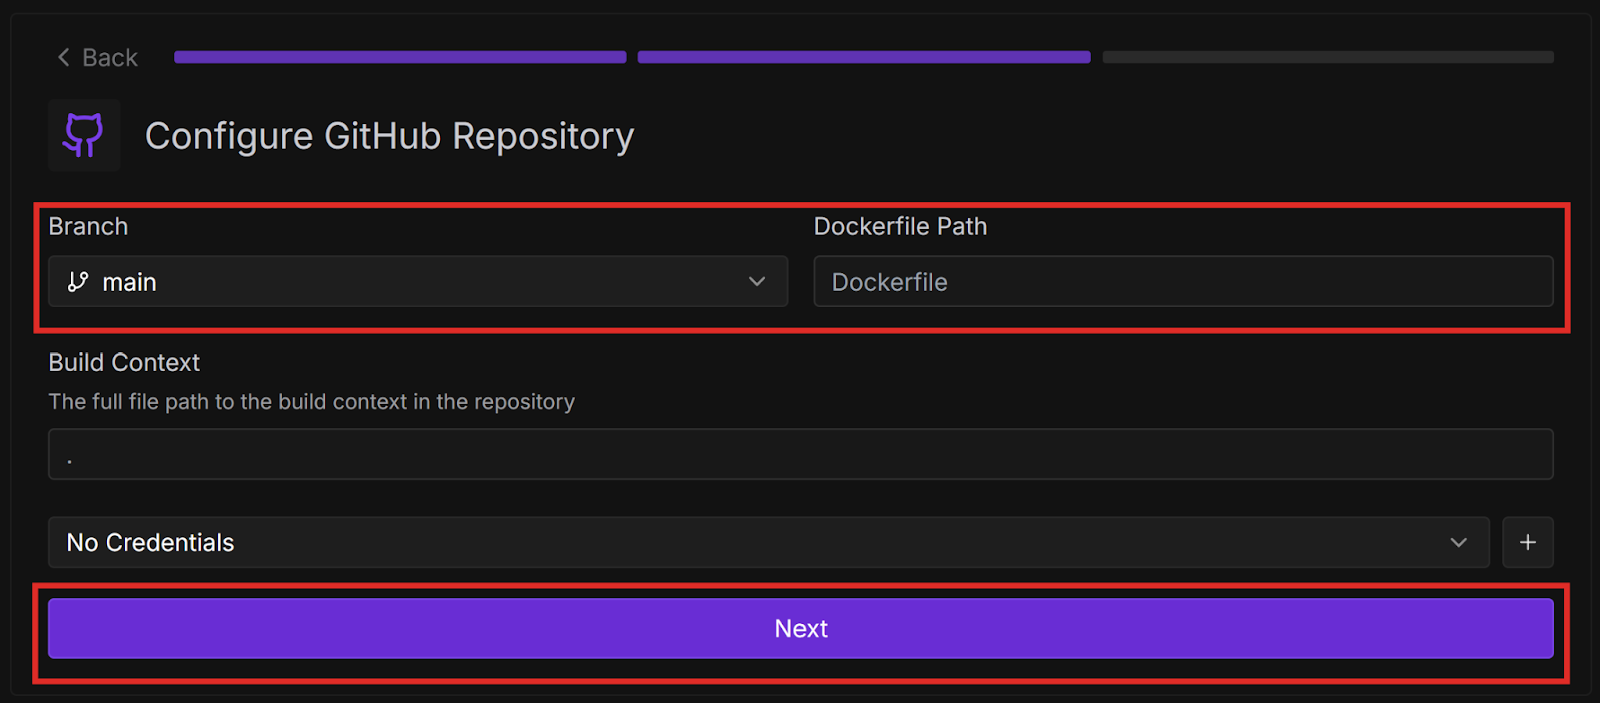
Configure the deployment settings:
Select which Branch to deploy from.
Enter the Dockerfile Path from the root of the repository.
Select Next.
Configure the endpoint settings:
Enter an Endpoint Name.
Select a GPU Configuration. For this example, the 16 GB GPU is sufficient.
Note: Make sure you have credits in your Runpod account.
Select Deploy Endpoint
If Runpod successfully deploys your endpoint, it redirects you to the endpoint’s page. Select the Builds tab to check on the initial build and wait for it to finish. Once it’s finished, wait for Runpod to roll out the workers. When the endpoint is ready, it should look like this:
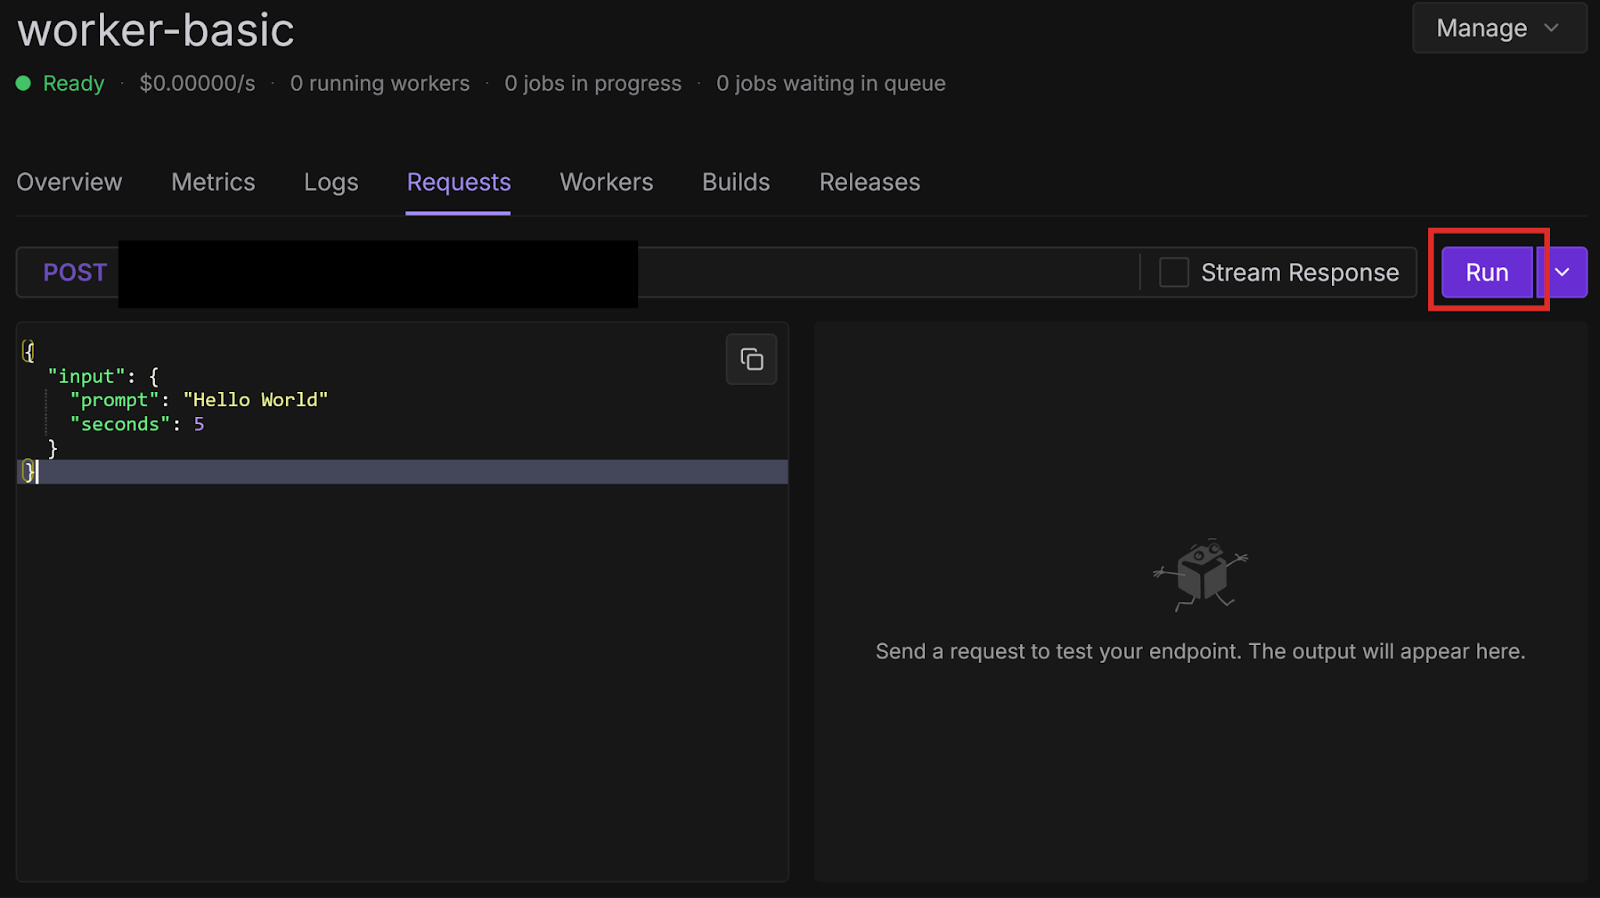
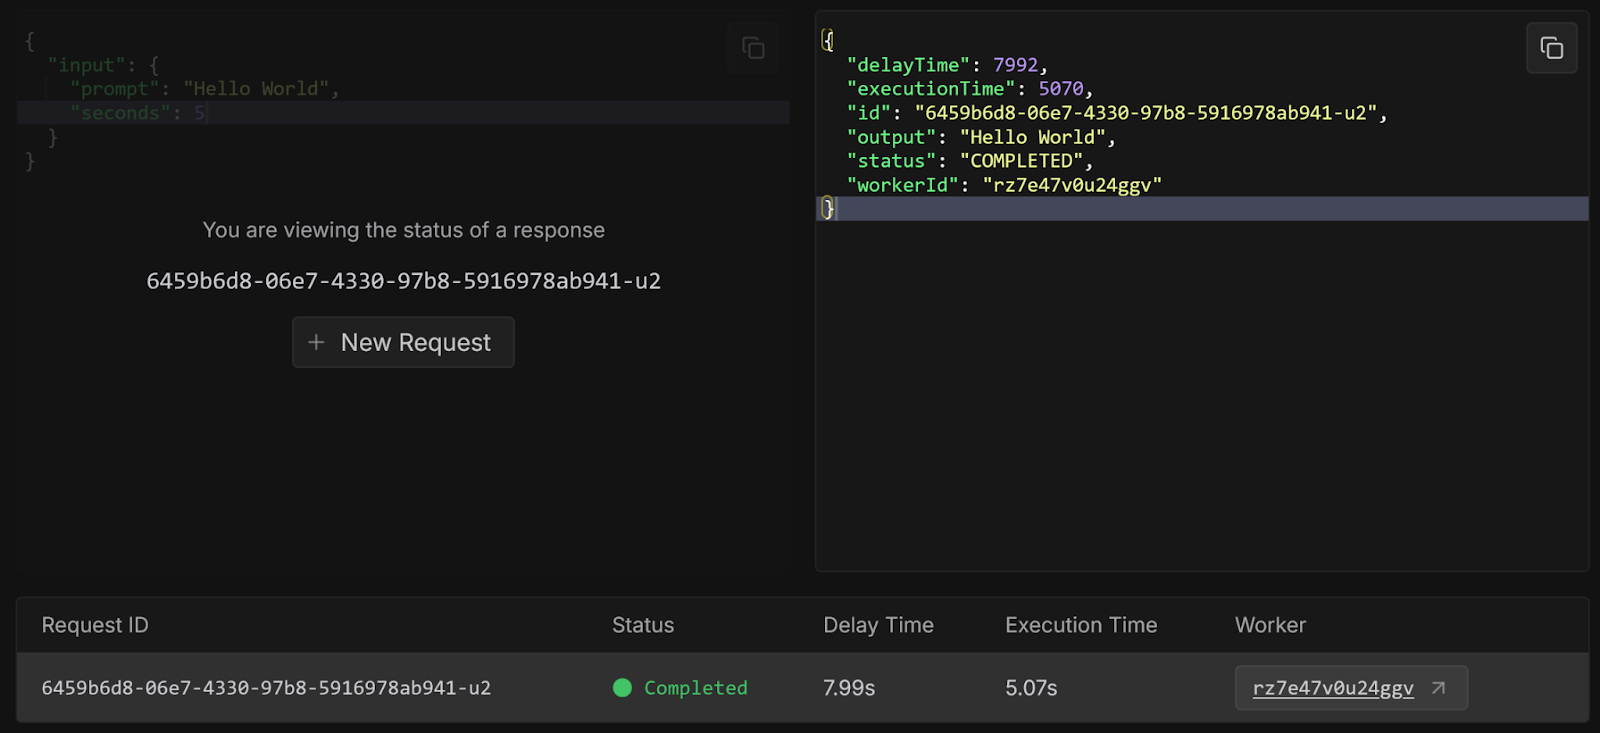
Select the Requests tab. You should see a sample request similar to the following:
Select Run to send the request to the endpoint:
Runpod sends the request to the queue, where it waits for an available worker. When a worker becomes available, it assigns the request to the worker, and the worker executes the handler function using the given input. You can view the status of the request in the console:
Next steps
Congratulations, you have successfully created a worker from a template repository and deployed it from GitHub! These examples were very basic, but there are many other more practical templates available, which we will explore in future blog posts. You can also check them out yourself on GitHub.
Try modifying your handler function to do something more interesting, like having an LLM process a query, or running compute-intensive code. You can also implement GitHub Actions for Continuous Integration/Continuous Deployment to automatically test and deploy every time you push to your repository.
What's new in Runpod Serverless: Faster cold starts, batch inference, and no-Docker deploys
Whether you're already running production endpoints on Runpod or you're sizing us up for the first time, here's a plain-language tour of what Runpod Serverless does today, why it's faster and cheaper than it was six months ago, and how to deploy your first endpoint in minutes.
Beyond the Notebook: The Engineering Realities of Production AI Agents
Shift from stateless inference to stateful architectures to resolve infrastructure bottlenecks like memory management, concurrency limits, and runaway jobs in production AI agents.


.jpeg)