This tutorial guides users through setting up a true SSH daemon on Runpod, enabling functionalities like SCP and IDE connections. It covers selecting a.
Runpod allows you to get a terminal access pretty easily, but it does not run a true SSH daemon by default. There are plenty of use cases, like needing to SCP or connecting an IDE that would warrant running a true SSH daemon inside the pod. We'll go through the easiest ways to accomplish this in this article. We'll go through the following steps to get up and running...
Edit: All of this is now automated through our custom tensorflow, pytorch, and "Runpod stack" images (github). You can still follow this tutorial to get started in any custom image you want to use, though!
We'll go through the following steps to get up and running:
How to select a compatible pod
How to configure the pod to install and configure OpenSSH automatically
How to get the correct connection command to SSH into your pod
Finding a Compatible Instance
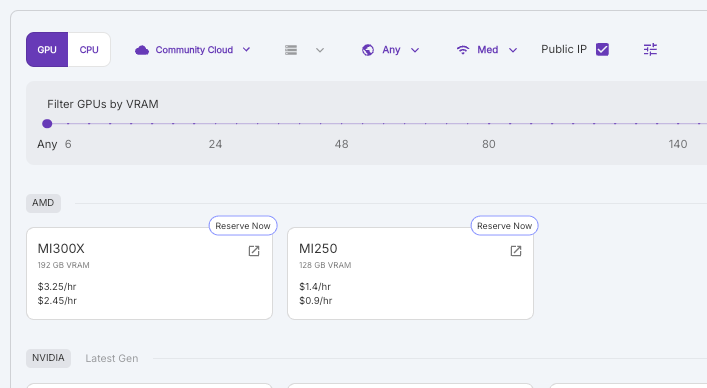
All secure cloud pods are TCP enabled by default, so the easiest way to get a compatible pod is to deploy a Secure Cloud instance. If you'd rather browse or use the Community Cloud, you can select "Pods" from the left side menu and then click Deploy to get to the deployment options.
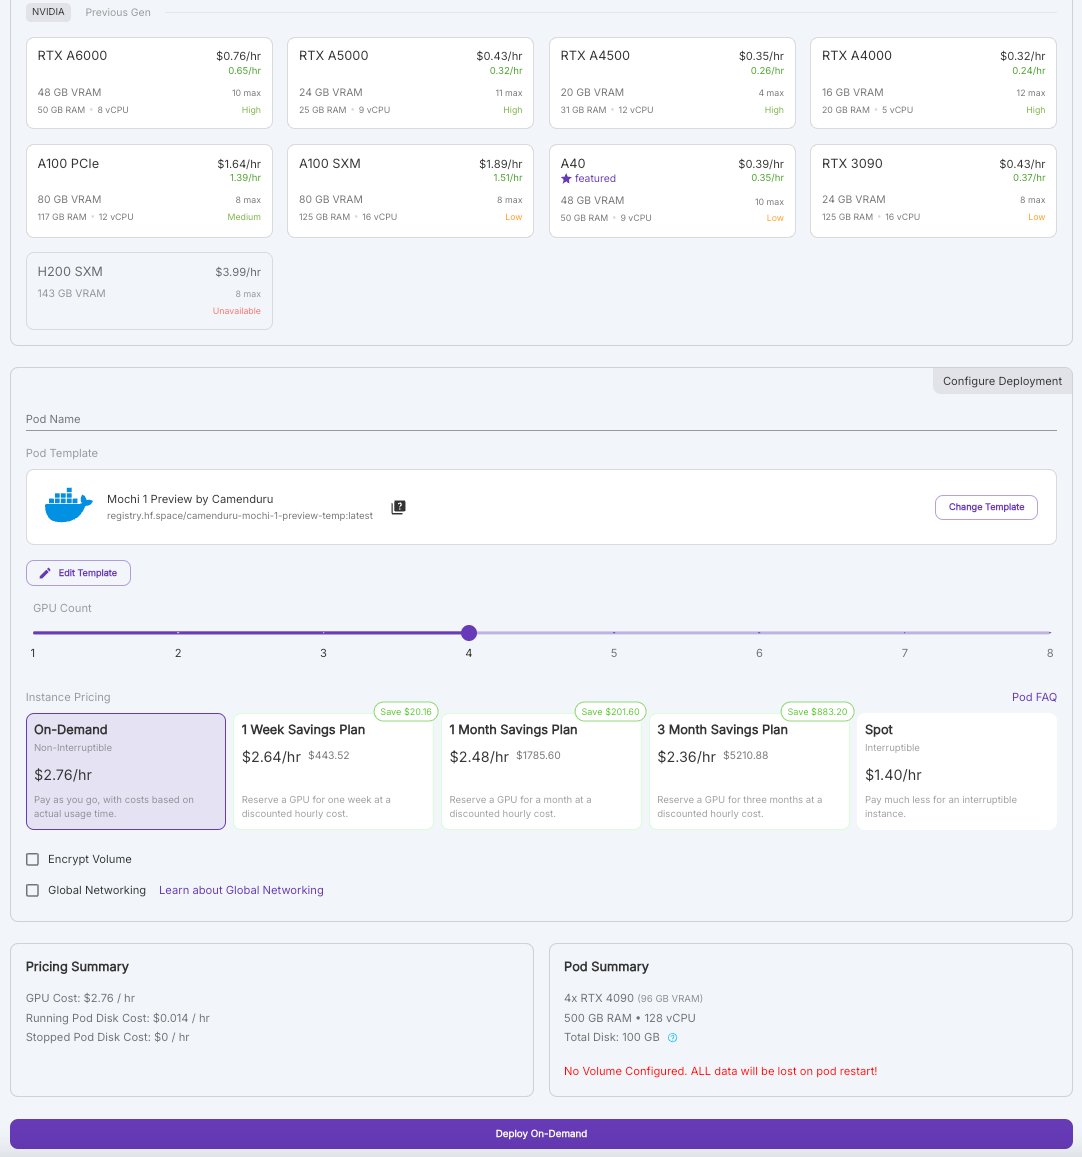
First choose your GPU spec, then how many units would like, and your pricing requirement, and then click Deploy On Demand.
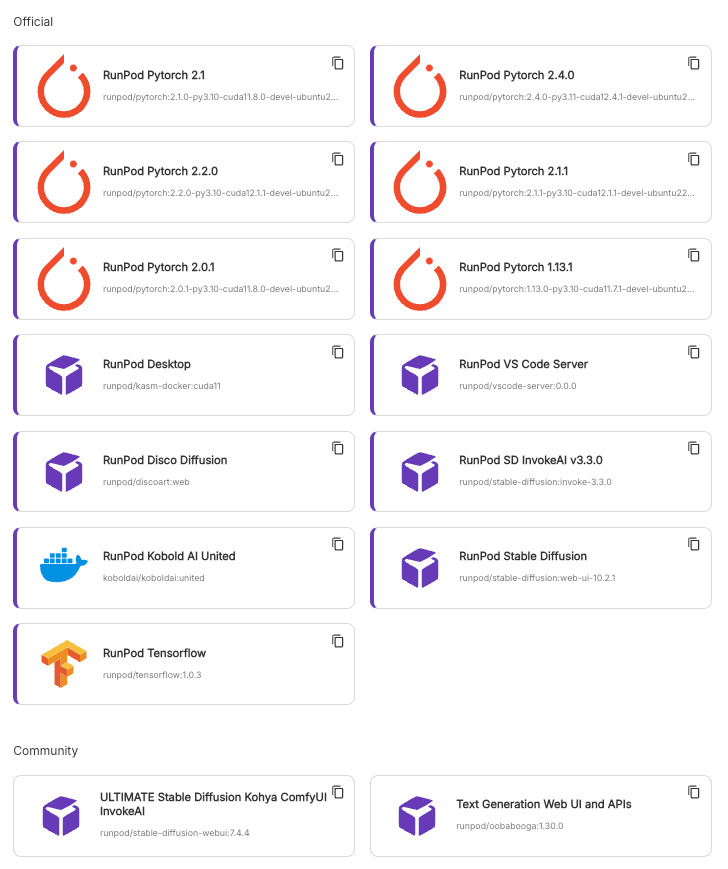
At this point, you can also select any Runpod template that you have configured, along with any templates that our community have created.
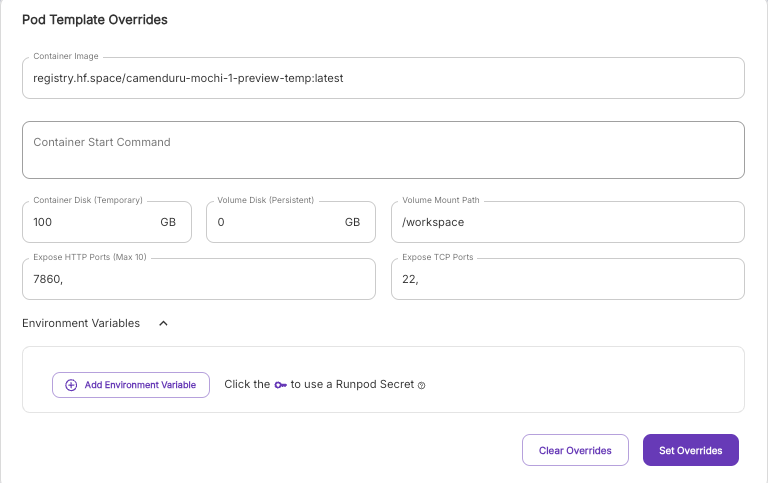
Once you've selected your template, click on the "Edit Template " button. You should see a menu like this pop up:
Most of the setup takes place in this menu. In this example, we're using the stock Ubuntu image. The major things to check off are:
Expose TCP port 22
Copy/Paste the below in the "Container Start Command" field
Make sure that you replace YOUR_PUBLIC_KEY with... your public key
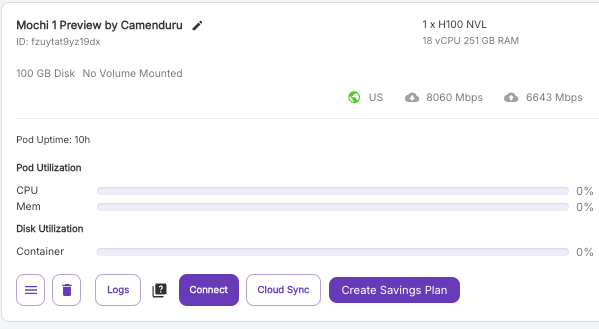
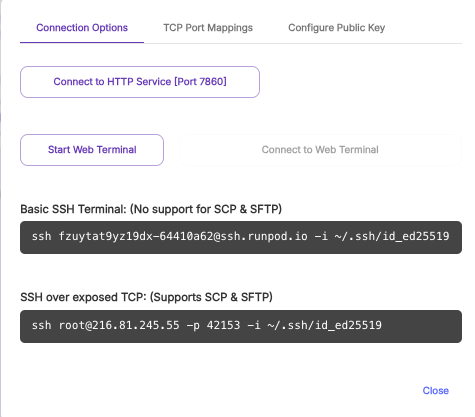
Fill out the rest of the fields however you desire. Hit OK, Continue, then choose whether you would like a spot instance or an on-demand instance and deploy. Your pod will begin initializing. This is very fast for images that are used often, but may take some time if you are using an image that has not been run yet on the machine. Normally, this will take 20 seconds to 5 minutes. If you are concerned that something may not be working correctly, you can inspect the log output to debug whether it's a configuration issue. Once your pod is initialized, you should see the "Connect" button enabled.Click on this button, and it will bring up a menu of connection options. The one we are most interested in is at the bottom.
Clicking on the field will automatically copy it to your clipboard. You may have to edit this command if you saved your private key somewhere else. You should now be able to run this command in a terminal window and get a real SSH tunnel!
What's new in Runpod Serverless: Faster cold starts, batch inference, and no-Docker deploys
Whether you're already running production endpoints on Runpod or you're sizing us up for the first time, here's a plain-language tour of what Runpod Serverless does today, why it's faster and cheaper than it was six months ago, and how to deploy your first endpoint in minutes.
Beyond the Notebook: The Engineering Realities of Production AI Agents
Shift from stateless inference to stateful architectures to resolve infrastructure bottlenecks like memory management, concurrency limits, and runaway jobs in production AI agents.


.jpeg)