.jpeg)
Deploy When Available is now GA
Queue for any GPU spec, even one that's fully rented out, and we'll deploy it the moment capacity opens up. No more refreshing the console or running a sniping tool.
All
Blog
This tutorial walks you through using the Kohya_ss template on Runpod for desktop CUDA-based tasks, including installation, model compatibility, and.


Introduction:
In this post, we will discuss the process of utilizing the Kohya_ss template with Runpod. The Kohya_ss template is designed for desktop CUDA and supports applications like Kohya_ss. We will provide a step-by-step guide to help you get started. It is recommended to use the NVIDIA 3090/4090 GPU for optimal performance with this template.
The template can be accessed via this link: Template
Step 1: Start a Runpod Pod with TCP Connection Support
To begin, start a Pod that supports TCP connection. This is crucial for ensuring seamless communication to the desktop environment.
Step 2: Access the Desktop Environment
Once the Pod is up and running, copy the public IP address and external port from the connect page.
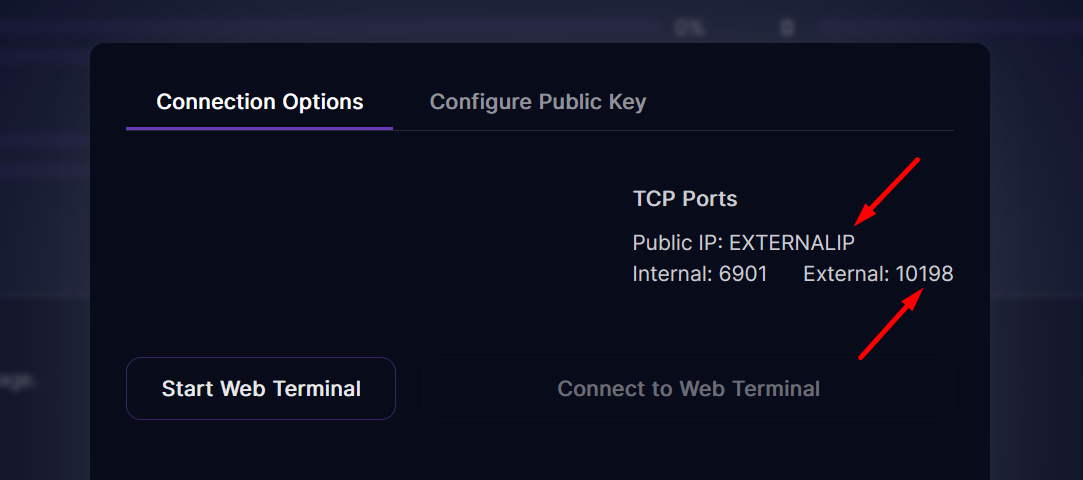
In a new browser tab, enter the following URL:
https://EXTERNALIP:EXTERNALPORT
Note: Your browser may warn you about an insecure connection. This is expected, and you can safely ignore it.

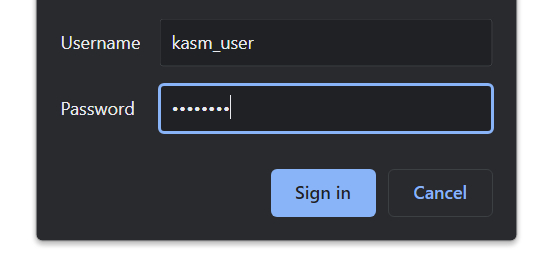
Step 3: Log in to the Desktop Environment
Use the following credentials to log in:
Username: kasm_user
Password: password
Step 4: Install Kohya_ss
To install Kohya_ss, follow these steps:
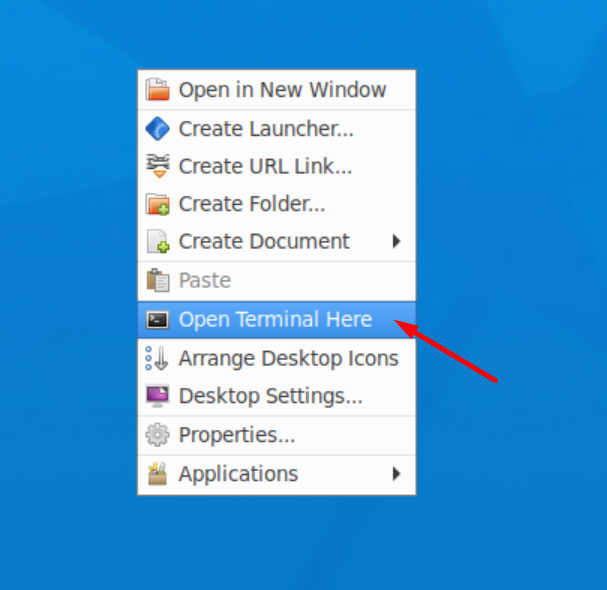
Right-click on the desktop and open a terminal window.
Enter the following commands one by one:
wget https://github.com/kodxana/SCforRunpod/raw/main/kohya_ss-installer.sh
chmod +x kohya_ss-installer.sh
./kohya_ss-installer.sh
These commands will download the Kohya_ss repository, install the necessary packages, and create a run script on the desktop.
Note: This might take some time depending on internet connection. If there are some errors let Madiator2011 know on our Discord.

Step 5: Launch Kohya_ss
After the installation is complete, you can run the Kohya_ss user interface with the following command:
./kohya_launcher.sh
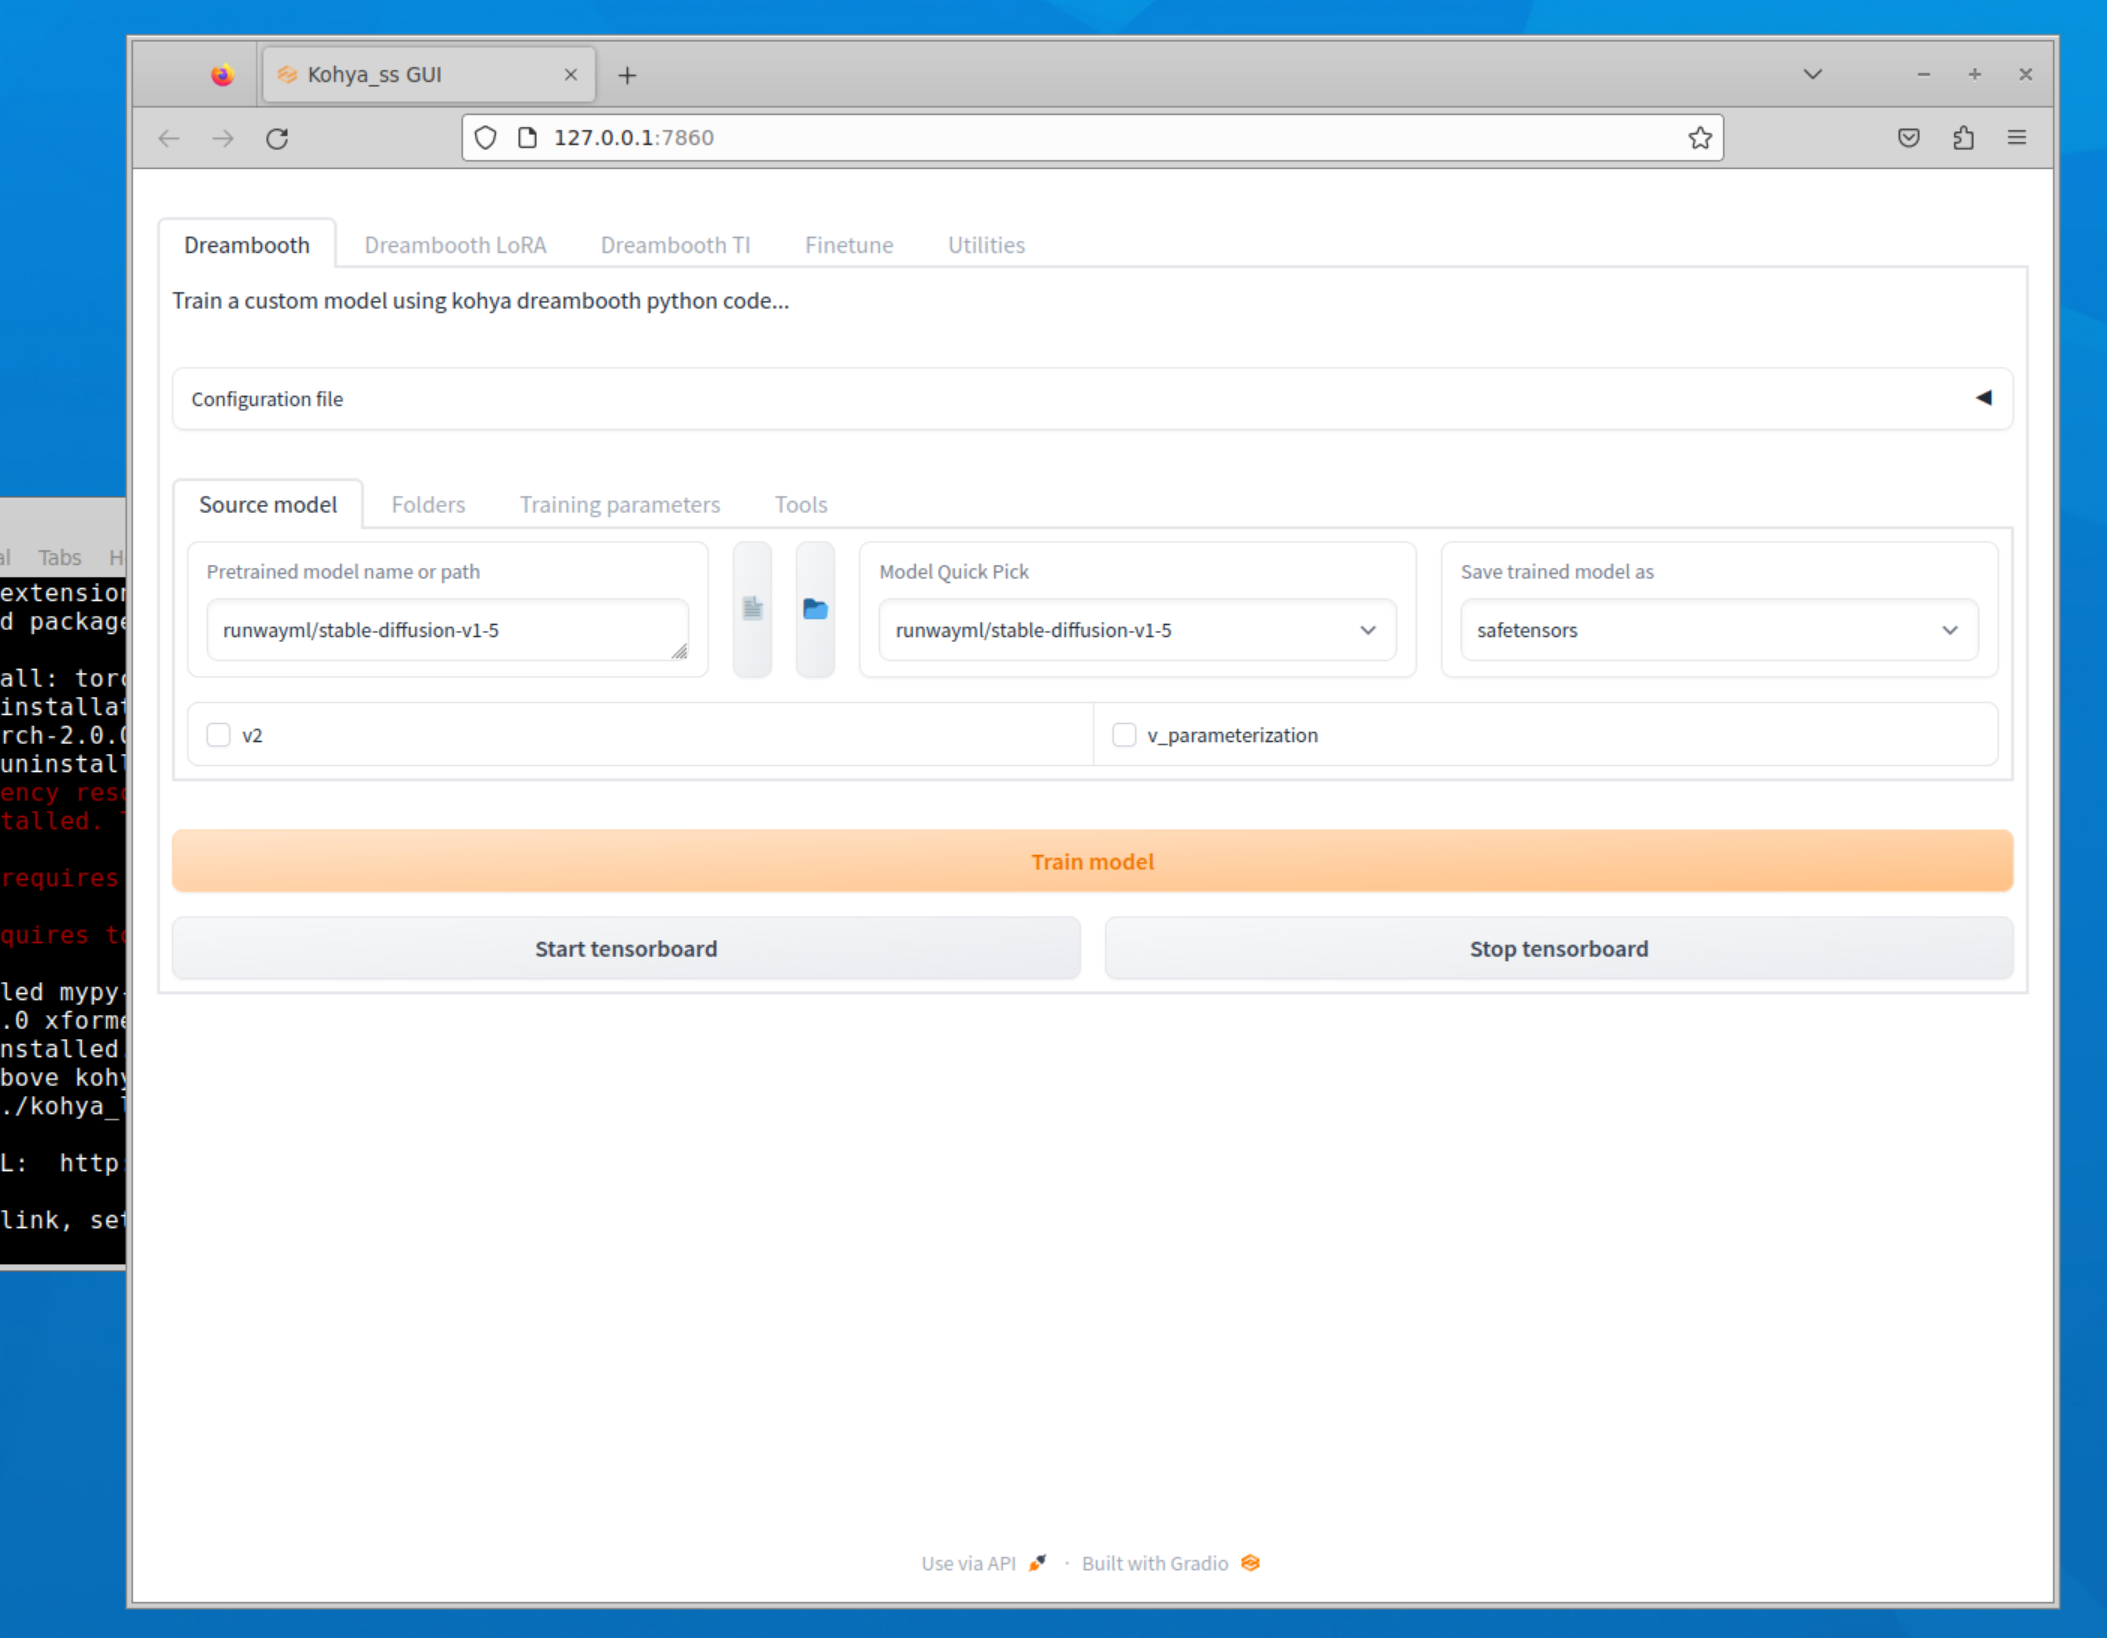
The command will generate a link that you can open in browser inside Kasm to access the Kohya_ss application.
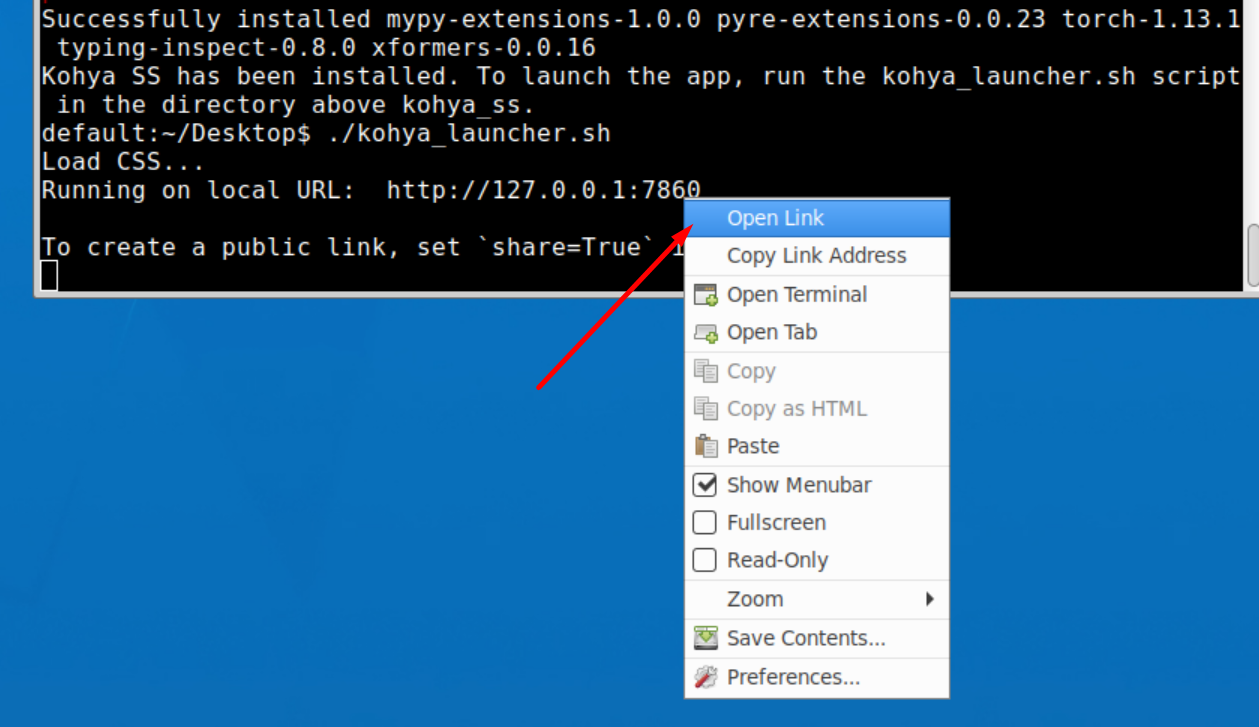
Congratulation you have installed Kohya_ss GUI :)
Conclusion:
In this guide, we have provided a detailed walkthrough on setup of the Kohya_ss template. By following these steps, you can easily set up and run the Kohya_ss application in a Runpod environment. This powerful combination allows you to harness the power of desktop CUDA and enjoy a seamless experience with the Kohya_ss application.
Hopefully, this blog post has given you a better understanding of how to use the Kohya_ss template. If you have any questions or need help, don't hesitate to send message on Runpod's Discord or other communities for support.
Author profile: Madiator2011
Blog Posts
Queue for any GPU spec, even one that's fully rented out, and we'll deploy it the moment capacity opens up. No more refreshing the console or running a sniping tool.

Explore why faster chips have shifted the bottleneck to AI infrastructure, and what that means for teams running production workloads.
.jpeg)
With MIG, we can partition RTX 6000 Pro cards into isolated 24 GB instances. Here's when it makes sense for your workloads.
