.jpeg)
Deploy When Available is now GA
Queue for any GPU spec, even one that's fully rented out, and we'll deploy it the moment capacity opens up. No more refreshing the console or running a sniping tool.
All
Blog
Learn how to deploy any Hugging Face Space on Runpod using Docker, including an example with Kokoro TTS and Gradio.

Hugging Face Spaces are interactive demos that showcase AI models directly on the Hugging Face platform. They're great for experimenting with AI capabilities, but what if you want more computing power or need to run these models in your own environment? Or you want to use them as much as you want to without being rate limited?
Good news! Every Hugging Face Space can now be run using Docker, which means you can deploy them on platforms like Runpod to leverage powerful GPUs. In this guide, we'll walk through deploying Kokoro TTS (a Text-to-Speech model) via Gradio from Hugging Face to Runpod.
Gradio is a popular Python library that creates user-friendly interfaces for machine learning models. Many Hugging Face Spaces, including Kokoro TTS, use Gradio to provide an interactive web interface where you can test the model's capabilities through your browser. By the end of this tutorial, you'll have this same interface running on your Runpod instance.
We've chosen Kokoro TTS for this example because it's a powerful text-to-speech model that benefits from GPU acceleration. This makes it a perfect candidate to demonstrate how to move from Hugging Face Spaces to Runpod's more flexible, accessible computing environment.
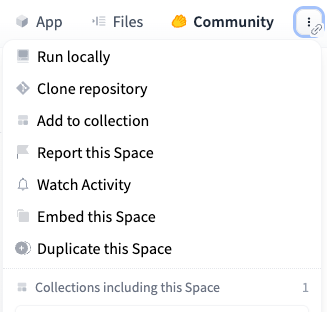
First, go to the Kokoro TTS Space on Hugging Face. In the upper right you'll see a pullout menu with three dots. Click Run Locally to get more info about the Docker image that drives the Space.
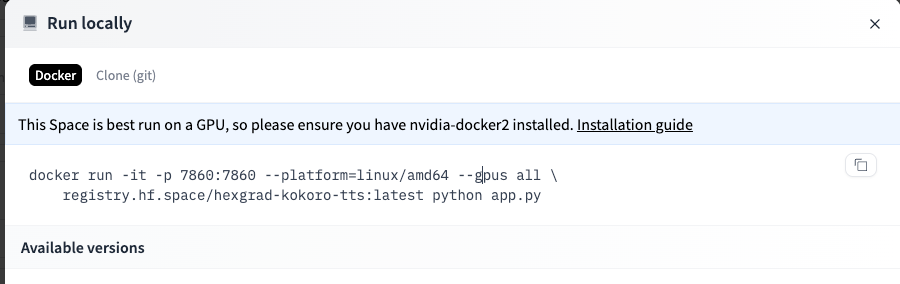
Copy this Docker command down, as it contains variables that we will need later.
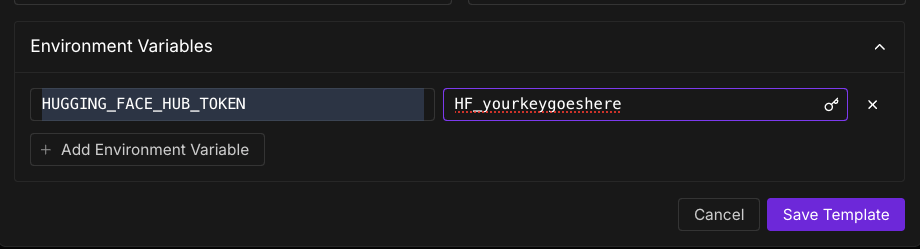
In addition, you will need an access token, which you can get from your Settings page.
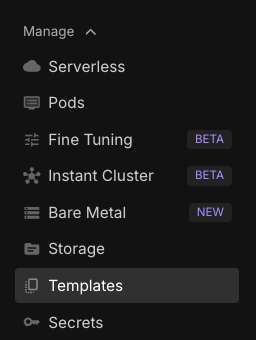
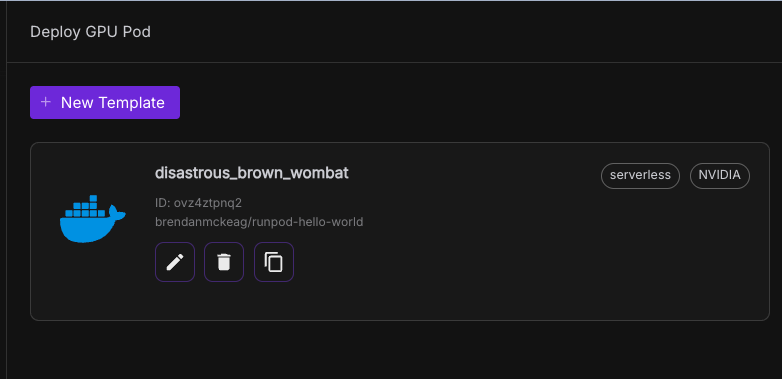
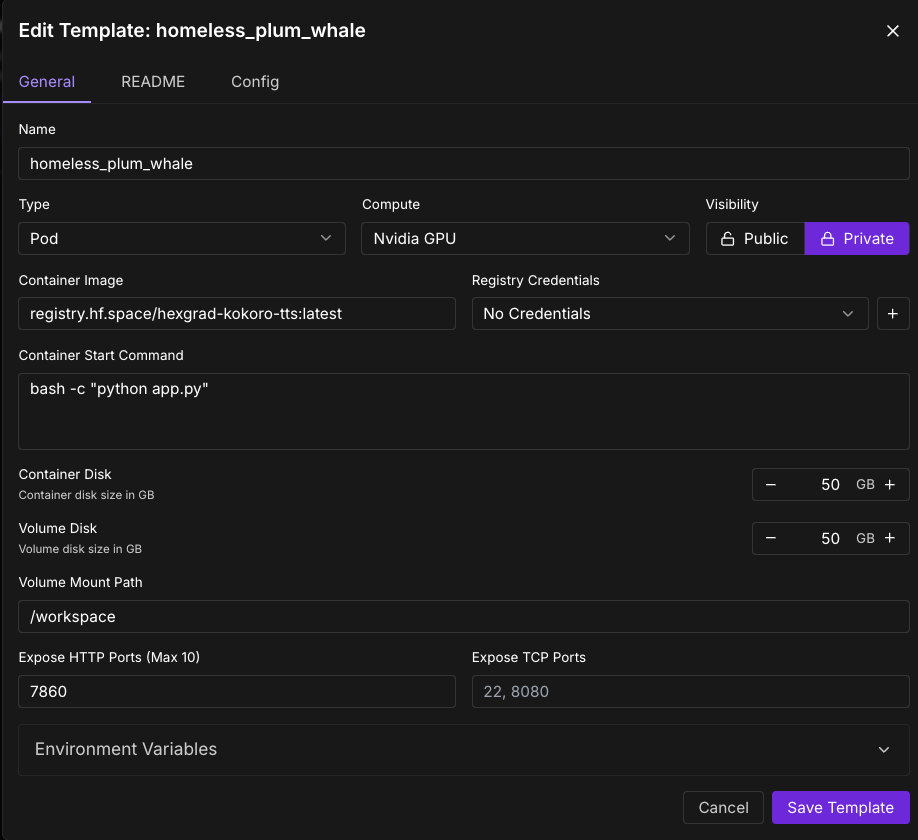
Now, go to Templates in the nav bar on Runpod, and click New Template.

Review the logs in your deployed pods under the Pods screen, and wait for a notification to appear that the image is up and running on port 7860.
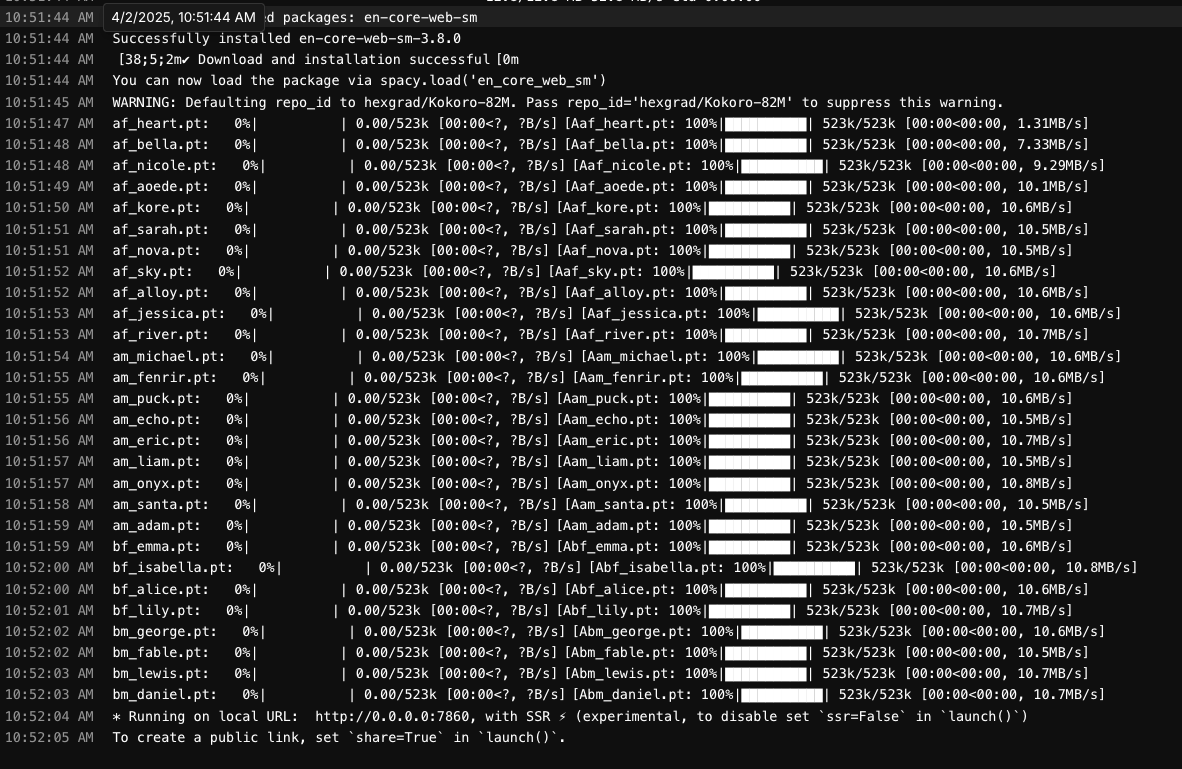
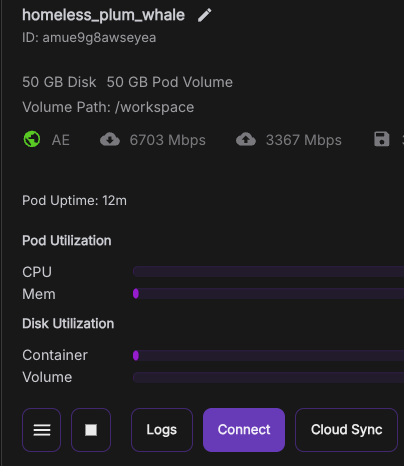

And ta-da!, you should see your deployment within Runpod!
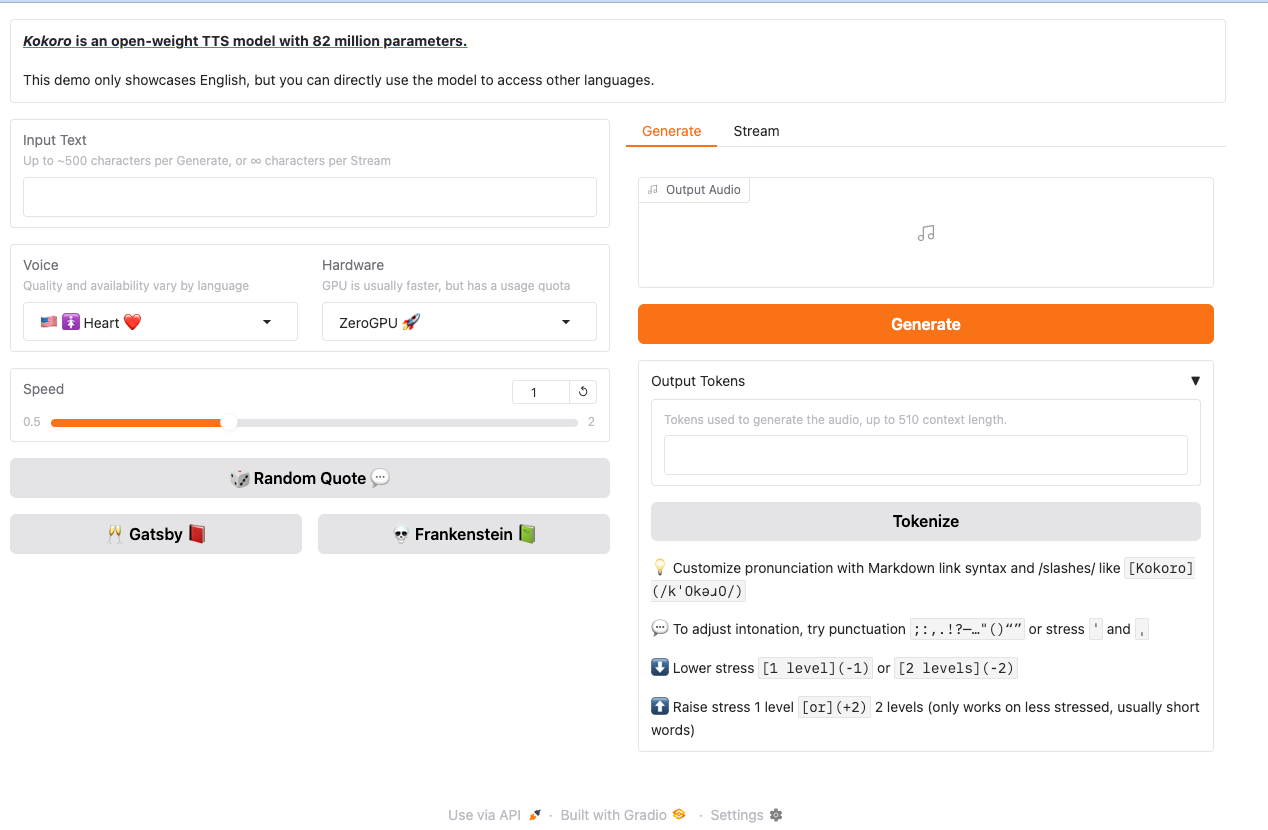
You've successfully deployed a Hugging Face Space on Runpod! This approach works for virtually any Hugging Face Space - just repeat these steps with the appropriate Docker image and port. Runpod gives you the flexibility to choose more powerful hardware when needed, allowing you to run more demanding models than what's possible directly on Hugging Face.
Author profile: River Snow
Blog Posts
Queue for any GPU spec, even one that's fully rented out, and we'll deploy it the moment capacity opens up. No more refreshing the console or running a sniping tool.

Explore why faster chips have shifted the bottleneck to AI infrastructure, and what that means for teams running production workloads.
.jpeg)
With MIG, we can partition RTX 6000 Pro cards into isolated 24 GB instances. Here's when it makes sense for your workloads.
