.jpeg)
Deploy When Available is now GA
Queue for any GPU spec, even one that's fully rented out, and we'll deploy it the moment capacity opens up. No more refreshing the console or running a sniping tool.
All
Blog
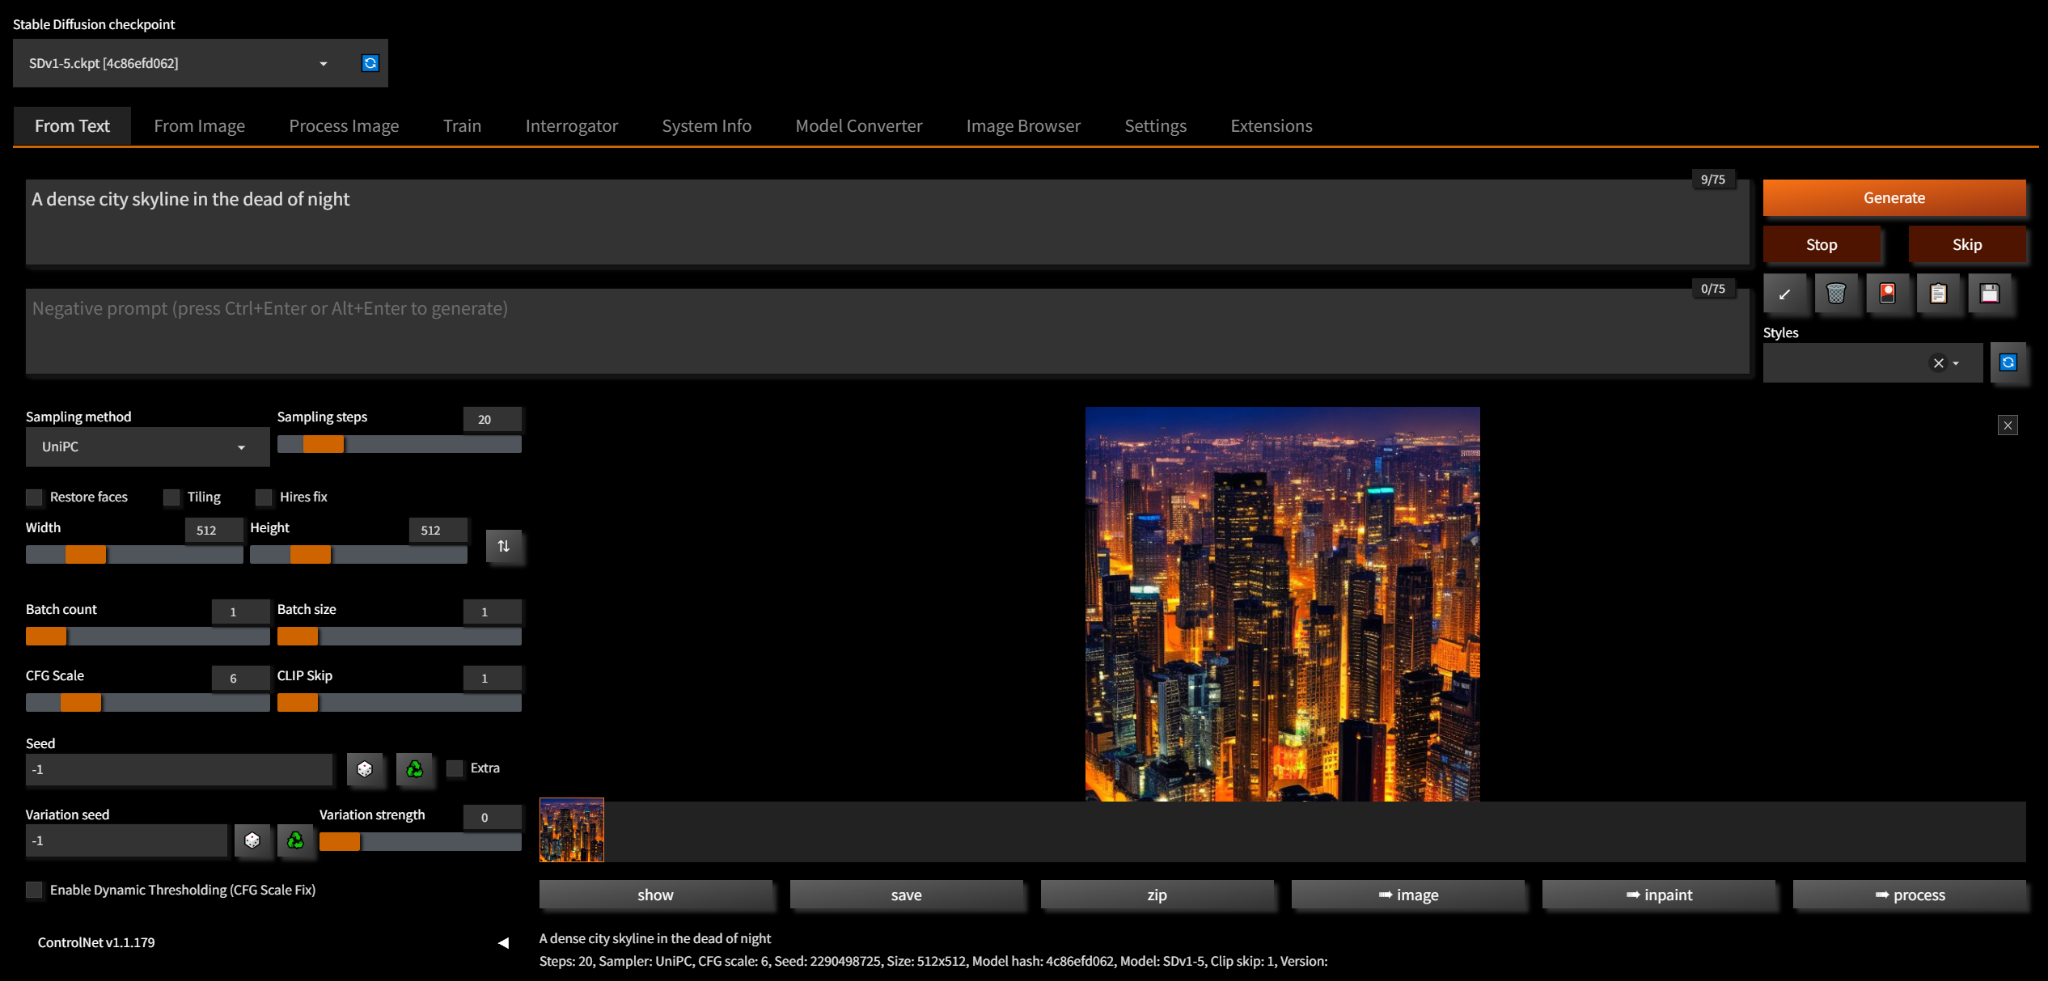
Want a custom spin on Stable Diffusion? This post shows you how to create and launch your own Vlad Diffusion template inside Runpod.


The default Pod templates and models are pretty cool (if we say so ourselves), but play with them for too long and you'll start to get used to them. If you're looking for something new and exciting again, it might be time to create a new custom template. Here, I'll show you how I made a custom template for Vlad Diffusion in Runpod.
Pod templates are simply Docker containers. We've previously written this article on some of the basics of Docker; if you're unfamiliar with Docker, it might be worth checking out! I'll still explain as I go, though. Let's get to it!
Vlad Diffusion is a fork of the Automatic1111 Stable Diffusion webUI GitHub repository; as such, their installation processes were similar enough to use Runpod's existing Stable Diffusion Dockerfiles as starting points for the Vlad Diffusion ones. These Dockerfiles are available in this repository if you'd like to follow along.
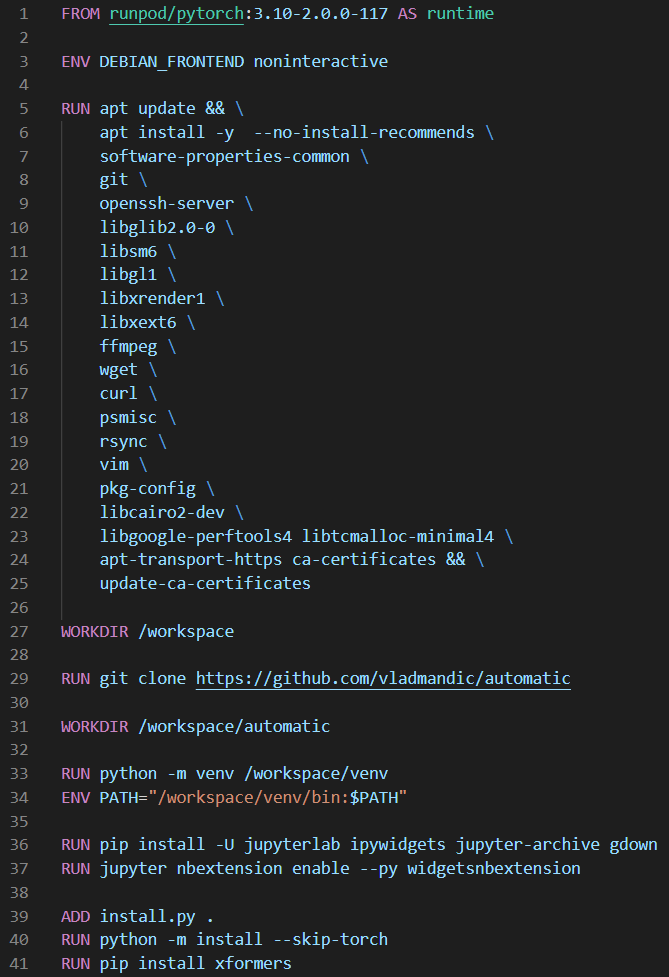
The Vlad install Docker image is responsible for managing the dependency installs. Here's it broken down:
FROM instruction) specifies the previous image to continue building from; in my case, I started with the Runpod PyTorch template (which already has an operating system, PyTorch, and a few other useful things).ENV DEBIAN_FRONTEND noninteractive instruction sets the DEBIAN_FRONTEND environment variable (which is specific to Debian-based Linux distros) to noninteractive, which prevents user input requirements when performing package installs (which is useful for the next instruction!).RUN instructions execute a shell command/script. I've used these to install some general dependencies, clone the Vlad Diffusion GitHub repo, set up a Python virtual environment, and install JupyterLab; these instructions remain mostly the same as those in the Runpod Stable Diffusion container Dockerfile.WORKDIR instructions simply change the context directory of the RUN (and ADD) instructions that follow it.ADD instruction copies this file into the image context so I could use it in the RUN instruction which follows. Your install.py will be different if you're building an image for something other than Vlad Diffusion; I had to dig into Vlad Diffusion's code structure to figure out which functions are used for the installation process. Here's what my install.py looks like: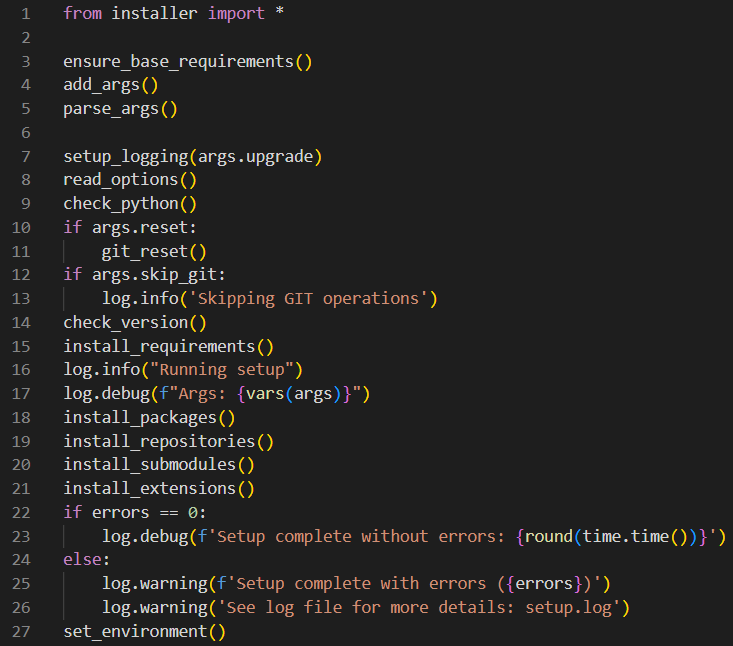
You can build this image and push it to Docker Hub (essentially, a GitHub for Docker images) using the Docker CLI:
docker login command, build the image with docker build -t user/repo:tag path/to/directory/containing/Dockerfile. The -t flag lets you tag your image under a Docker Hub repository. Make sure your Dockerfile is named Dockerfile with no file extension, too.docker push user/repo:tag (the same user/repo:tag as before).docker images.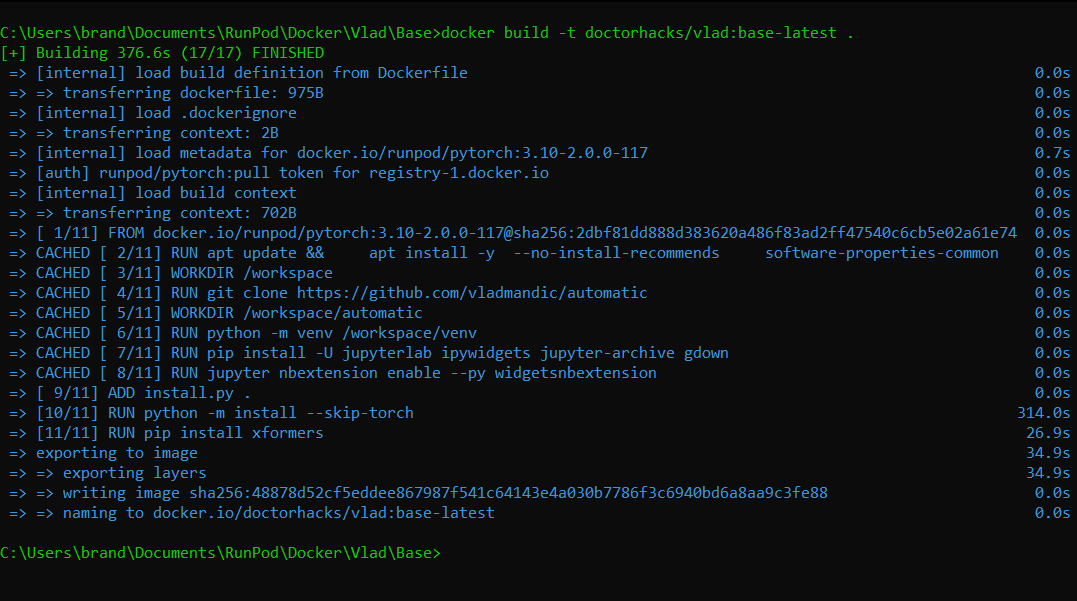
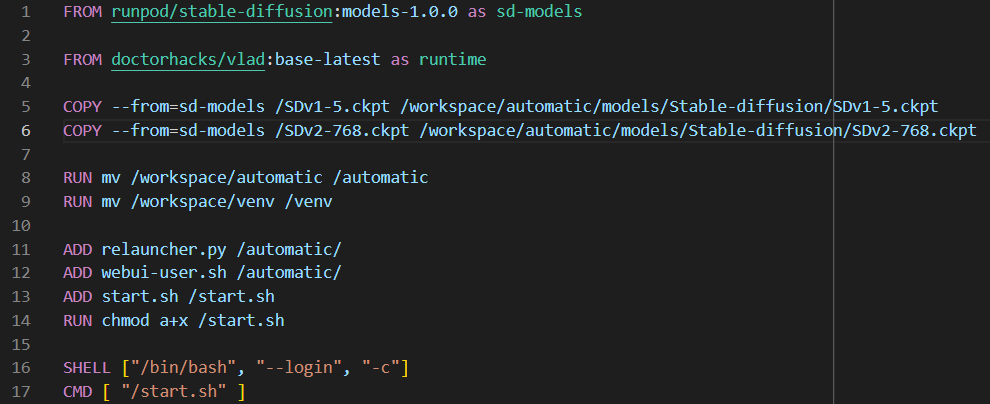
This image made from this Dockerfile is the one we'll give to a Pod later for it to work with. It includes a few files which allow the UI to launch when the Pod spins up. It builds off the install image (and the Dockerfile is, overall, also pretty similar to the analogous Runpod Stable Diffusion container Dockerfile):
COPY instructions copy over the diffusion models from the sd-models container into the directory that Vlad Diffusion expects to find them; the "automatic" directory is Vlad Diffusion's equivalent of Automatic1111's "stable-diffusion-webui" directory.ADD instructions copy over these three files (once again, each very similar to the Runpod Stable Diffusion container equivalents; I was able to get away with making only a couple of changes to each regarding file paths and command-line arguments):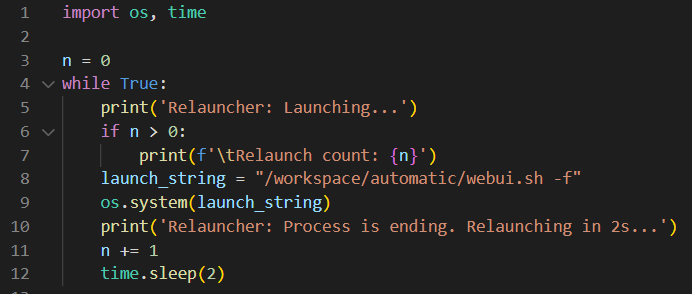
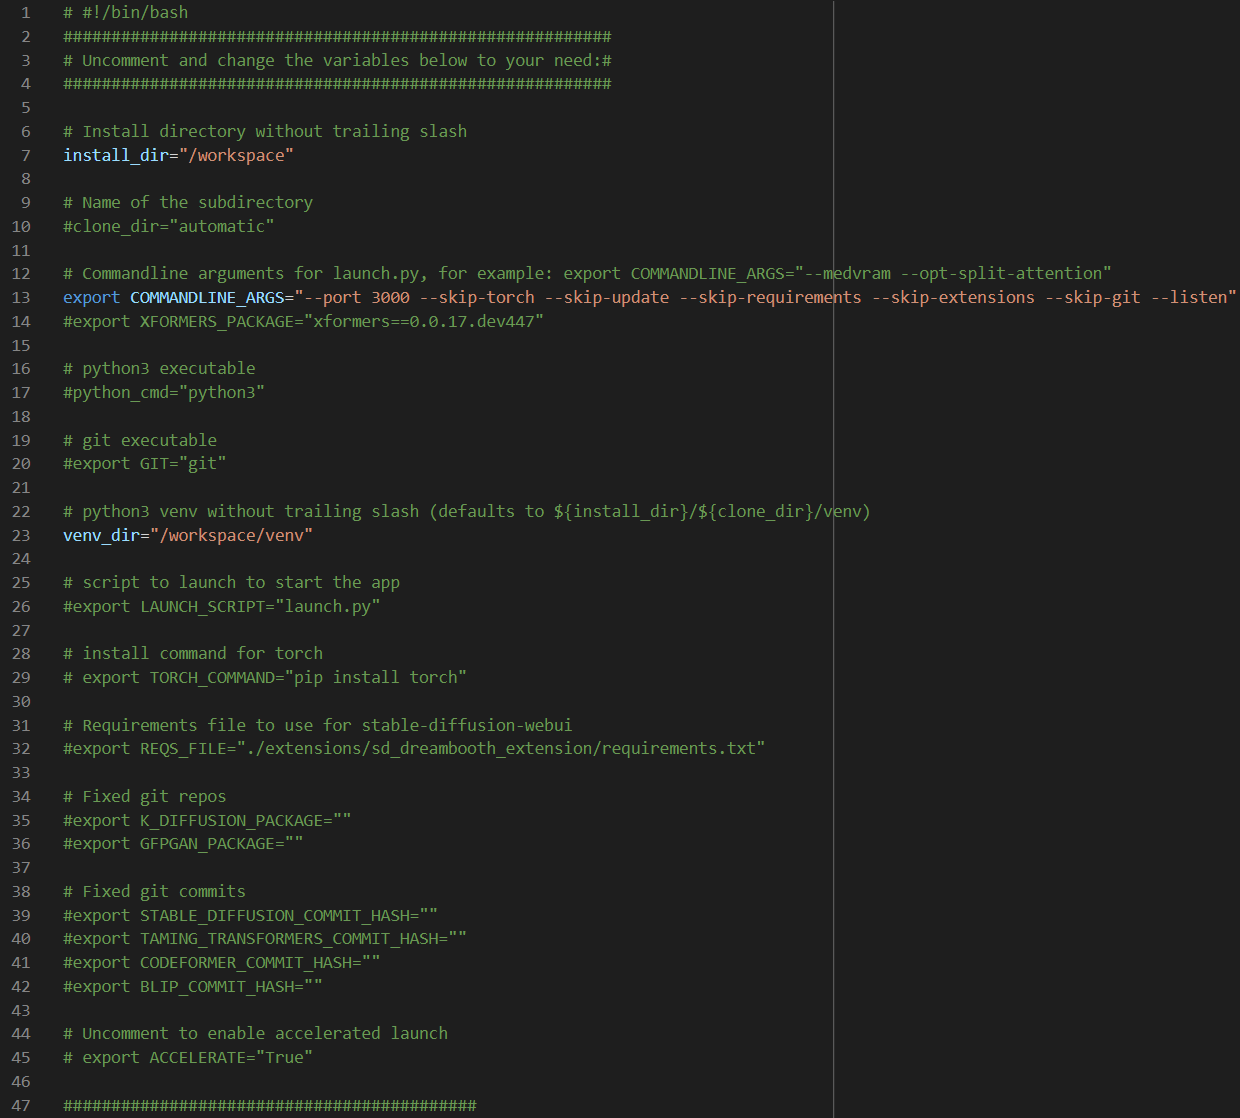
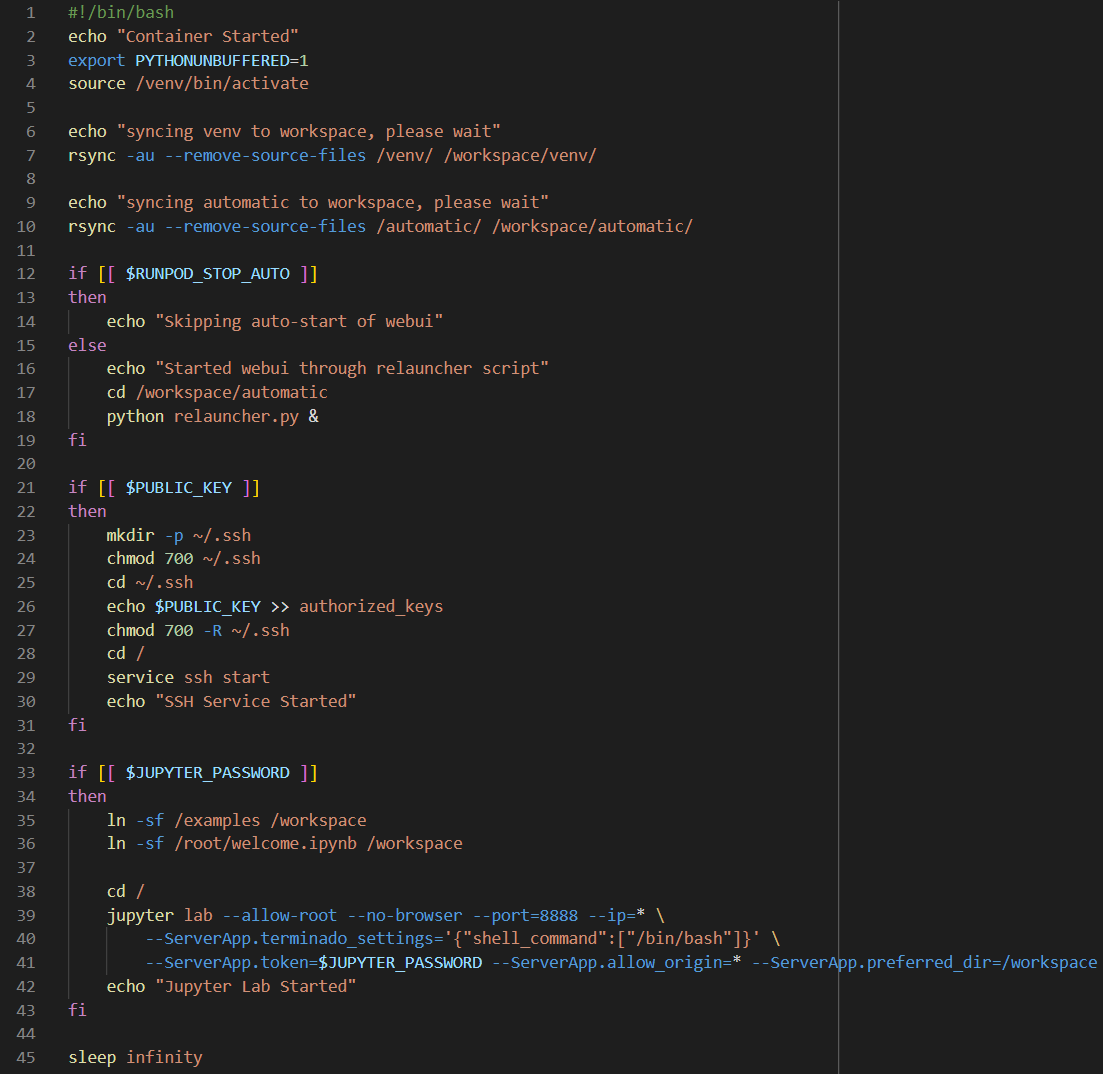
SHELL instruction simply sets Bash to be the default shell for running future commands.CMD instruction in a Dockerfile contains a command to run when the container is instantiated. In this case, when a container from this built Dockerfile is instantiated (i.e., when a Pod with this container spins up), start.sh will execute. start.sh starts running JupyterLab on port 8888 and runs relauncher.py; relauncher.py runs webui.sh, which collects arguments from webui-user.sh and starts the Vlad Diffusion webUI!Build, tag, and push this image the same way as the install image with docker build and docker push.
Before we go back to our Pods, it's worth noting that there's a lot of optimizations to be made on these Dockerfiles to reduce the final image size. This resulting image is about 43GB, but I've been able to get the template down to ~20Gb by taking advantage of layer caching and multi-stage building (and it can probably get a lot smaller than that, too).
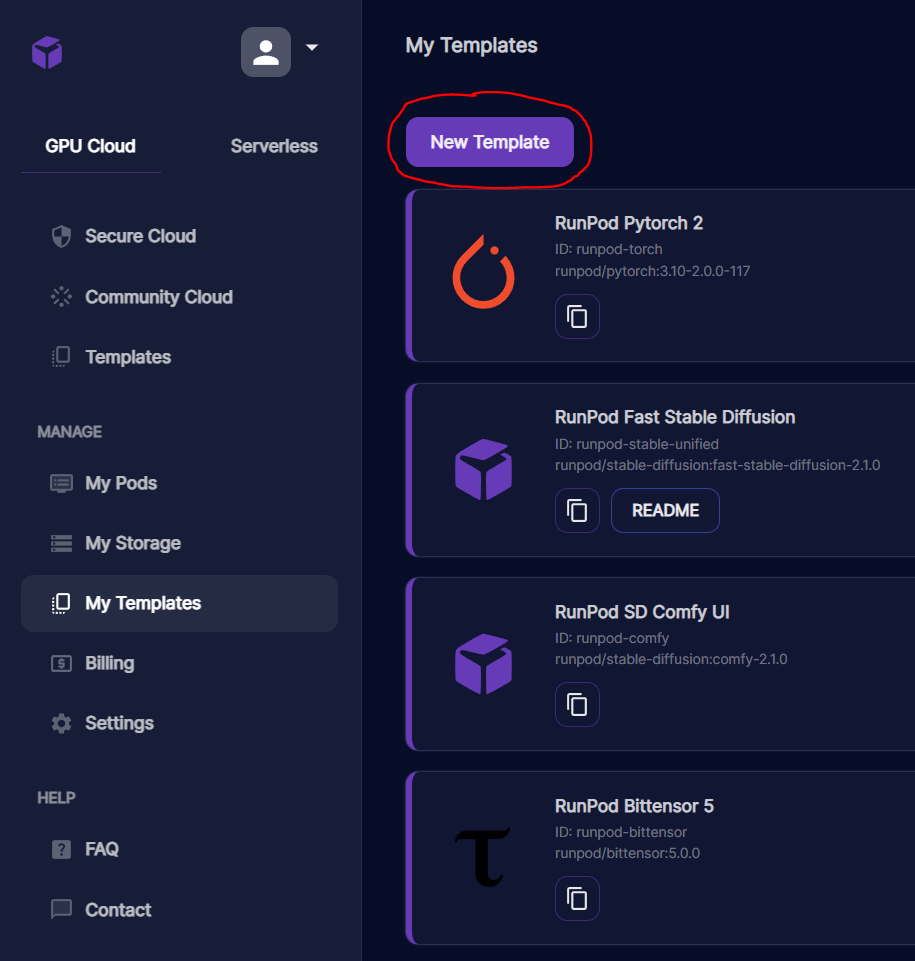
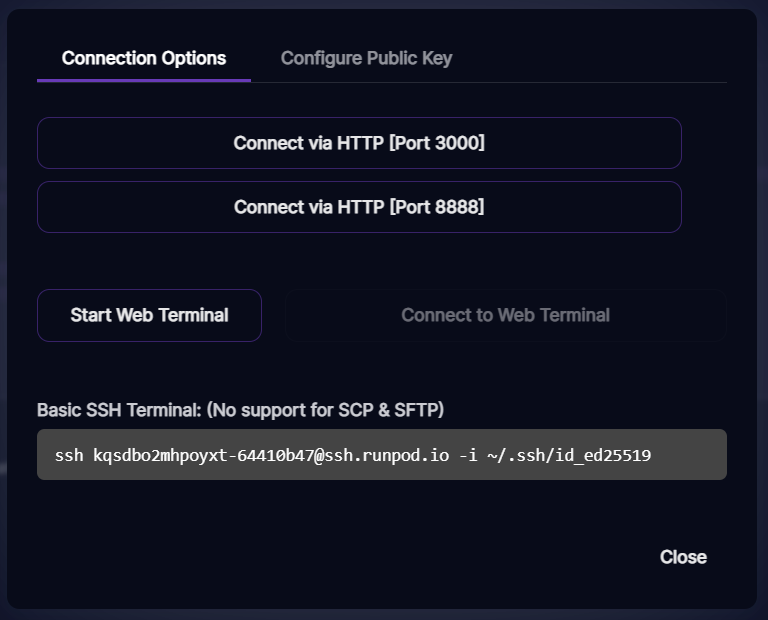
Back on runpod.io, select My Templates and choose to make a New Template.
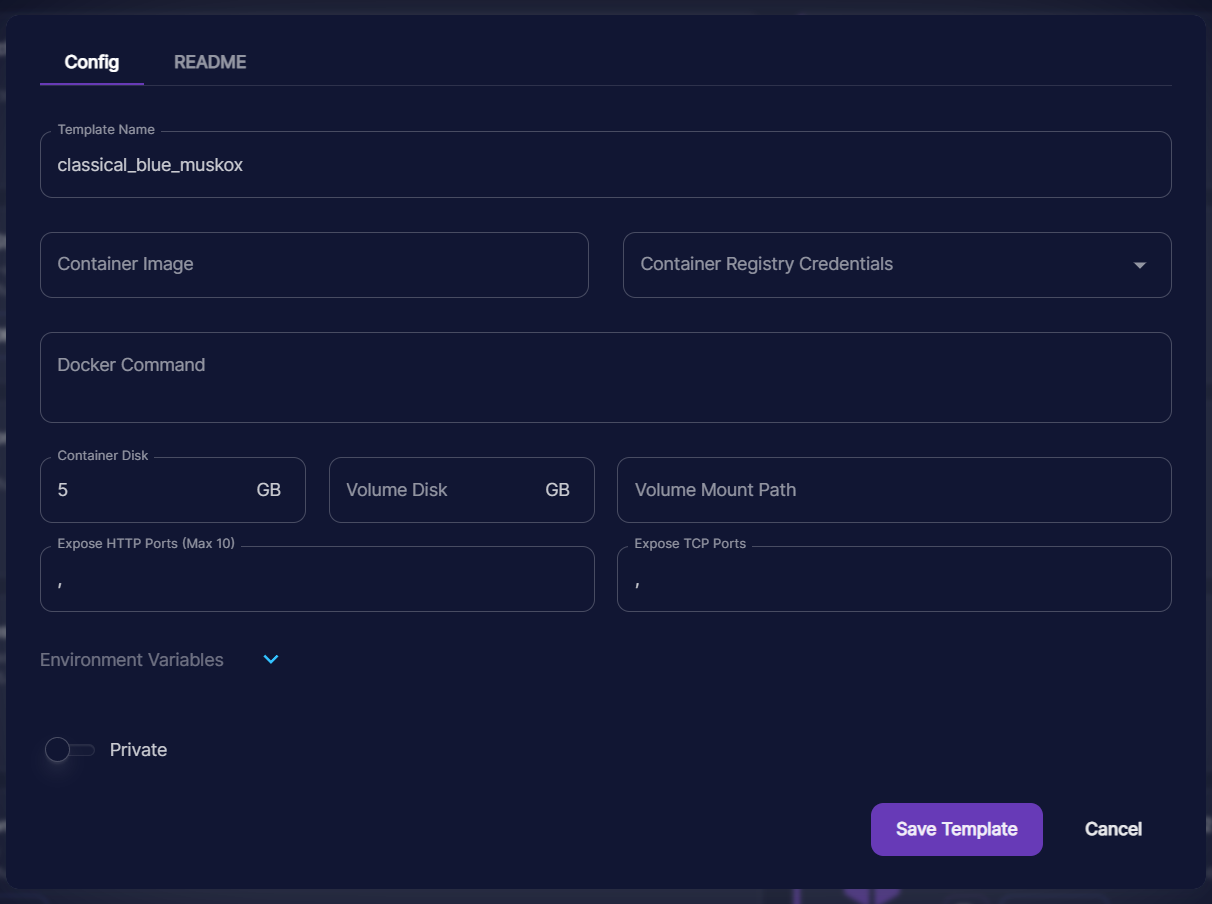
The user/repo:tag you gave your run image goes in the Container Image box. For this image, I exposed HTTP port 8888 for JupyterLab and 3000 for the webUI itself. Don't forget to give your template a more meaningful name! Here are the options I provided:
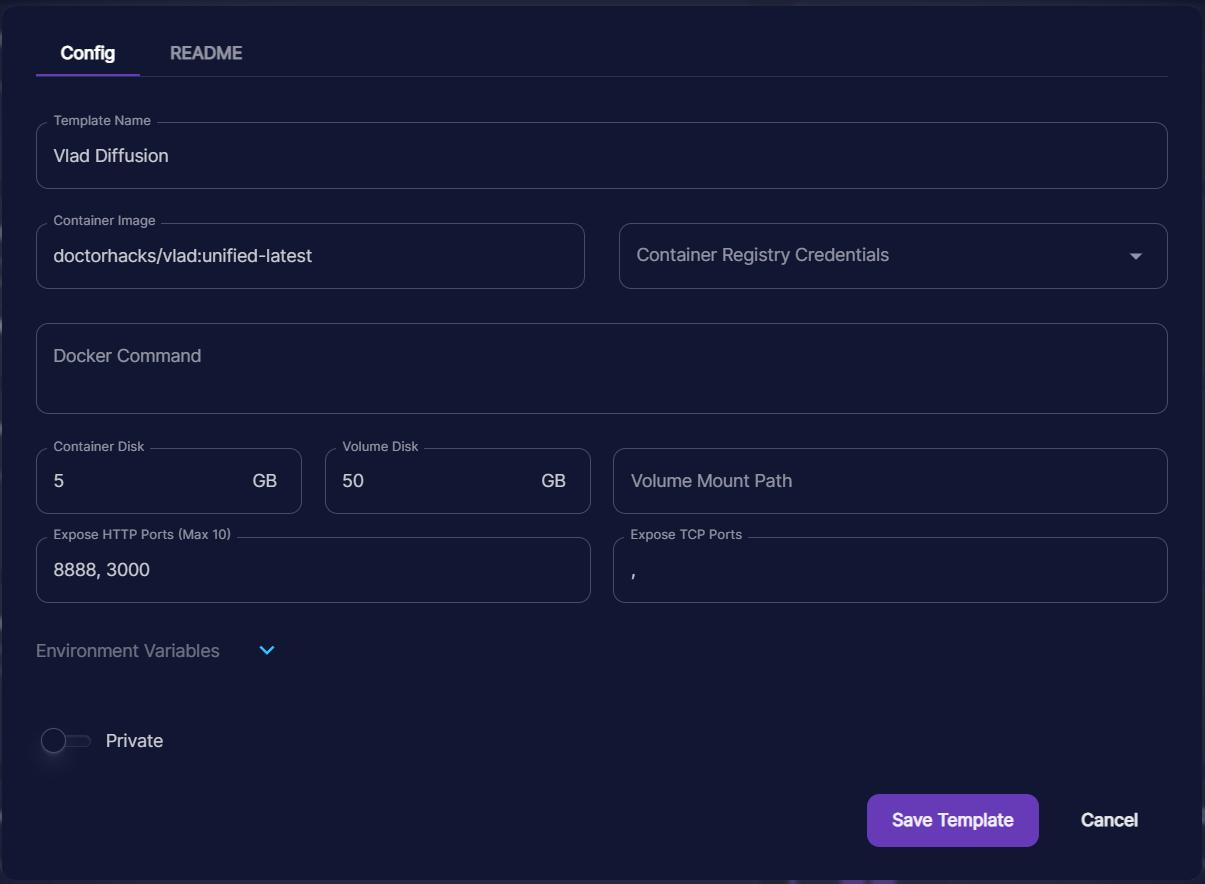
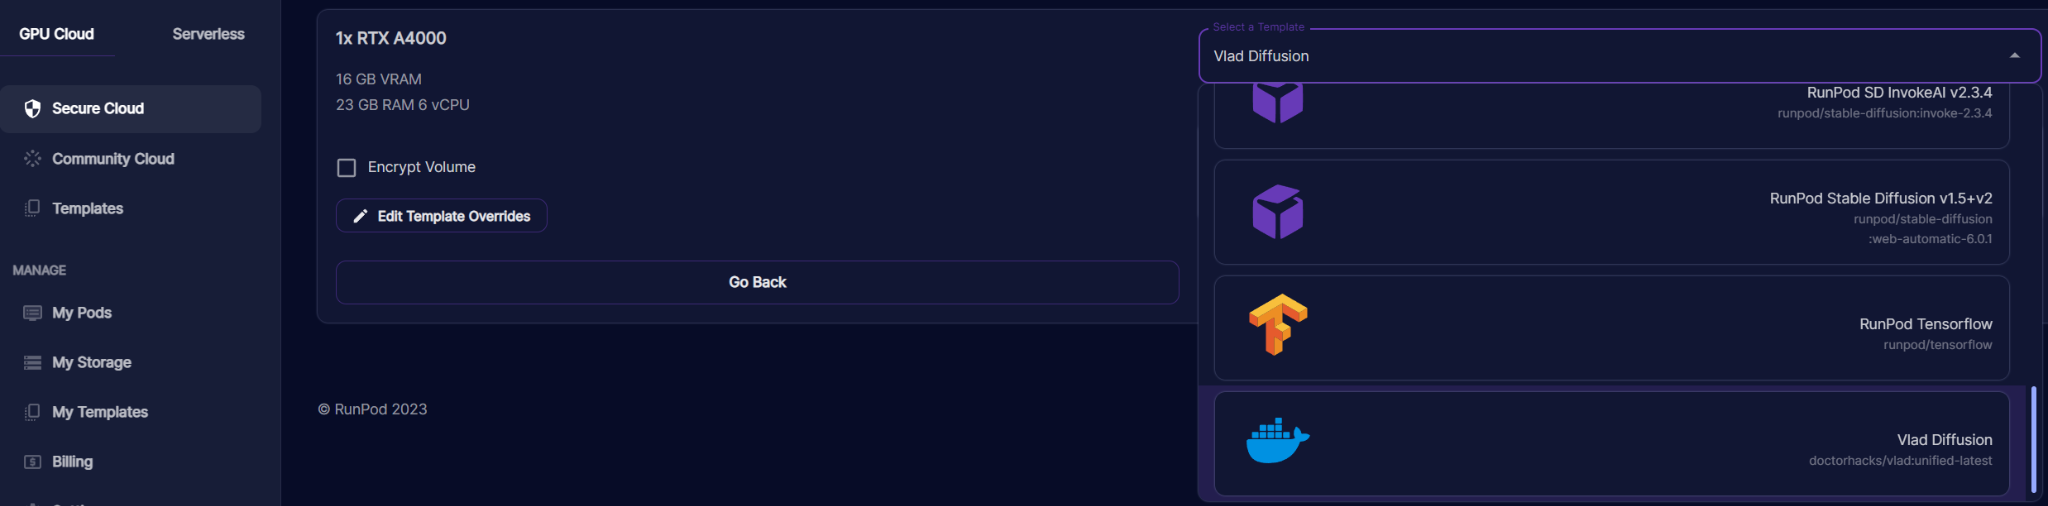
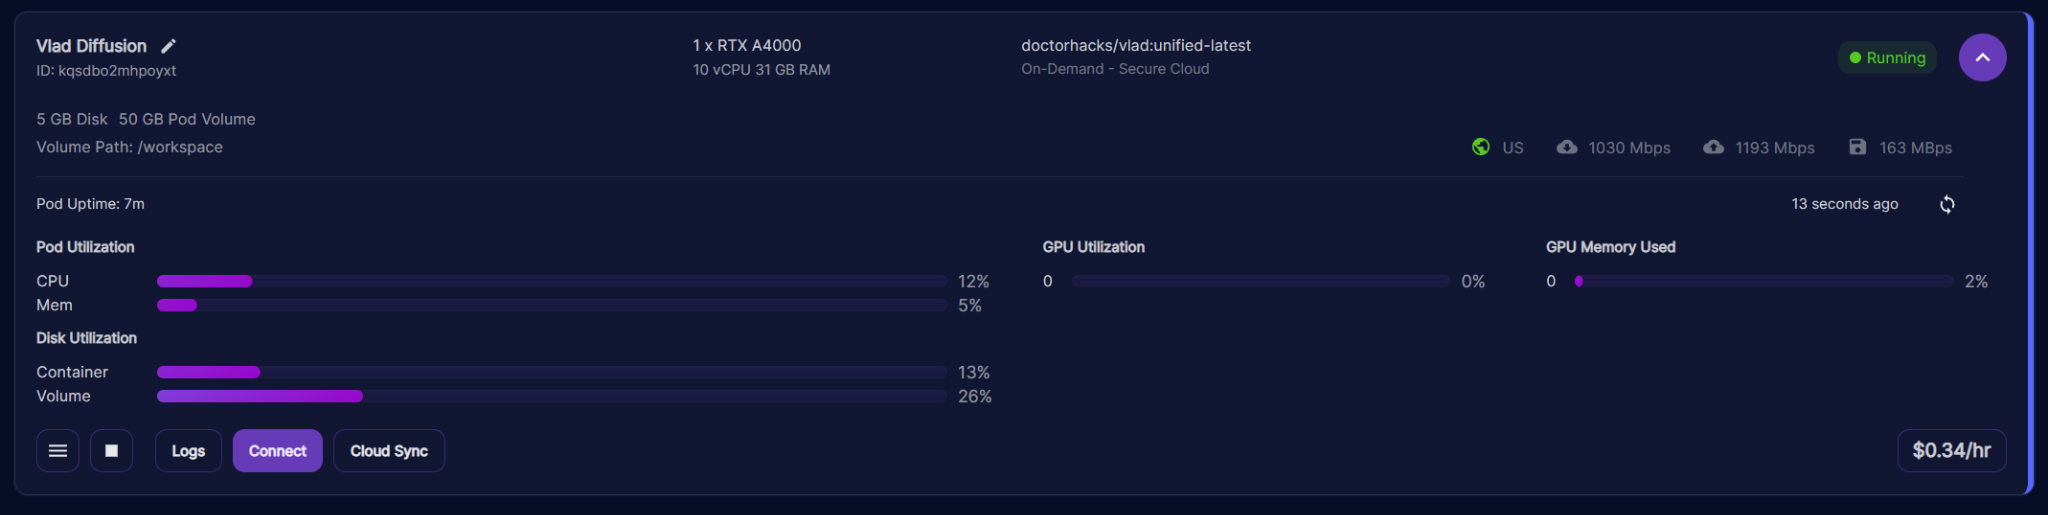
Select Save Template. Now, you should be able to select it when you spin up a new Pod!
As a final side-note, if you've followed this to the tee, trying to connect to JupyterLab for the first time will net you this:
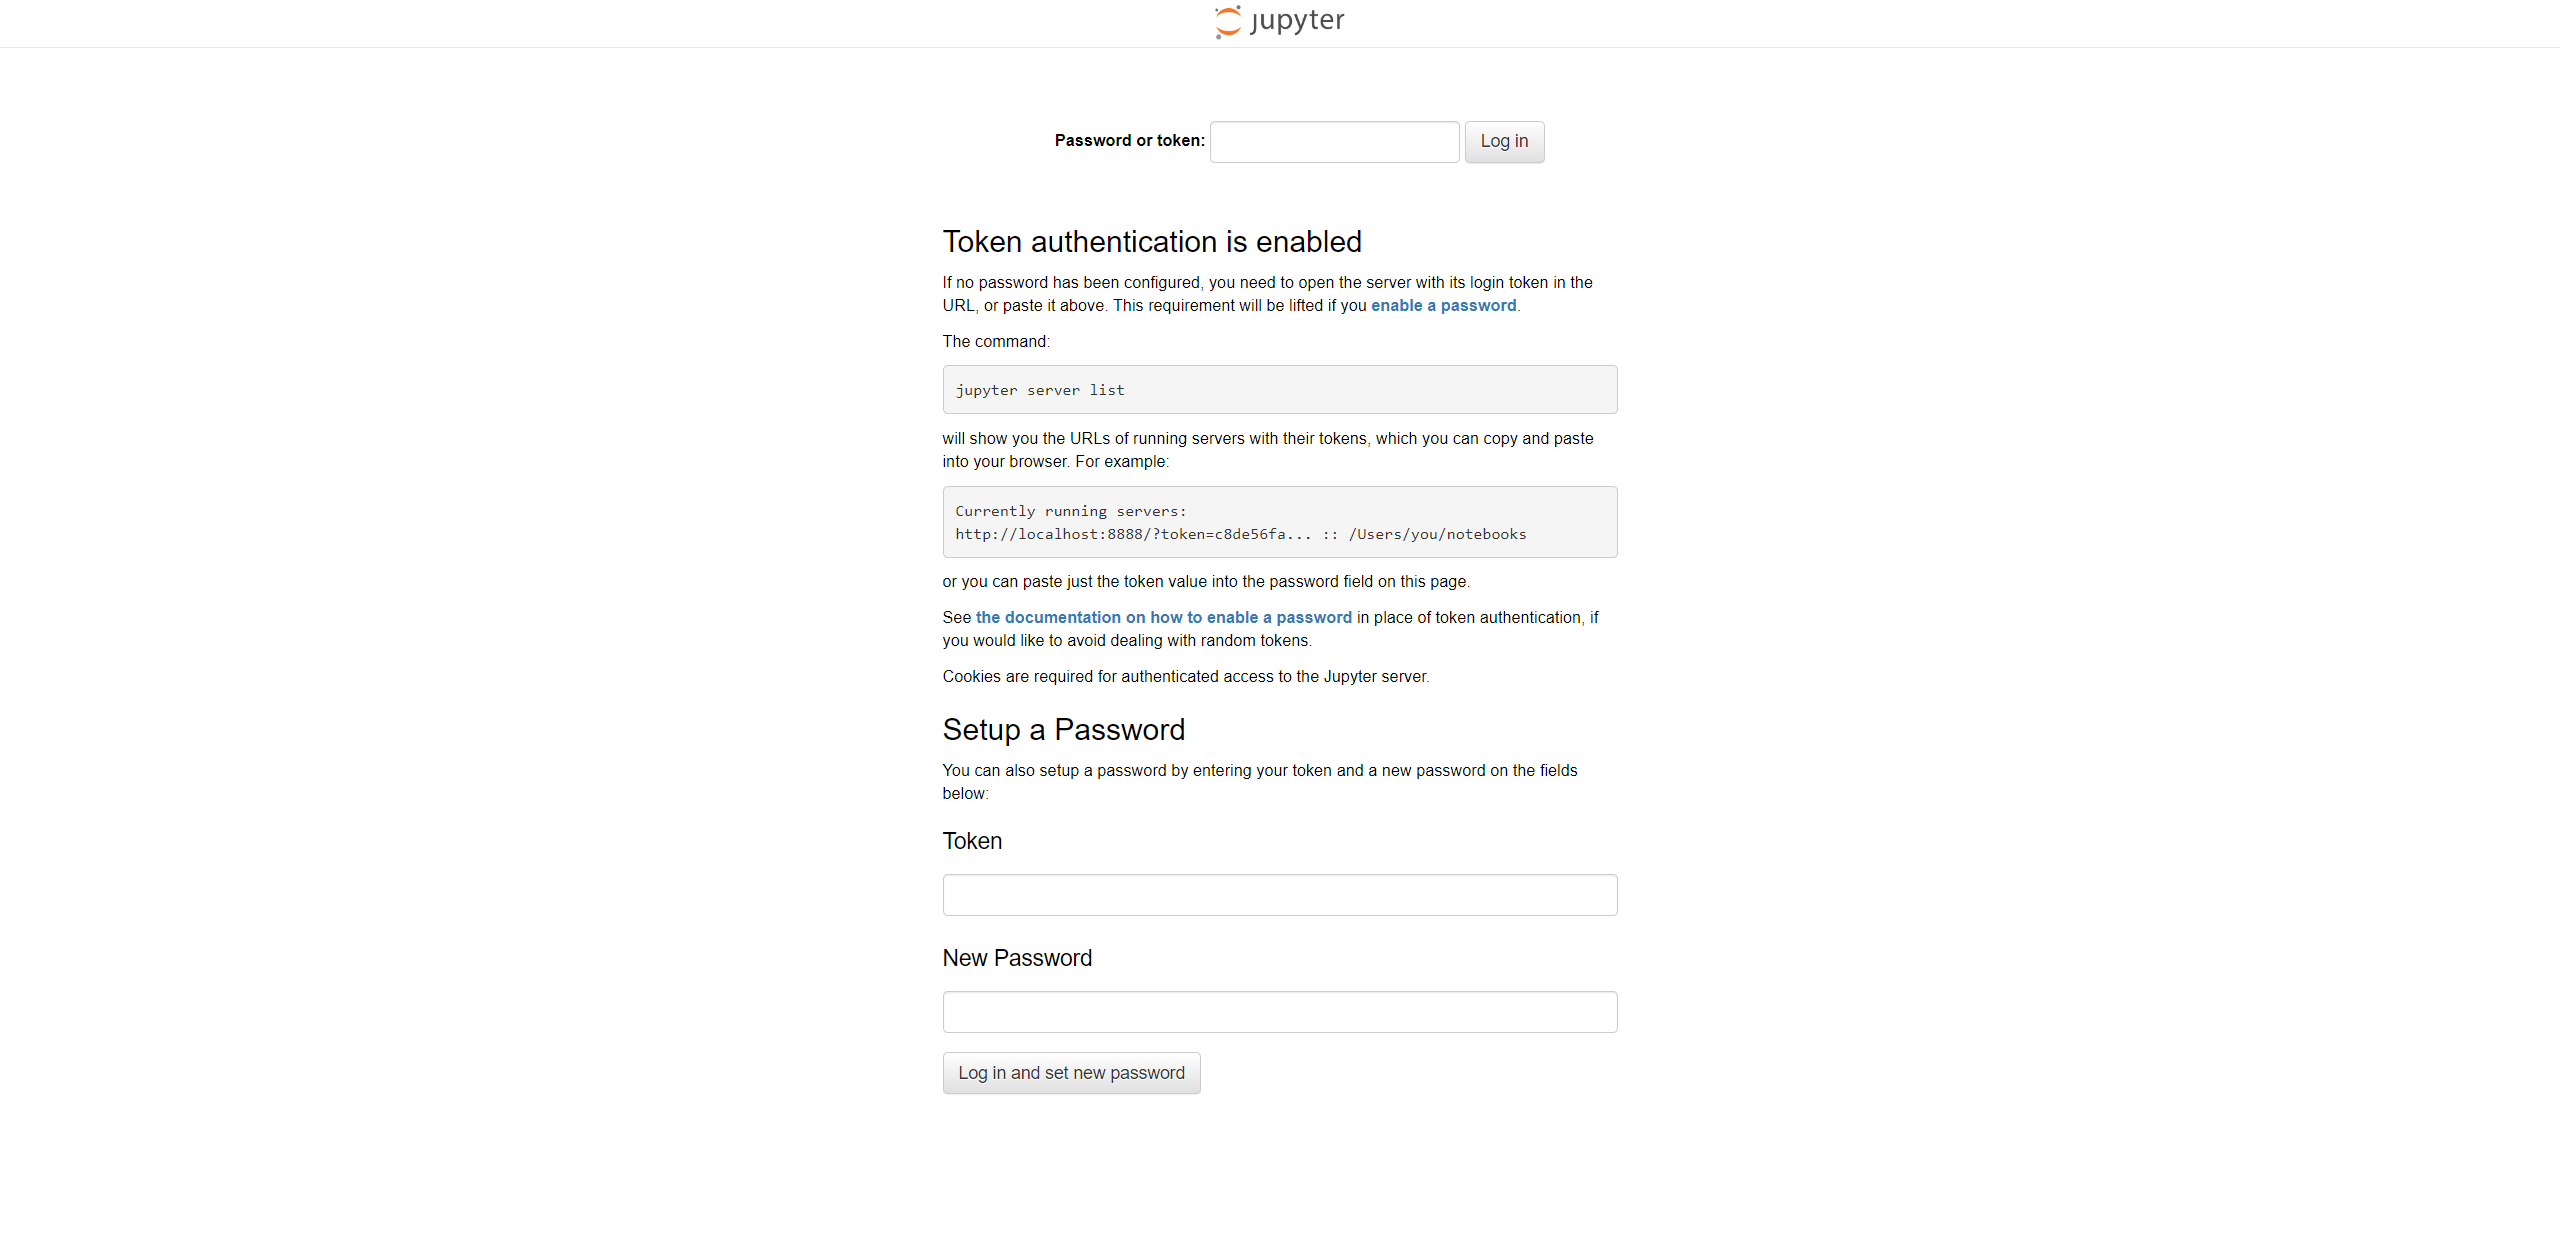
Select Start Web Terminal and then Connect to Web Terminal on the Pod's connect options interface and run jupyter server list; it should only return one connection, and the string after ?token= in the server URL is what you supply to the login prompt in order to access your Pod's files through JupyterLab.


Author profile: Brandon Ikeler
Blog Posts
Queue for any GPU spec, even one that's fully rented out, and we'll deploy it the moment capacity opens up. No more refreshing the console or running a sniping tool.

Explore why faster chips have shifted the bottleneck to AI infrastructure, and what that means for teams running production workloads.
.jpeg)
With MIG, we can partition RTX 6000 Pro cards into isolated 24 GB instances. Here's when it makes sense for your workloads.
