.jpeg)
Deploy When Available is now GA
Queue for any GPU spec, even one that's fully rented out, and we'll deploy it the moment capacity opens up. No more refreshing the console or running a sniping tool.
All
Blog
Migrating from Replicate? This tutorial shows how to adapt your existing Cog models for deployment on Runpod Serverless with minimal rework.


Switching cloud platforms or migrating existing models can often feel like a Herculean task, especially when it necessitates additional developmental efforts. This guide aims to simplify this process for individuals who have deployed models via replicate.com or utilized the Cog framework. Through a few straightforward steps, you'll learn how to establish a Runpod serverless worker from an existing Replicate image. This tutorial presumes you are operating within a Linux terminal environment and have Docker installed on your system. For demonstration purposes, we'll be transitioning the lucataco/hotshot-xl model to a Runpod serverless endpoint.
Step 1: Clone and Navigate to the cog-worker Repository
Begin by cloning the cog-worker repository and then navigate to the root folder of the repository:
>_ git clone https://github.com/runpod-workers/cog-worker.git
>_ cd cog-worker/
The cog-worker repository contains essential scripts and configuration files required for the migration.
Step 2: Identify Model Information
Identify the username, model name, and version you wish to use from Replicate.

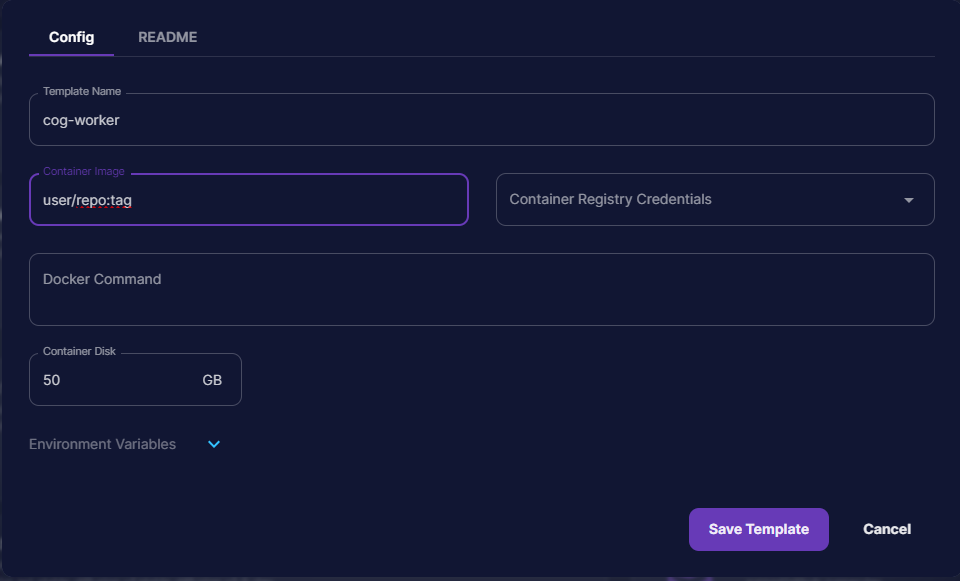
Step 3: Build and Push Docker Image
Build the Docker image by providing the necessary arguments for your model. Once your Docker image is built, push it to a container repository such as DockerHub:
>_ docker build --tag user/repo:tag --build-arg COG_REPO=user --build-arg COG_MODEL=model_name --build-arg COG_VERSION=model_version .

>_ docker push user/repo:tag
The --tag option allows you to specify a name and tag for your image, while the --build-arg options provide the necessary information for building the image.
Step 4: Create and Deploy a Serverless Endpoint on Runpod
Open Runpod and initiate the creation of a serverless endpoint template. Once the template is set up, deploy the endpoint. This will now allow you to send requests to your new endpoint.
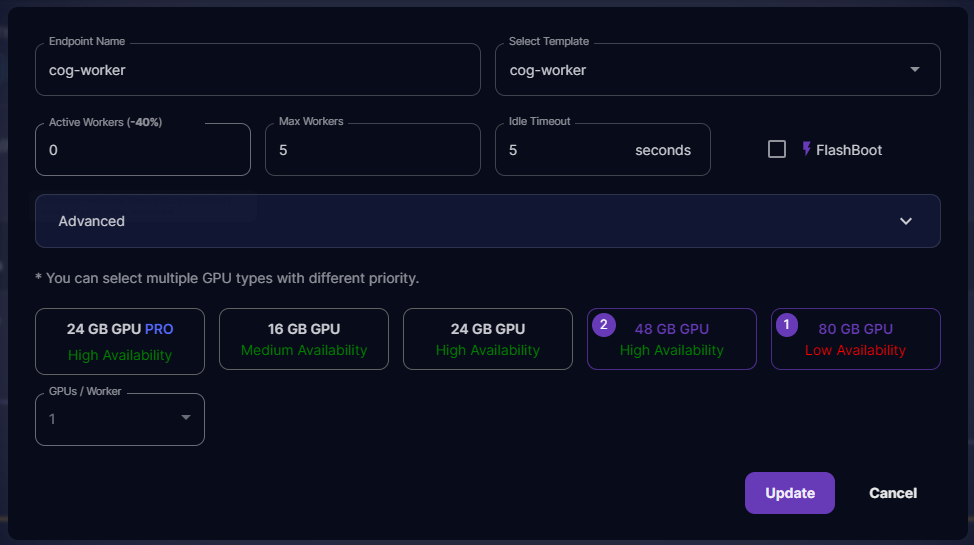
Your Runpod serverless endpoint is now ready to handle requests! Depending on the specifics of your application, you may need to modify the handler file before building, especially if you intend to upload images to object storage, for instance.
The next step, of course, is to now test your API with ReqBin. Every package has their own parameters to pass to the API, but generally the overarching structure of the request is the same no matter what. Check out this article if you need to learn how to send a request through Reqbin to your serverless worker to see if it's ready for prime time. You also may want to check out our previous article on Serverless APIs which includes an example using cURL at the bottom.
By following this streamlined process, transitioning from Replicate to a Runpod serverless endpoint is made significantly less daunting, enabling a smoother migration and deployment of your Cog image.
Author profile: Justin Merrell
Blog Posts
Queue for any GPU spec, even one that's fully rented out, and we'll deploy it the moment capacity opens up. No more refreshing the console or running a sniping tool.
Explore why faster chips have shifted the bottleneck to AI infrastructure, and what that means for teams running production workloads.
.jpeg)
With MIG, we can partition RTX 6000 Pro cards into isolated 24 GB instances. Here's when it makes sense for your workloads.
