Disco Diffusion on Runpod: Creative AI for Artists
Explore Disco Diffusion on Runpod, an experimental art model beloved for its dreamlike style. Perfect for creative pros looking to generate high-concept.
AI is the latest frontier for artists, providing new opportunities for creativity and expression. While stable diffusion is the latest rage and is much faster, you can't beat the artistic aesthetic that comes out of good ol' DD. Disco Diffusion models are a great way to create some stunning pieces. In this article, we'll go through how to get running Disco Diffusion on Runpod.
What is Disco Diffusion?
Disco Diffusion leverages Machine Learning to create AI Generated Art. You can describe the scene using a text prompt and the AI model will generate the image, which can take anywhere from a minute to an hour. It takes quite a bit of GPU compute to generate these images, but the results can be amazing!
How do you run Disco Diffusion?
Disco Diffusion requires GPU compute to create stunning art and the process can take at least a few minutes. In this blog post, we will walk through how you can rent GPU on Runpod to start your DD journey. You can also do this with your own GPU, provided that it has at least 12 GB VRAM. Just keep in mind that some settings require much more VRAM (48+ GB)!
Step 1: If you don't have a Runpod account, create one. You will have to verify your email (check your spam!) and also sign the terms of service.
Step 2: Go to the billing section and load some money on your account. $25 should be enough to play around and get some great results.
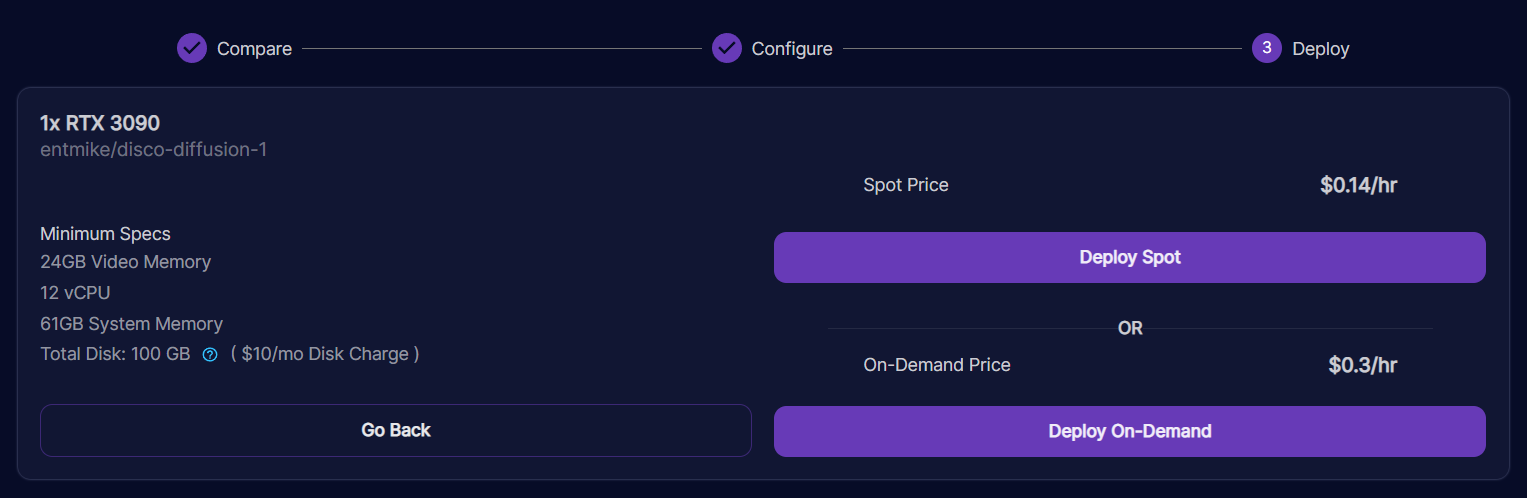
Step 3: Click on this template link, then pick your instance type. Runpod Has plenty of options to choose from and it can be daunting to choose from them all. Safe bets are the 3090s on Community Cloud or the A5000s on Secure Cloud. Community Cloud is a bit cheaper, so many people go with that. If you need a true SSH tunnel, it's easier to go with Secure Cloud, but Community Cloud will work for most use cases.
Step 4: Deploying your Pod
Click on the "Select" button
Click "Select" to continue.
You can feel free to leave everything as default. If you need more disk, then you can increase the "Volume Disk" amount.
Click "Continue"
At this point, you are presented with a summary of your choices and you can choose to deploy a spot instance or on-demand instance. A spot instance is a cheaper instance, but it can be interrupted at any time. On-demand instances are non-interruptable. For this tutorial, we'll deploy an on-demand instance.
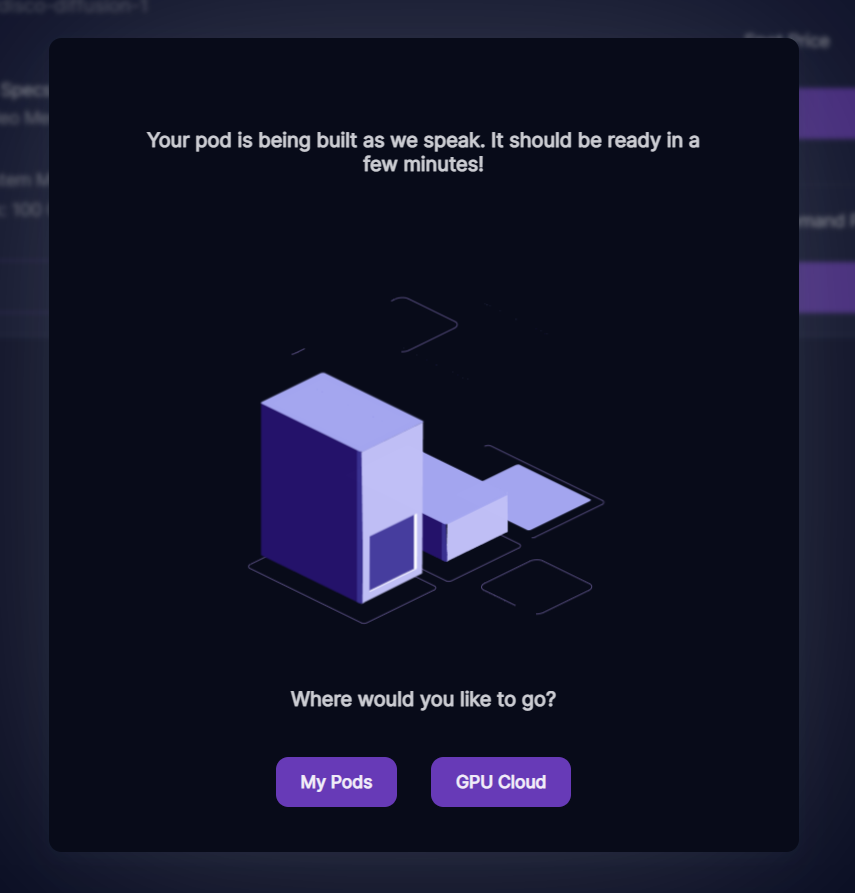
Click on "My Pods" to go to your dashboard.
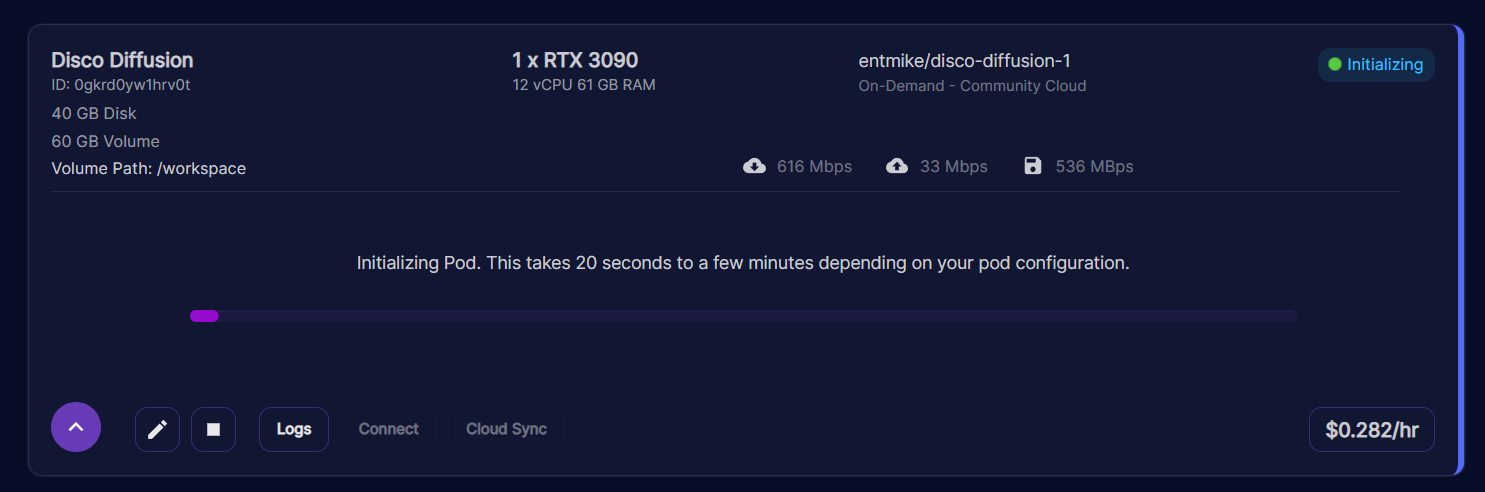
You should see your pod start to initialize.
This step may take a little bit depending on if the Disco Diffusion container image is cached on the machine you chose. If you want to check the status, you can click on the "Logs" button and you will be able to see the download/start status of your pod.
Step 5: Get Access to Your Pod
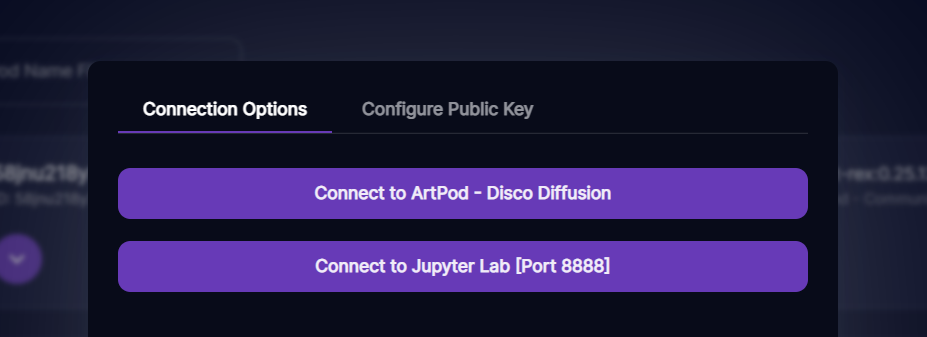
Once the pod is initialized, you should be able to access it by clicking on "Connect". This will bring up a modal window with a bunch of options. For now, you can ignore most of them and click on the button labeled "Connect ArtPod - Disco Diffusion". If you get a 500 error, please give it a minute and try to connect again. The service does take a little bit of time to spin up!
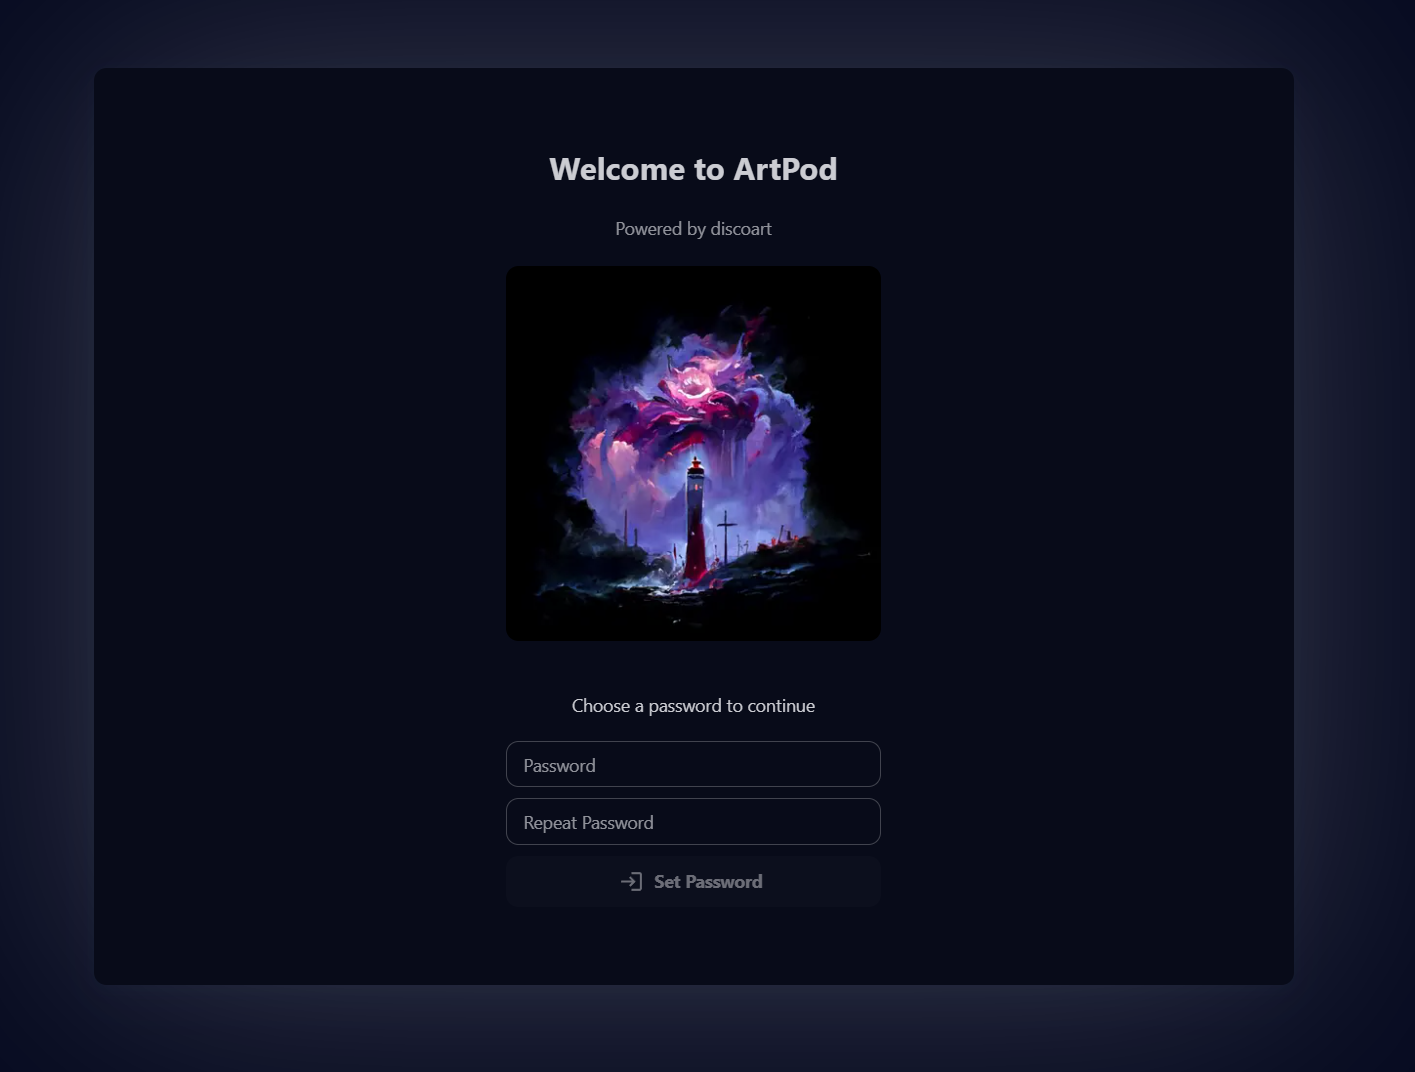
Step 6: Start Your First Run:
When you start this for the first time, choose a password for your instance. This is helpful if you'd like to stream or share your link publicly.
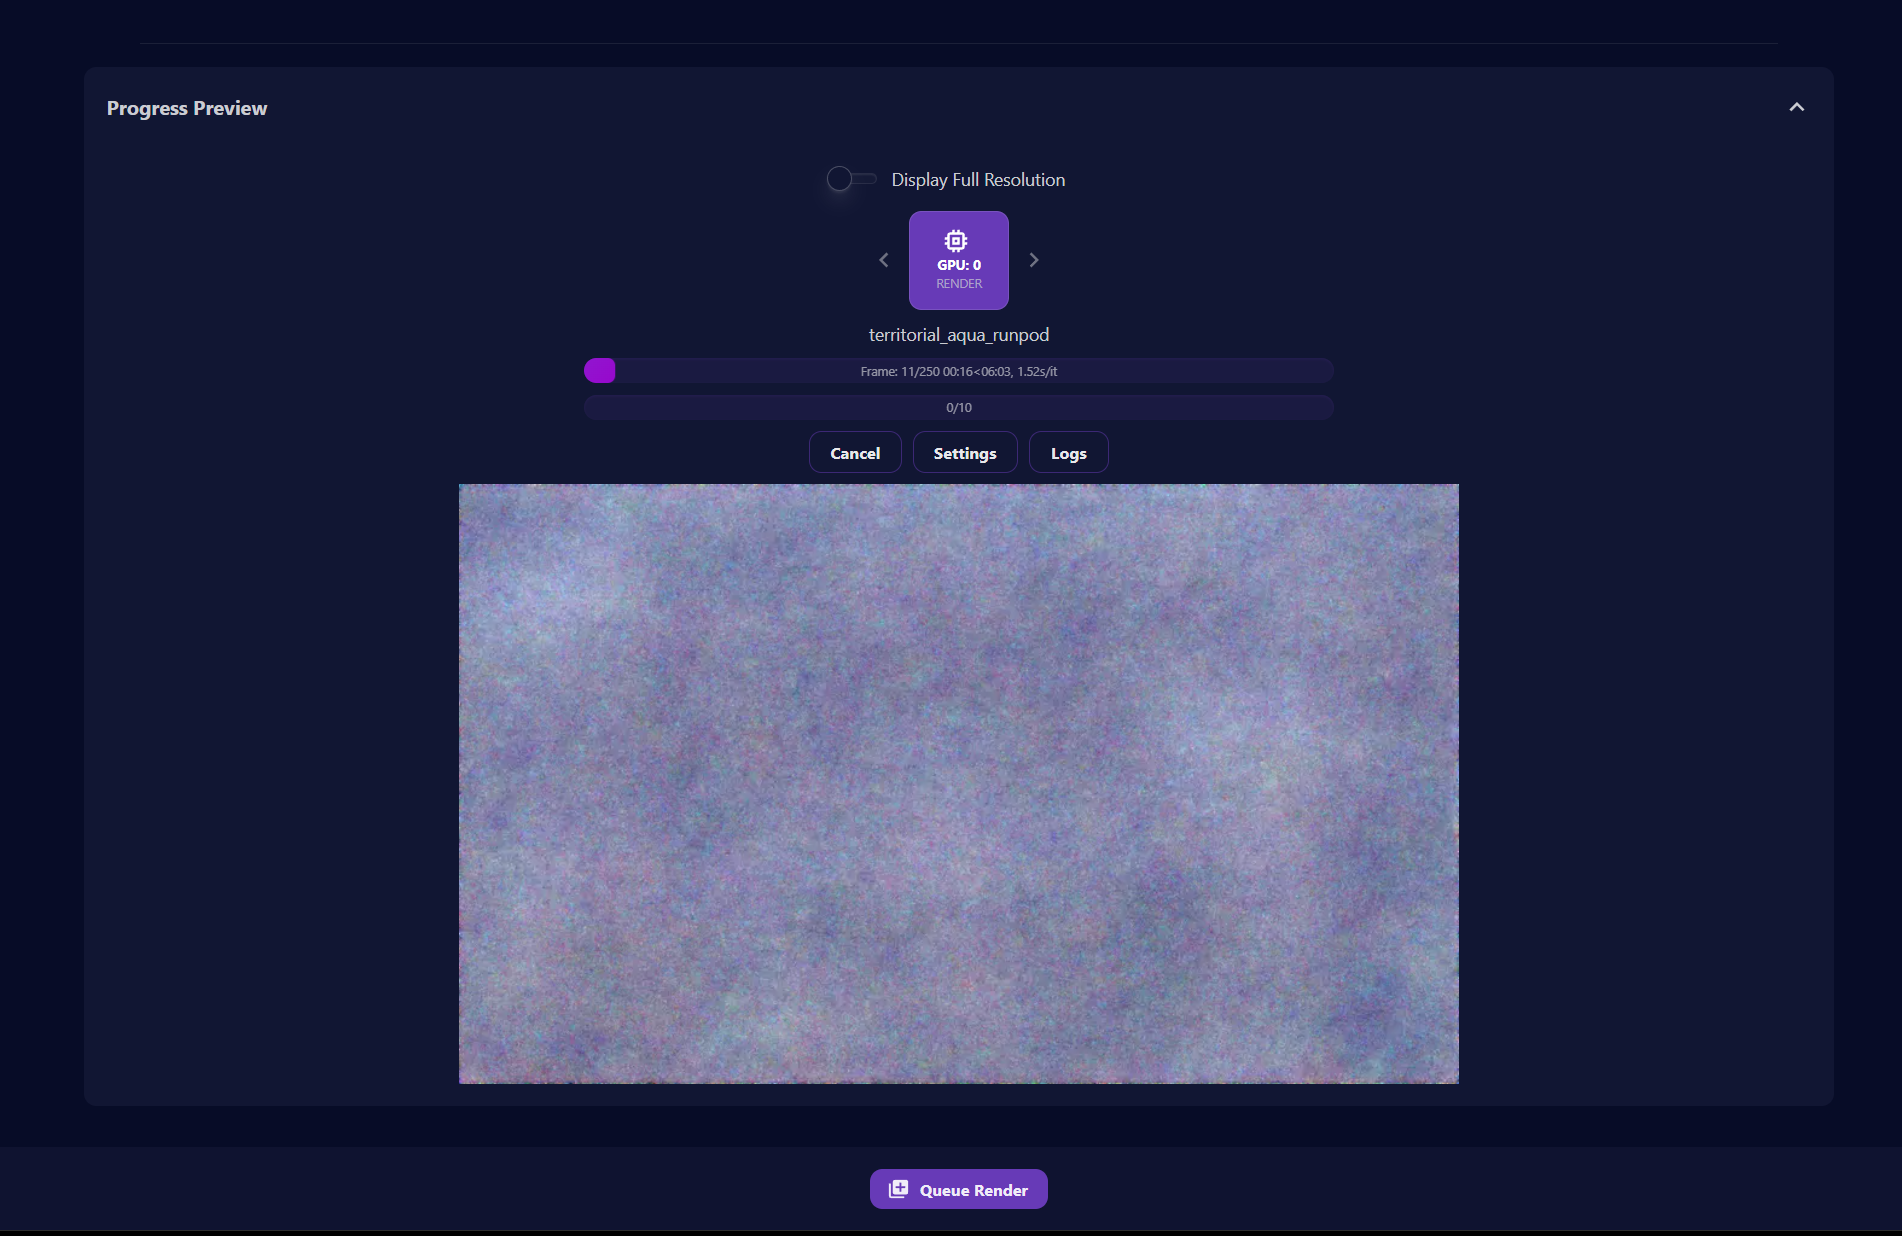
There are tons of settings for disco diffusion. Take your time and play around with them!
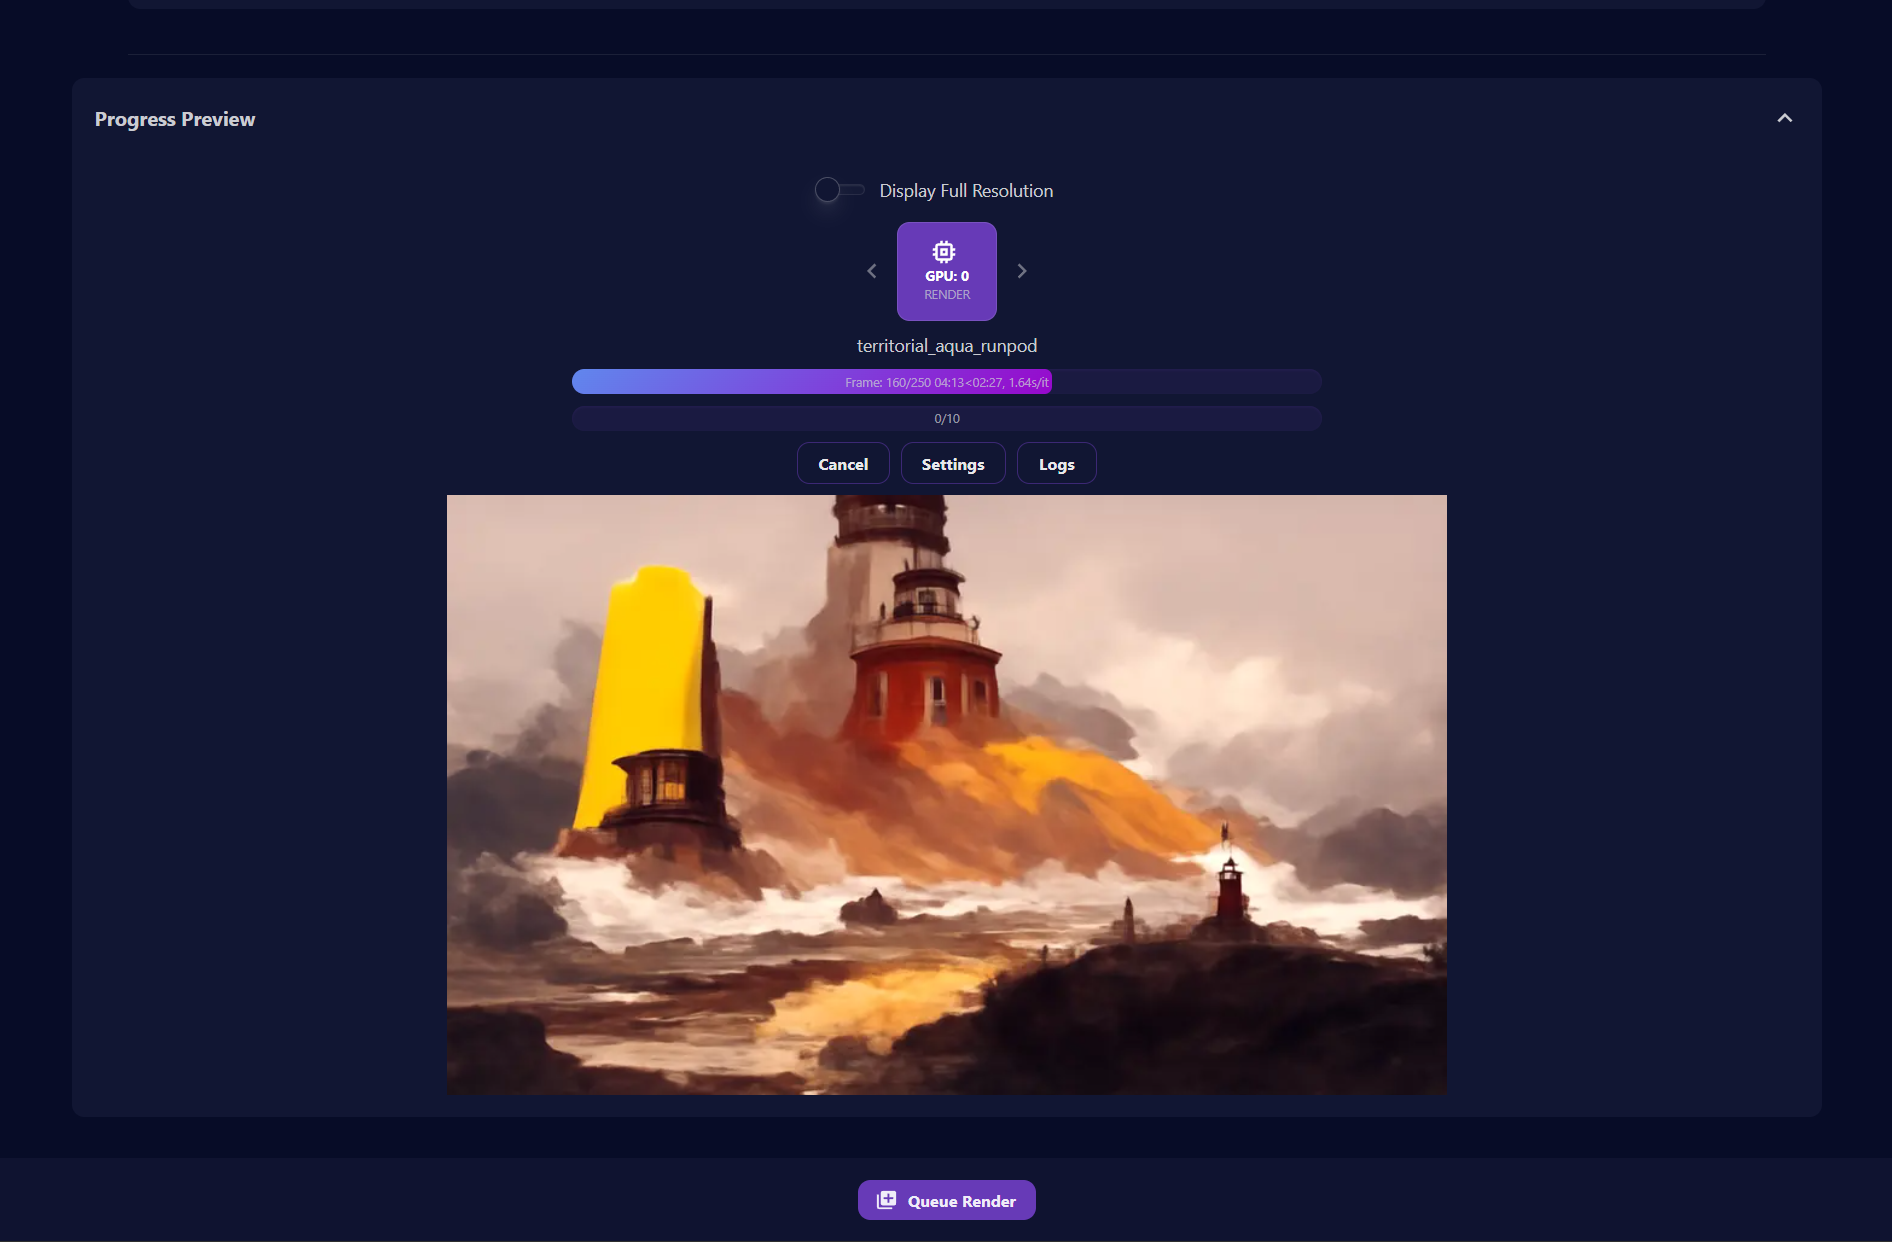
Put in the settings you want for your run and when you're ready, select "Queue Render". This will add your render job to the queue and your machine will pick it up shortly! Please allow a few minutes as it may need to download additional models to fulfil your request. When it starts, you should see the progress images start to show on your screen. If your renders finish really fast with no output, chances are that you have an issue with your inputs. You can check the logs for each job and debug using that. This UI is special in that it accepts queued prompts and it supports multiple GPUs!
When you're satisfied with your queue, feel free to close your window and go about your day. Your pod will continue to process your queue until everything is done.
This was a labor of love that I really enjoyed working on. Please let me know if you have feedback for improvements. I hope to make this much better in the future!
What's new in Runpod Serverless: Faster cold starts, batch inference, and no-Docker deploys
Whether you're already running production endpoints on Runpod or you're sizing us up for the first time, here's a plain-language tour of what Runpod Serverless does today, why it's faster and cheaper than it was six months ago, and how to deploy your first endpoint in minutes.
Beyond the Notebook: The Engineering Realities of Production AI Agents
Shift from stateless inference to stateful architectures to resolve infrastructure bottlenecks like memory management, concurrency limits, and runaway jobs in production AI agents.


.jpeg)