Learn how to deploy ComfyUI as a serverless API endpoint on Runpod to run AI image generation workflows at scale. The tutorial covers deploying from.
In a previous blog post, we explored Runpod Serverless, a pay-as-you-go cloud computing solution that doesn’t require managing servers to scale and maintain your applications. We deployed some basic code from templates that just printed some text to the console, but now let’s do something more performance-intensive.
ComfyUI is an open-source, node-based application for generative AI workflows. You can deploy ComfyUI as an API endpoint on Runpod Serverless, send workflows via API calls, and receive AI-generated images in response.
What you’ll learn
In this blog post you’ll learn how to:
Deploy ComfyUI to a serverless endpoint using the Runpod Hub and Docker images
Call the endpoint in Python and generate images based on ComfyUI workflows
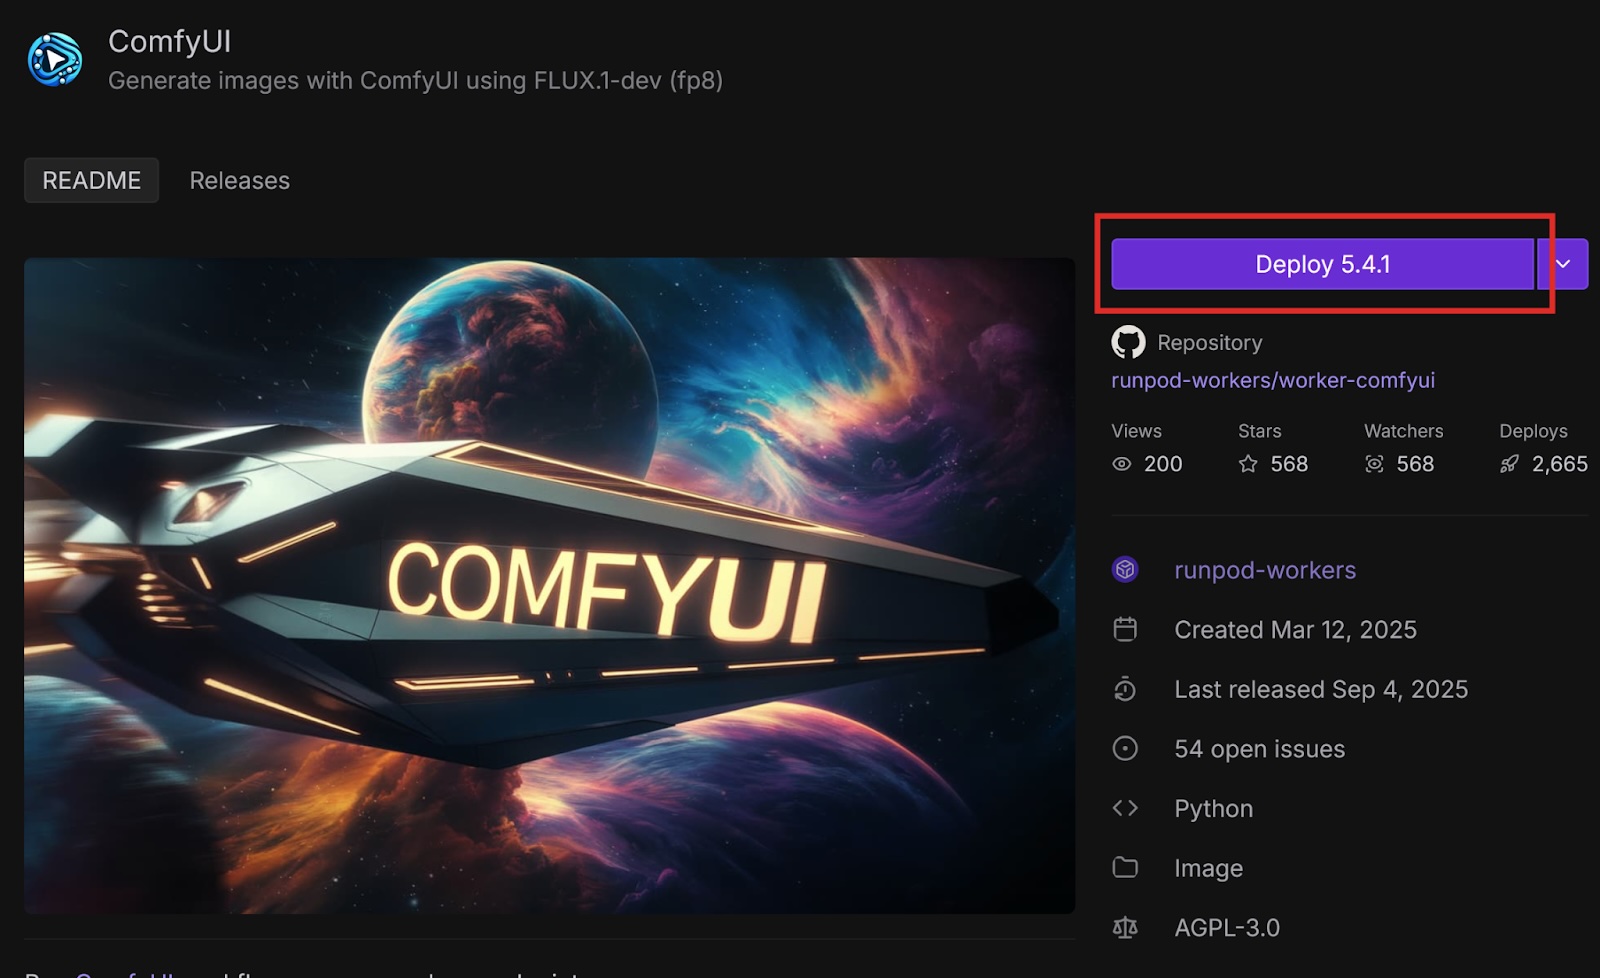
Deploy ComfyUI from Runpod Hub with FLUX.1-dev model
Runpod Hub provides convenient repositories that you can quickly deploy to Runpod Serverless without much setup. Let’s deploy the ComfyUI repo from Runpod Hub to a serverless endpoint, which will allow us to make requests to it from code.
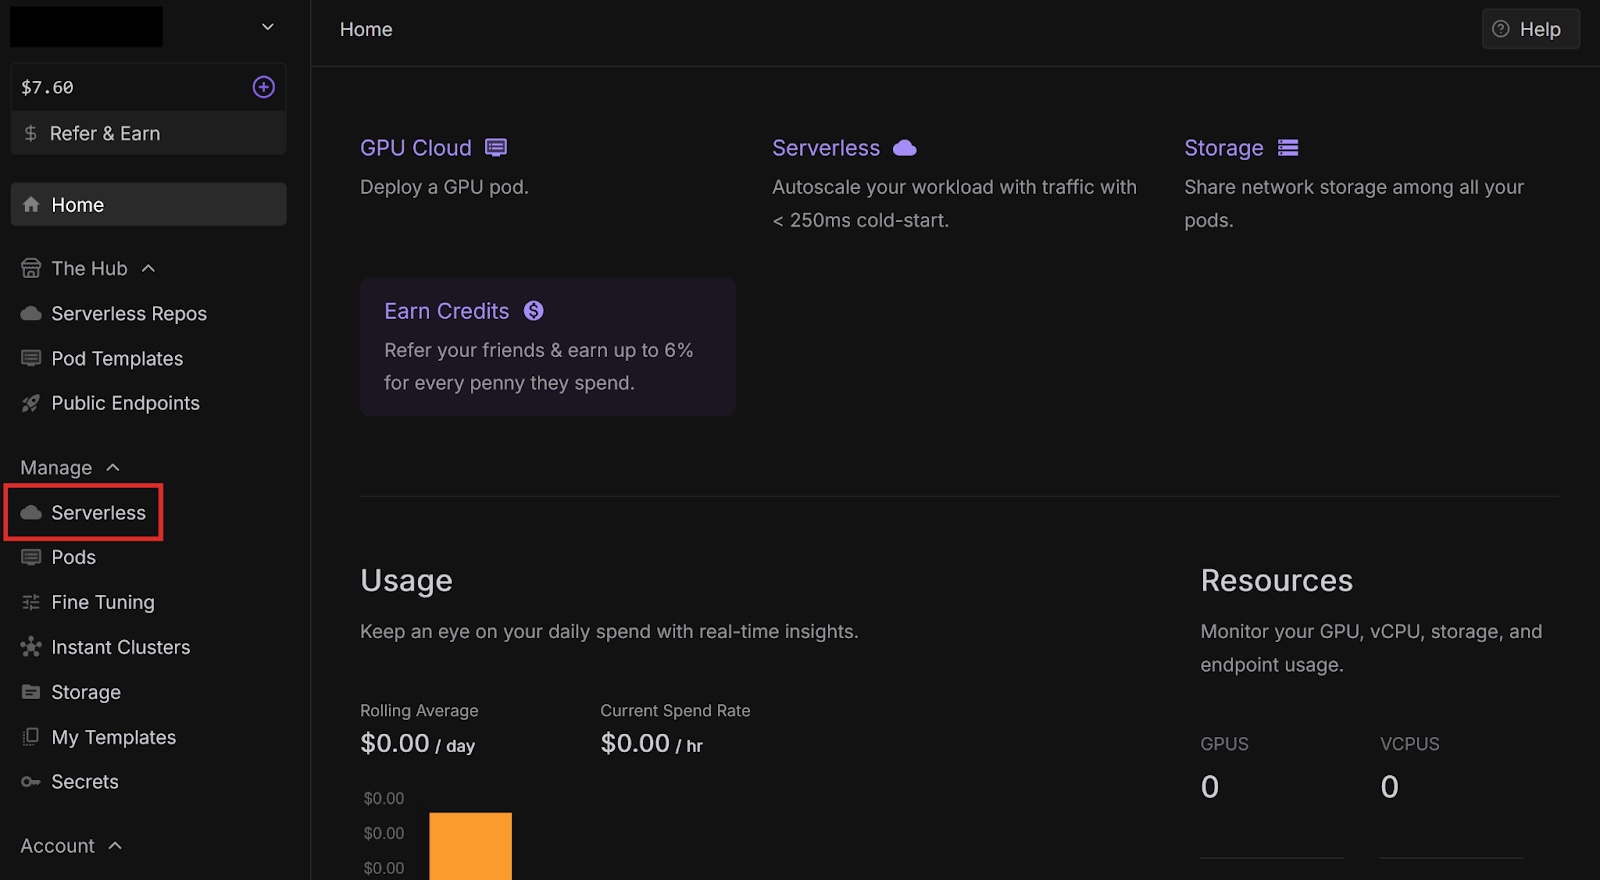
Select Serverless from the left menUnder Ready-to-Deploy Repos, select ComfyUI.
Under Ready-to-Deploy Repos, select ComfyUI.
This is a ready-to-deploy template from the Runpod Hub. It uses the FLUX.1-dev-fp8 model and only works with this model. Later in this post, we will deploy this template with other models using Docker.
Select Deploy to deploy the latest version of the template.
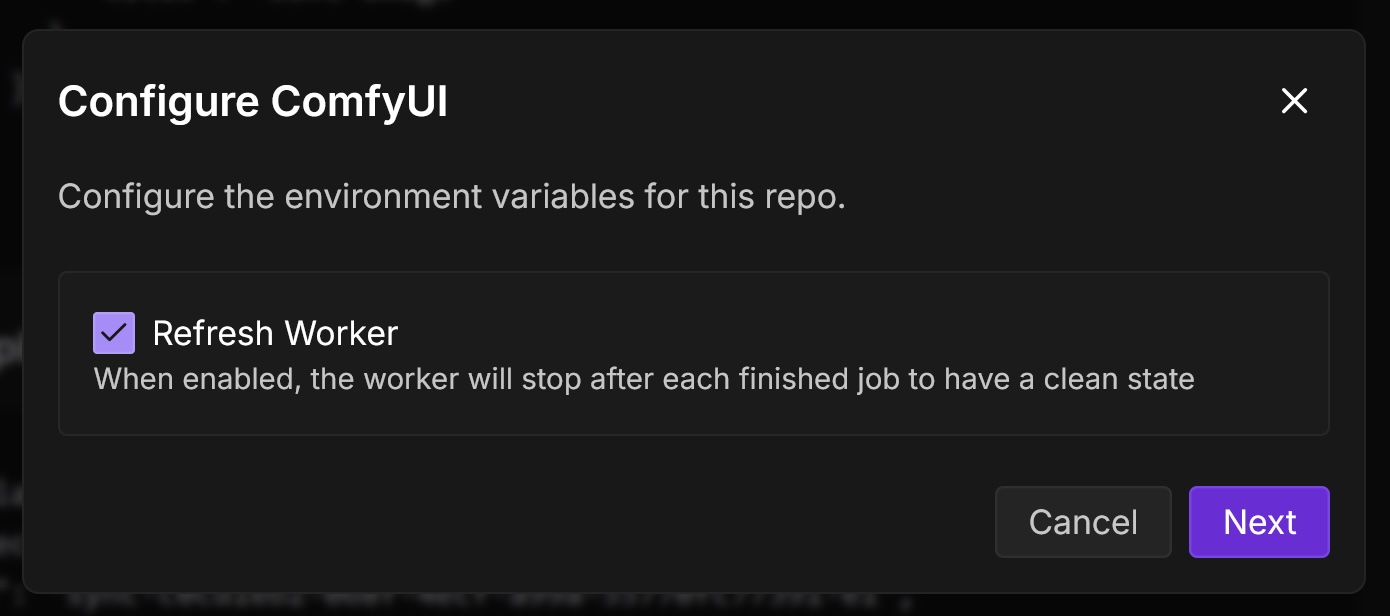
In the Configure ComfyUI dialog, check Refresh Worker. This will ensure that the worker stops after each finished job. Then, select Next.
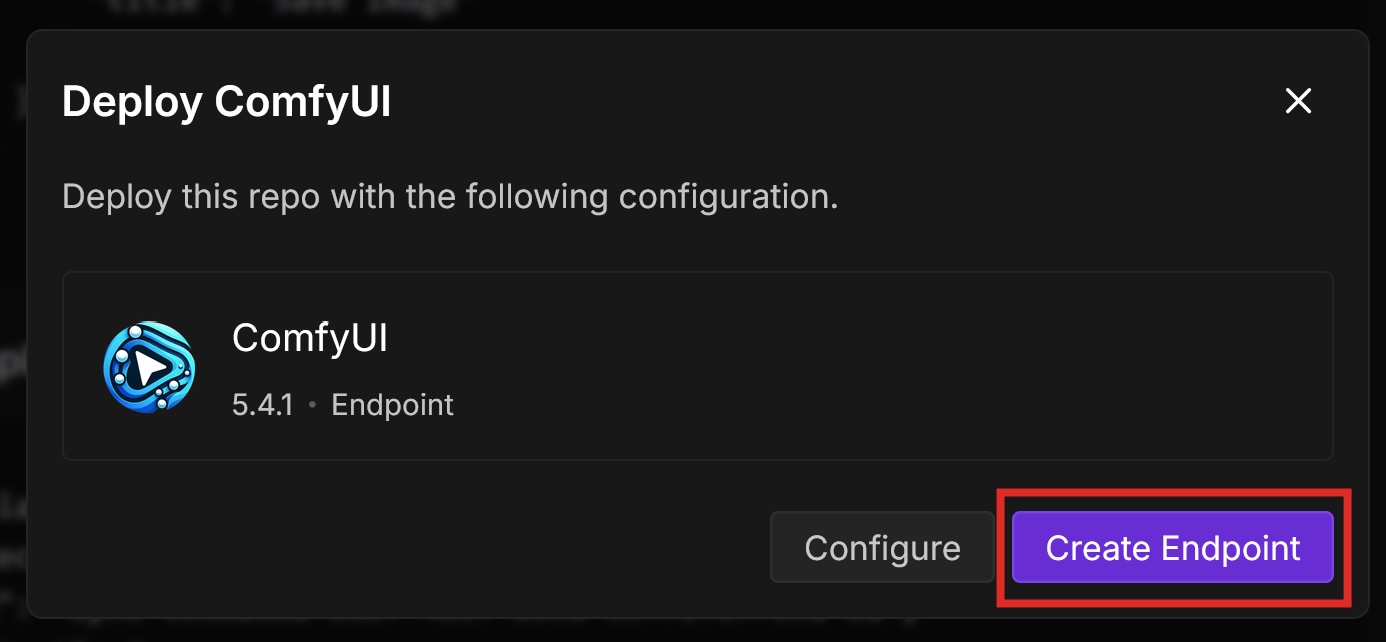
In the Deploy ComfyUI dialog, select Create Endpoint.
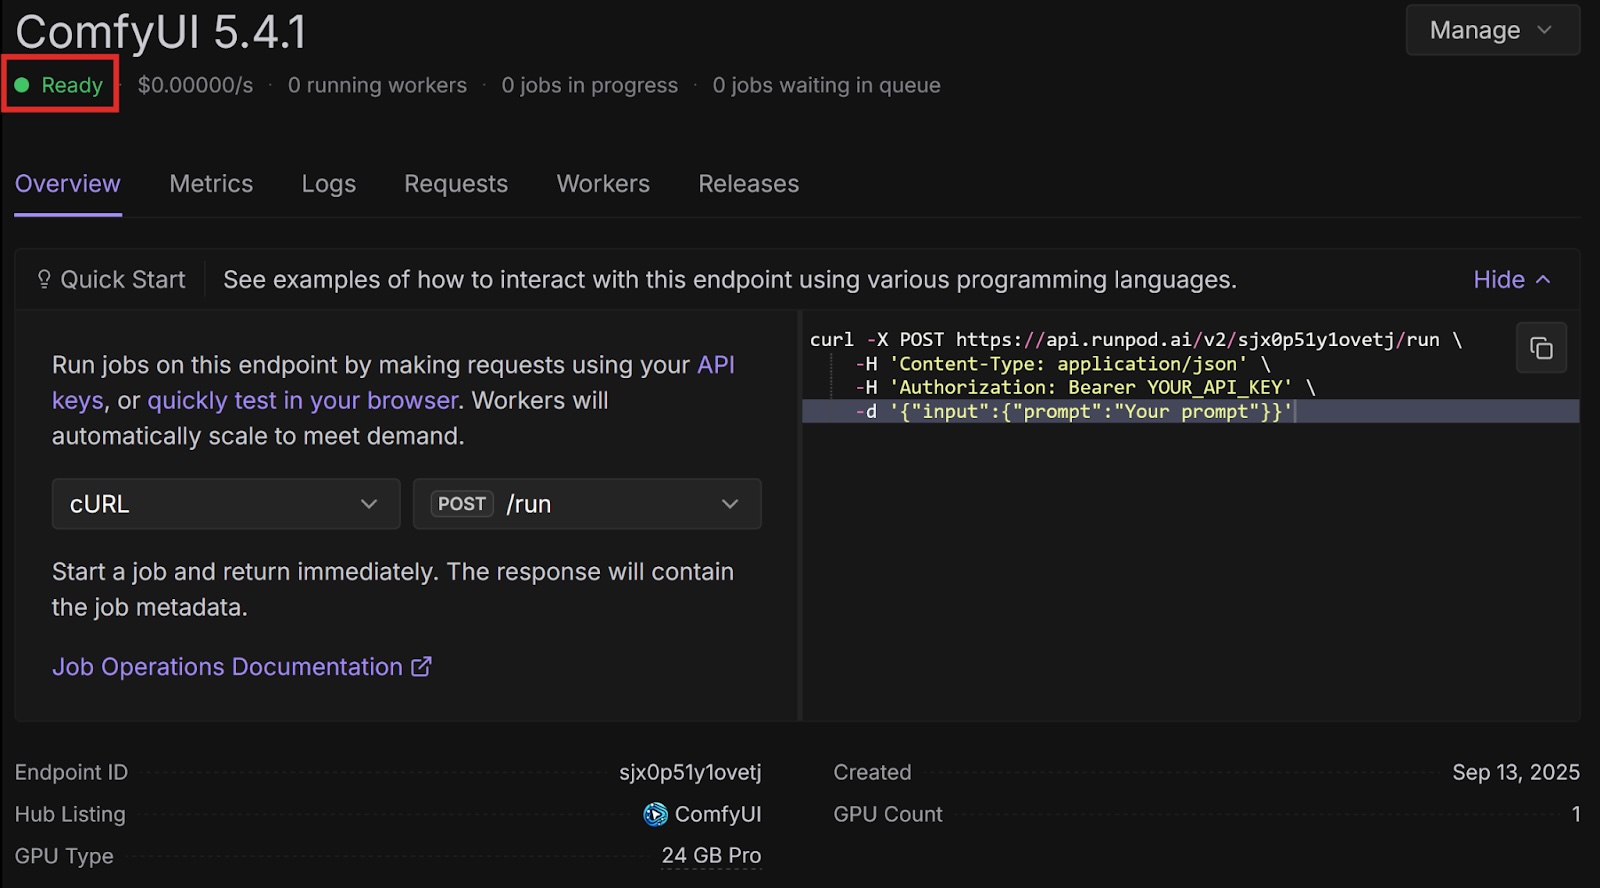
On the endpoint overview page, wait for the status to say Ready.
Let’s call our endpoint using Python. Create a folder on your computer for this project and open it in your preferred code editor (I’ll be using VSCodium).
Set up the development environment by following Prerequisites.
In your virtual environment, create a Python file (name it whatever you like).
Add the following import statements at the top of the file:
Requests to ComfyUI return images in the form of base-64 strings by default, so we need the base64 library to decode them.
The requests library helps us send requests to our API endpoint.
Add the following headers. Enter your Runpod API key.
Next, let’s add the ComfyUI workflow which defines the parameters ComfyUI should use to generate images. You can create your own using ComfyUI, or you can use an example like this one:
Back in the Runpod console, on the page for your endpoint, select the Requests tab. Next to the Run button, select the drop-down arrow and select RunSync. The /runsync endpoint is for synchronous requests that wait for the job to complete and return the result directly. Copy the URL in the text box - this is your endpoint URL. Send the request to your endpoint and store the first image in the response in a variable:
Convert the base-64 string into an image file:
Run the program and open the image file that it outputs. It should be an image that the FLUX.1-dev-fp8 model generated based on the description in input.workflow.6.inputs.text (in the case of the example, a cat looking at a birthday cake). Here is the full code example:
Deploy ComfyUI with a different model
The ComfyUI template on the Runpod Hub makes it easy to deploy as a serverless endpoint, but it is restricted to the FLUX.1-dev-fp8 model. If you want to use a different model, you can use the worker-comfyui repository on GitHub.
Runpod provides official container images on Docker Hub that deploy ComfyUI with various models. In this tutorial, we will use one of these images, but if you want to use a model that Runpod does not have an image for, you can use the latest base image and supply your own model.
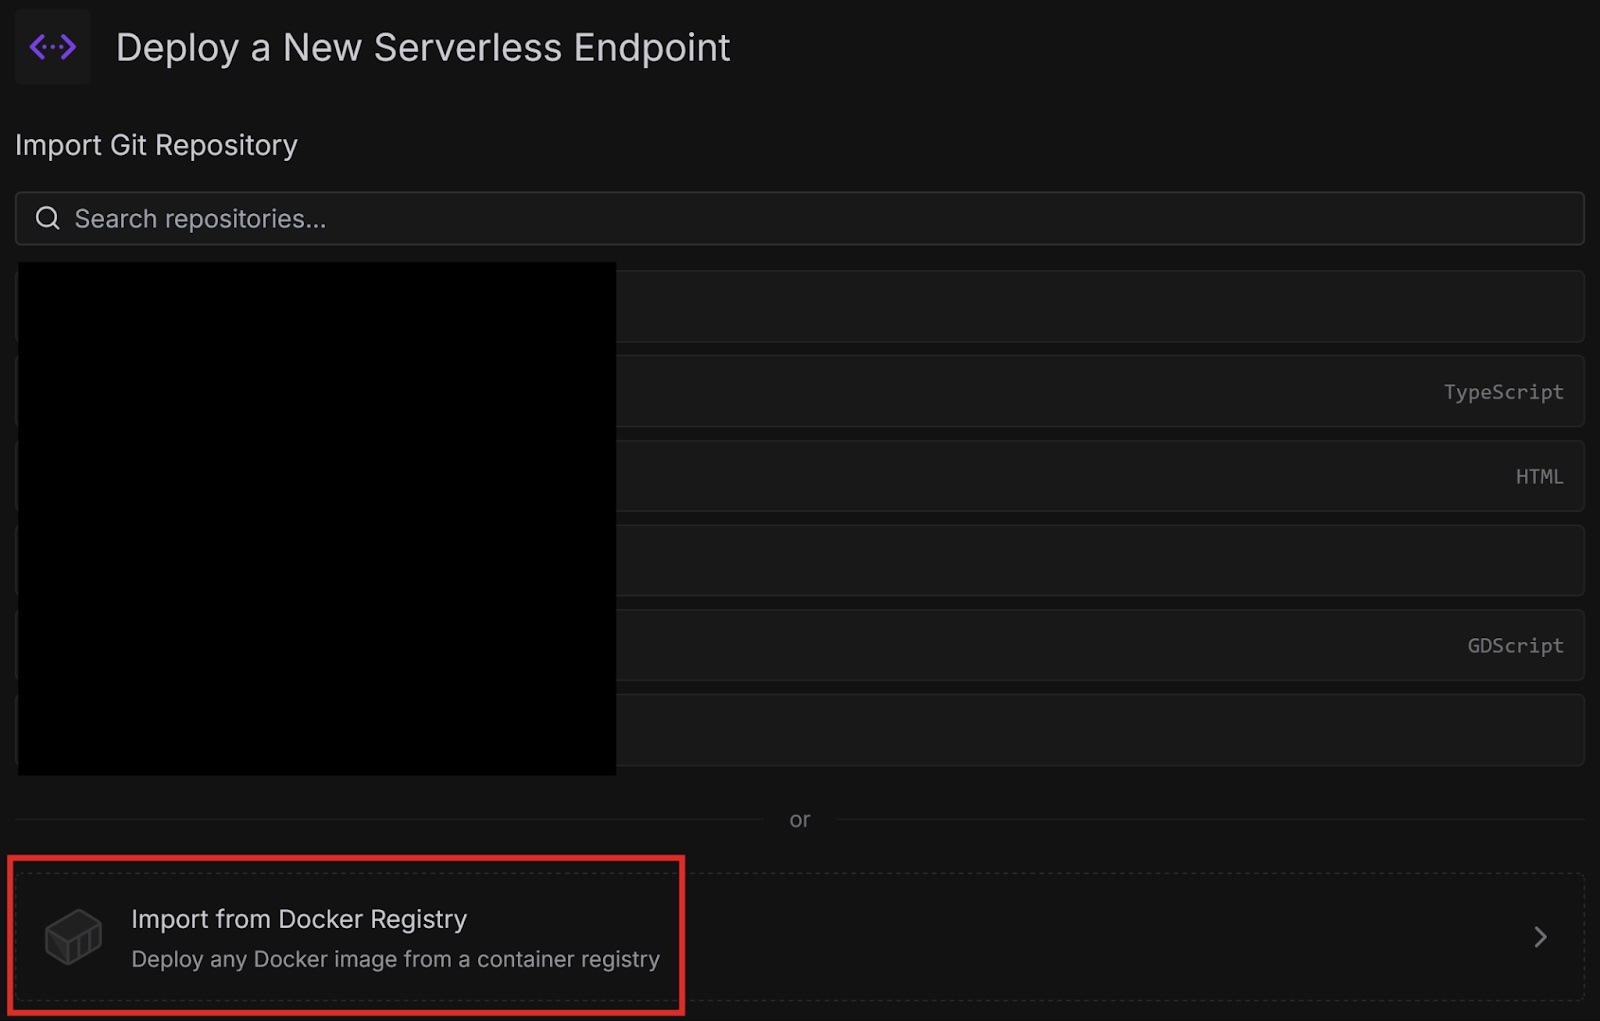
Log in to the Runpod Console. Open the Serverless page and select New Endpoint.
On the Deploy a New Serverless Endpoint page, select Import from Docker Registry.
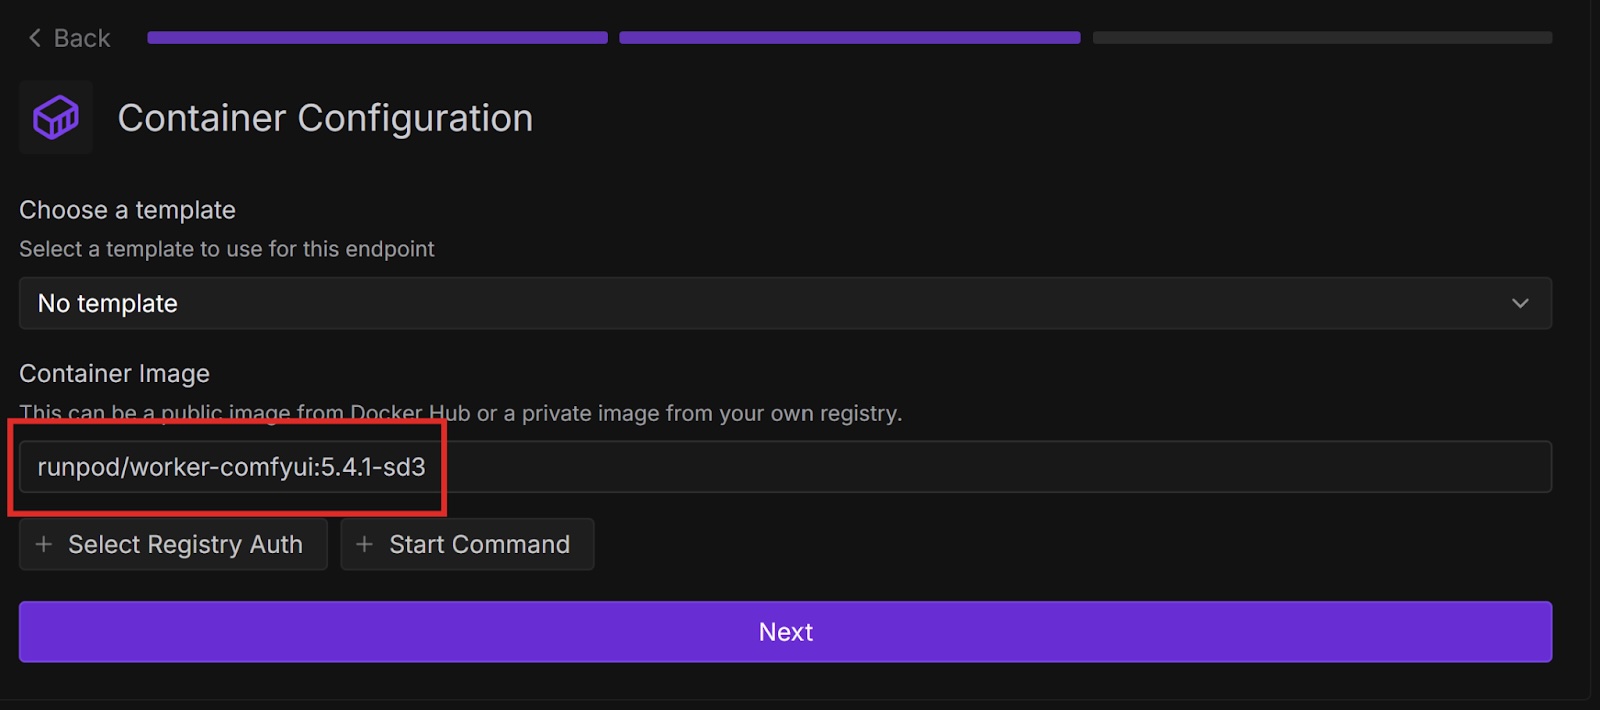
On the Container Configuration page, paste the name of the container image from Docker, then select Next. In my case, I am using the Stable Diffusion 3 Medium model.
Enter an Endpoint Name, and select the GPU Configuration for your model based on the minimum VRAM required in GPU recommendations. For Stable Diffusion 3 Medium, I chose 16 GB.
Open Container Configuration and set the Container Disk to the recommended container size for your model in GPU recommendations. For Stable Diffusion 3 Medium, I used 20 GB.
Select Deploy Endpoint.
Wait for the status to be Ready. Then, select the Requests tab. Select the drop-down arrow next to Run and select RunSync. Copy the new endpoint URL and paste it into your Python program that we wrote earlier (in the requests.post() call).
Create a workflow for your model in ComfyUI and paste the JSON into the data variable. Runpod has some example workflows in the worker-comfyui repository on GitHub. For Stable Diffusion 3 Medium, I used this workflow.
Run the program and check the output. It should generate an image based on the new workflow.
Next steps
Congratulations, you successfully deployed ComfyUI to a serverless endpoint both from a Runpod Hub repository and a Docker image! Runpod provides many ways to quickly start running common AI workloads without much setup.
Is there a particular model that you want to use with ComfyUI, but isn’t in any of Runpod’s Docker images? Try customizing your setup by creating your own Dockerfile starting from one of the base images and baking the model you want into your image. Then deploy it to Runpod either from Docker or your own GitHub repository.
What's new in Runpod Serverless: Faster cold starts, batch inference, and no-Docker deploys
Whether you're already running production endpoints on Runpod or you're sizing us up for the first time, here's a plain-language tour of what Runpod Serverless does today, why it's faster and cheaper than it was six months ago, and how to deploy your first endpoint in minutes.
Beyond the Notebook: The Engineering Realities of Production AI Agents
Shift from stateless inference to stateful architectures to resolve infrastructure bottlenecks like memory management, concurrency limits, and runaway jobs in production AI agents.


.jpeg)